Assembling Your First Pedalboard

Tätä juttua on alun perin julkaistu suomeksi Rockway-blogissa.

****

Even though the first guitar effects were already introduced in the mid-1960s, guitar pedals only started to become affordable and widely available in the late-1970s with brands such as Boss. Ibanez and MXR.

****

Why do I need a pedalboard?

Back in the early Seventies most guitarists used one to three effects at the most on stage, if any. Back then the signal chain was straightforward and easy to set up and tear down. There were maybe a couple of guitars, a guitar lead, a couple of effect pedals, a short patch cable, as well as a long cable from the front of the stage to the amplifier.

In the early days most guitarists weren’t even too particular with their live sound. If the guitar sounded a little different from one show to another, who cares? The main objective was to keep the show on the road.

These days both the musician and his/her audience are much more discerning, and want to hear a fairly accurate version of a song’s recorded guitar and bass sounds live as well. Most players are very knowledgeable and specific when it comes to their signature sounds, as well as the pedals they use. A dependable and ”secure” signal chain is a prerequisite for the professional musician of today.

If you carry your effects around in a sports bag, setting up your signal chain – and troubleshooting it in case of problems – is much more time-consuming than pulling a clean pedalboard out of its gig bag (or case) and connecting only a couple of audio cables; one for the guitar and one for the amp.

A pedalboard also protects your effects and patch cables from damage by keeping them firmly in place during transport. Additionally, powering all your effect pedals is much easier using one central power supply for the whole board.

Luckily, the 2020s offer us a wide array of different solutions for the budding ’board builder, making even the assembly of a complex signal chain relatively easy.

If you want to find out all there is to know about pro-grade pedalboard assembly, I can heartily recommend you check out Kimmo Aroluoma’s in-depth online guide.

Kimmo Aroluoma, who is the founder of Custom Boards Finland, has spent years on the road as one of Finland’s most sought-after guitar technicians. Kimmo has worked for acts such as The Rasmus, HIM, or Hanoi Rocks. These days Kimmo spends most of his time running Custom Boards, a company dedicated to making world-class pedalboards, as well as supplying pro-grade components to DIY pedalboard builders.

Is there a ”correct” order for effect groups?

Find out more on the best order for effects placement HERE.

Making music is a creative process, so any type of experimentation is highly encouraged, but if you want to ensure that your ’board will work in the desired way with the least amount of hassle, the above picture will get you there. Of course this effect order works also with effects that are not placed on a pedalboard.

The yellow box is home to such effects that will only work reliably with a pure/dry guitar signal. The orange box contains effects that add gain and texture to your signal. Next up are modulation effects. The green box adds space to your signal, as well as providing a good spot for a master volume pedal. And if you use an audiolooper and/or a booster pedal they should be placed last.

Plan before you act

You should definitely plan your new pedalboard, before you buy anything. Otherwise you can easily end up buying something that isn’t right for what you’re trying to achieve.

Choosing the effect pedals

What is the purpose of the ’board? What type of music do you play? Are you in a Metal band or do you play Top 10 covers?

The fact that there’s an old pedal lying around somewhere in a box isn’t a good enough reason to add this pedal to your new pedalboard. There should be a logical, musical or practical reason behind any addition to your effect chain, because any unnecessary addition could potentially degrade your guitar signal.

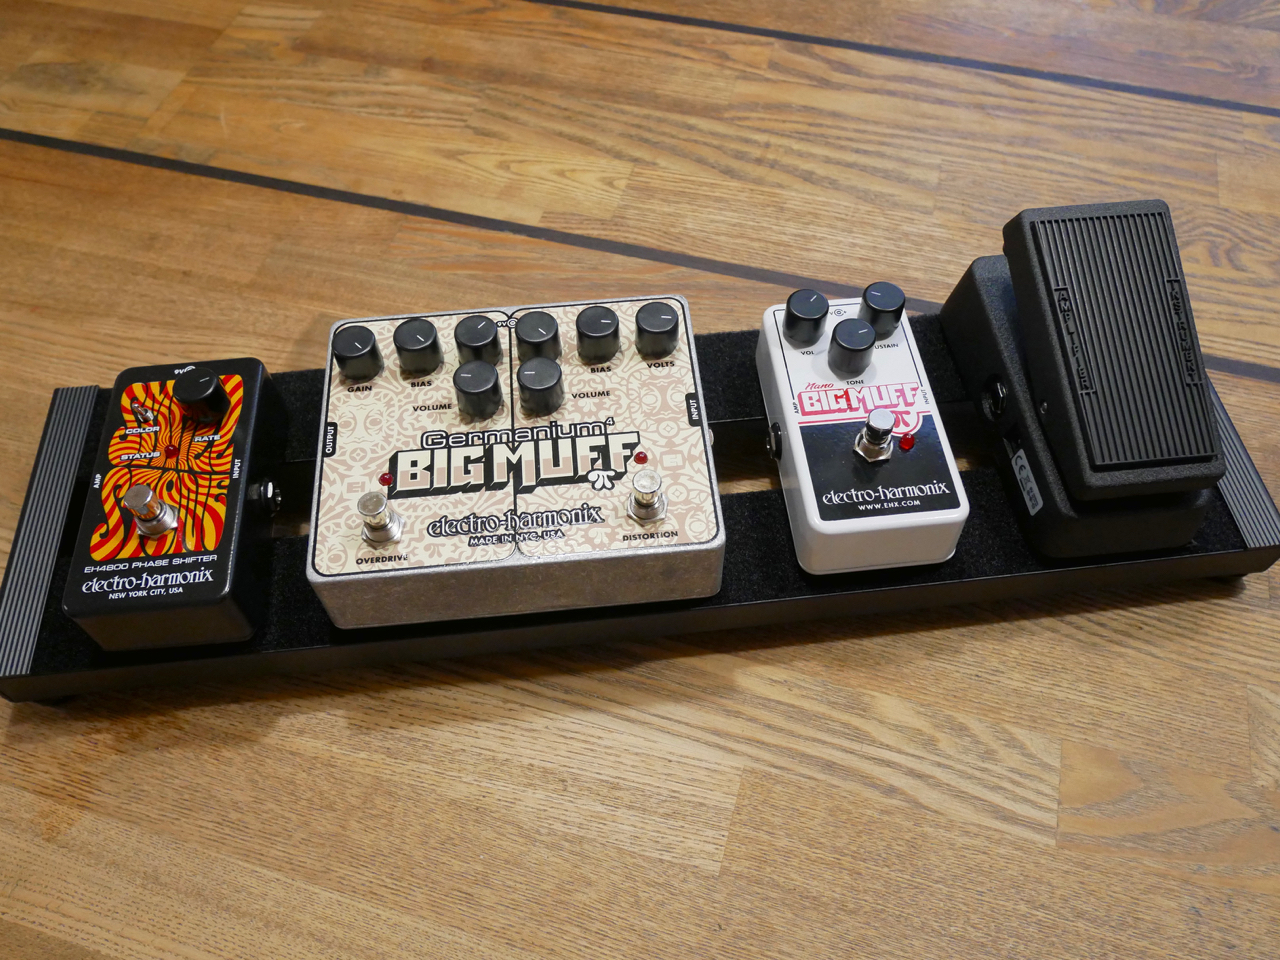
I had been dreaming about a compact board for playing Psychedelic Rock music – a bit ”Hendrix-ey”, but not necessarily totally authentic.

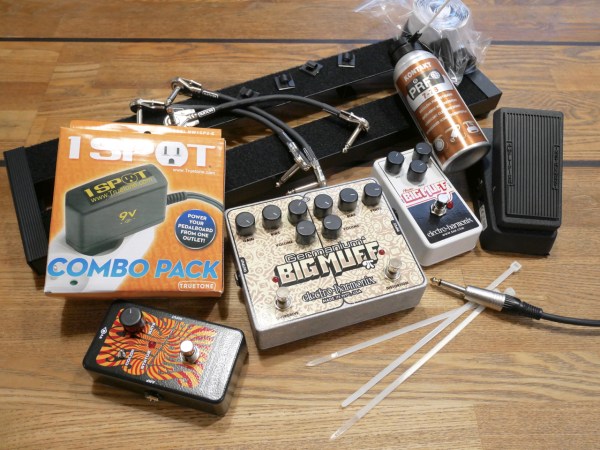
Because my main objective is ”compact” I have chosen a Jim Dunlop CBM95 Mini Crybaby-wah-wah for this project, as it is small enough to fit almost any ’board. Next up there are three blocks of different gain effects – a fuzz-style Electro-Harmonix Nano Big Muff Pi, as well as an EHX double-pedal – the Germanium 4 Big Muff Pi – to provide slightly wonky overdrive and distortion effects. The last pedal is a vintage-style phaser – the EHX Small Stone Nano. Tremolo, reverb and additional boosting are provided by my combo amp.

Patch cables

You should buy the best patch cables you can afford, because a poor quality cable will degrade your sound noticeably by ”eating away” your signal’s dynamic and treble content (especially with traditional passive pickups). There are many different models of ready-made patch cables available.

The number of patch cables you’ll need is dependent on the number of effect pedals you’re going to use. The individual length of each patch cable is determined by the physical placement of the pedals on the ’board. You should also remember to make sure that the plug design on a patch will fit in the space between two pedals. Choosing a relatively fat cable with large-bodied plugs will automatically mean that your pedals will have to be placed a little bit further apart.

Many professional pedalboard makers use bespoke patch cables for their clients’ pedalboards, using top-grade thin cable material coupled with special (no-solder) screw-on plugs. These patch cables save a lot of real estate on the ’board, while also being thin enough to be secured with the same security clips used for the ’board’s DC-power cables.

The physical placement of pedals and patch cables

My compact pedalboard will need no complicated wiring. I will place the effects in the physical order in which they appear in the signal chain in one simple row. This makes it very easy to use pre-made, off-the-shelf patch cables, because the signal continues straight on from one effect to the next.

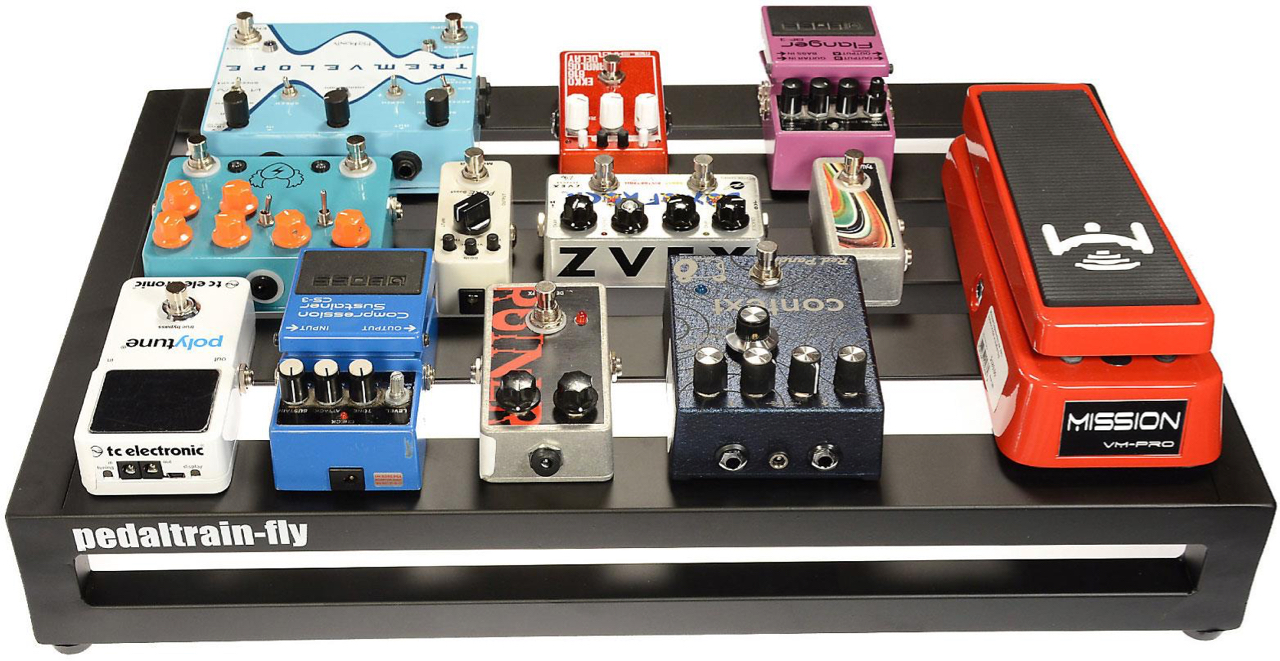
In larger and more complex cases it may be more convenient to place the pedals that are used most in the bottom row of a ’board, with lesser-used effects placed farther away in the second row. On such ’boards the signal flow can be decidedly different from the physical order of the pedals. In such cases you should prepare a signal flow chart for yourself, so you can easily look up how you have planned to hook up all of the effects. Placing the pedals in their approximate place on the ’board frame will make it easy to measure the lengths of all the patch cables needed.

Choosing your pedalboard frame

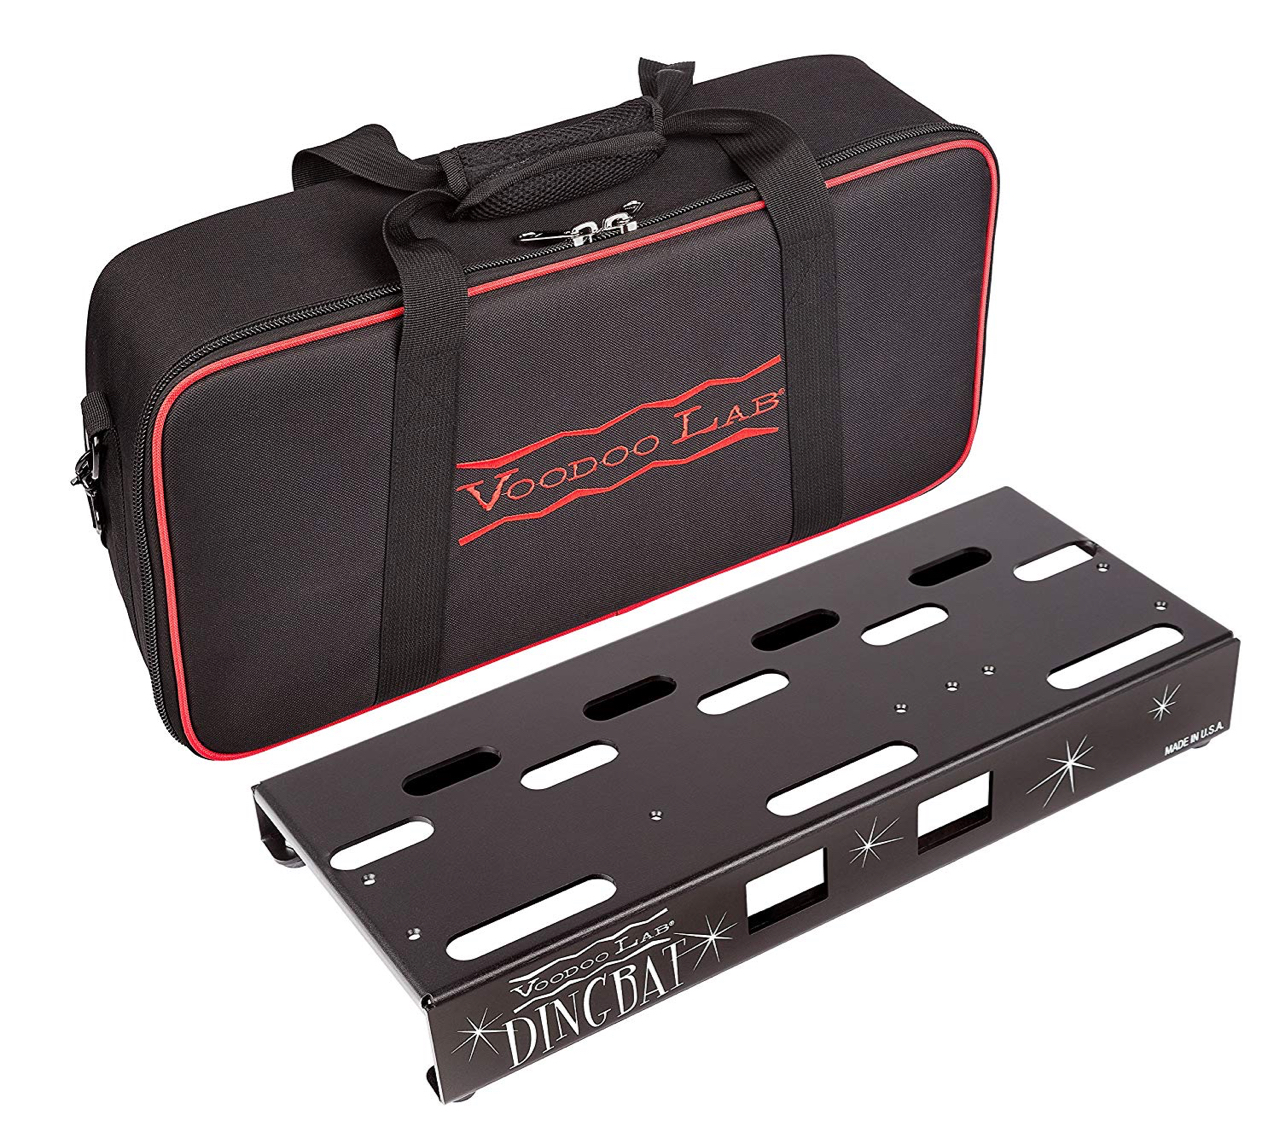
To find the best pedalboard frame for your project you have to measure the outer dimensions (width and height) of your effect array, but you shouldn’t forget to take into account how you plan to install your pedals on your board. Most ’board frames these days are made from metal, and the pedals are installed with adhesive hook-and-loop fastener tapes – either generic velcro (sold with most frames) or industry-grade 3M Dual Lock-tape (bought separately).

There are also a few companies who use their own types of screw-on bottom plates or side clamps on their board frames.

Choosing a power supply aka PSU

You have to choose your PSU according to the physical space of your ’board frame, as well as according to the power needs of your effect pedals. There is a plethora of different PSUs available on the market these days; some pedalboard brands also offer frames with pre-installed power supply units.

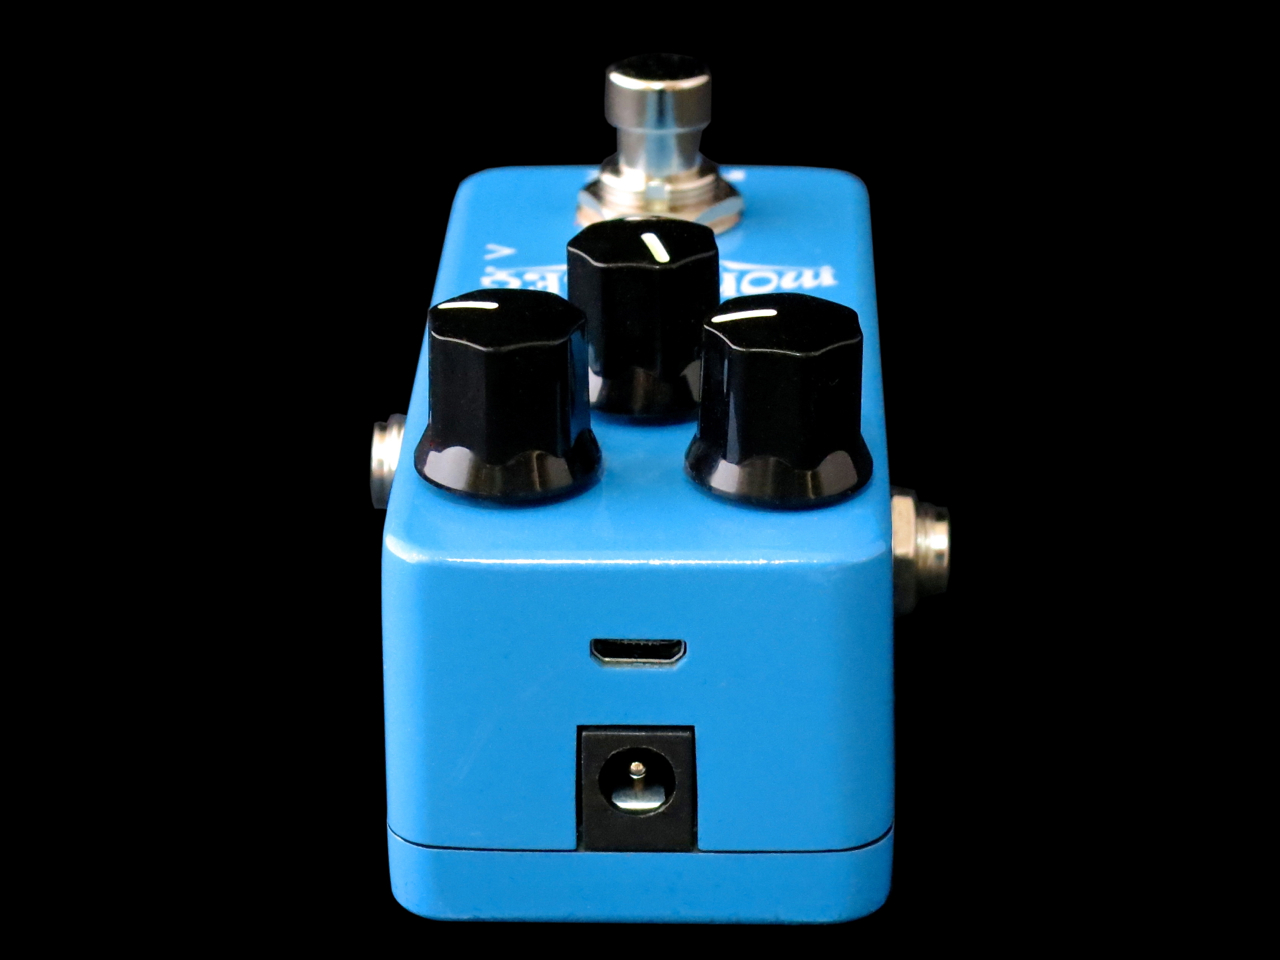
Do check the power requirements of each of the pedals that will go on your pedalboard. You should check for voltage (9, 12 or 18 V), for milliamperes, and for the type and polarity of the connector plug. Note that there are a few pedals out there that will require alternating current (AC) in contrast to most effects that run on DC! Pro-grade PSUs come with a whole set of different pedal power cables. Make sure that the set includes all the cables (and connectors) you require. If not you will have to buy the additional cables you need.

Because a pedalboard runs audio effects the power supplied by the PSU has to be ”clean”, e. g. free from extraneous noise, buzz and hum. Most traditional pedalboard PSUs provide this type of isolated power with the help of a whole row of tiny transformers. The transformers make sure no mains hum gets into the pedals’ power cables, while also isolating each of the outputs individually.

Because I have chosen the very compact and flat Palmer Pedalbay 50S frame, most professional PSUs cannot be mounted underneath the pedalboard in my case. Luckily, a 1Spot ”wall-wart” can be a viable option, if you forsake the additional safety and dependability of a ’board-mounted PSU. I’m not planning on touring with this pedalboard, and all the transporting will be done either by car or public transport, meaning the long cable between the transformer and the daisy chain cable will not be a problem for me. Additionally, I’m not running more than four pedals concurrently, and there’s no power-hungry digital multieffect in the group, so a simple daisy-chain set-up will work here.

Building my pedalboard

Here’s where it starts

Here’s what everything looks like at the beginning. I forgot to put the scissors in the picture, used to cut the velcro to size. Additionally, I made a last-minute switch to black cable ties, because they looked better, after all.

Cleaning all connectors

Should one of your chosen pedals be faulty, you should have it repaired before it goes on the pedalboard. One faulty pedal will have a very detrimental effect on the whole signal chain and the reliability of your new ’board.

You should clean all audio jacks before you assemble your ’board by squirting a little bit of switch cleaner (like PRF 7-78 Kontakt) on a 1/4″ plug, and then inserting and unplugging the plug several times from the jack. Repeat for each audio input and output.

Cleaning all bottom plates

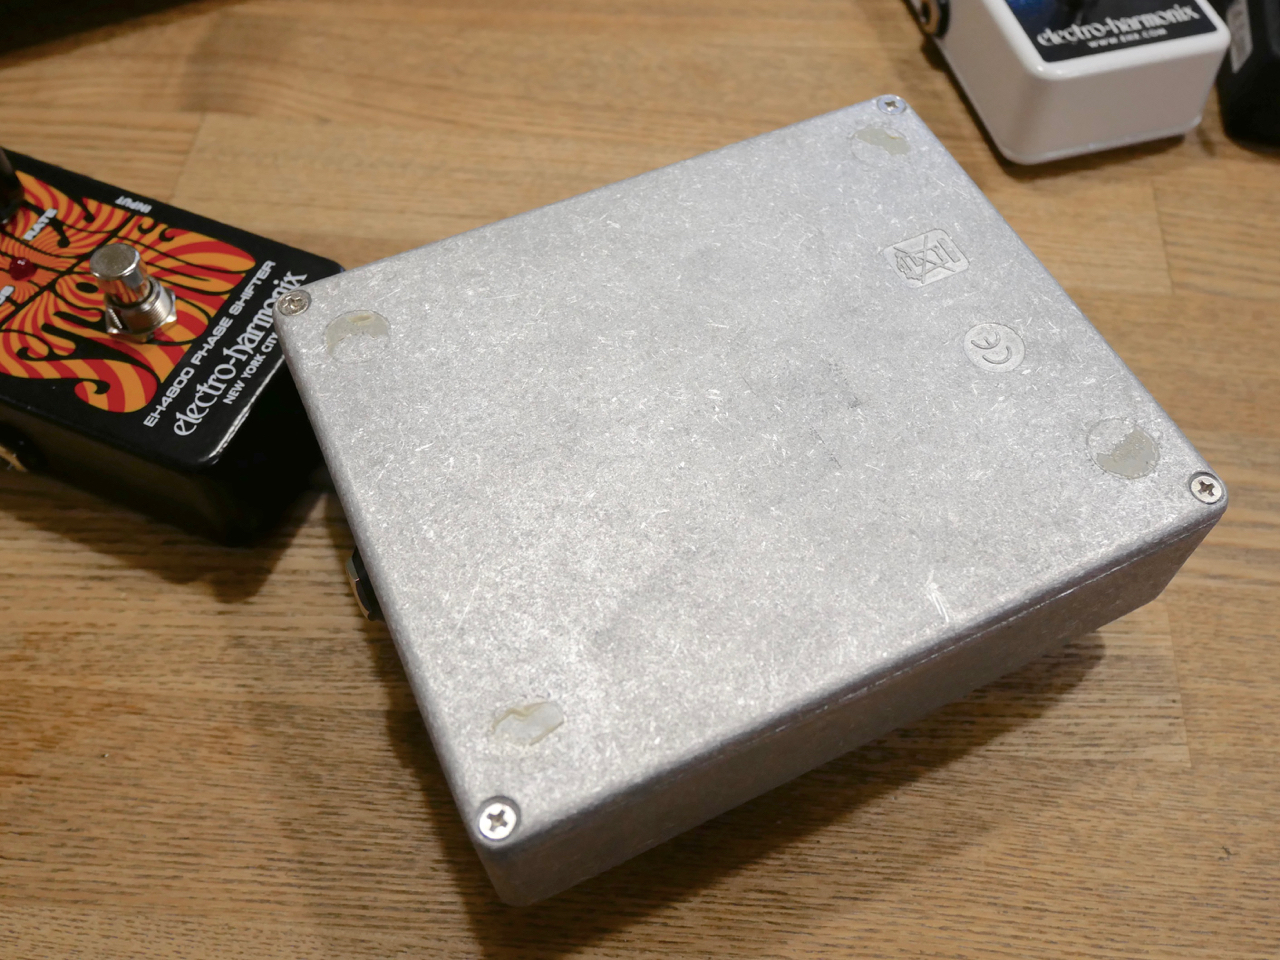
Before you can use any adhesive material on a pedal’s base plate, you will have to take off all rubber feet from the pedal. Velcro and 3M Dual Lock need a smooth and clean surface for them to stick reliably to a pedal’s bottom plate. Sometimes using an additional cleaning agent (like PRF Label Off) can help to get rid of any old glue residue.

On my Electro-Harmonix effects my work is made easier by the separate little rubber feet this company uses. Most Boss and Ibanez pedals, on the other hand, use large rubber or silicone mats, which are much harder to get to grips with. I’d recommend looking for the appropriate removal techniques in the Custom Boards online guide or on Internet forums.

Prevent leakage!

Remove all batteries from the pedals that go on your ’board. The patch cables stay inserted in each pedal’s input jack, which means any battery will be drained in a matter of hours (or a couple of days at the most). Taking the batteries out will prevent damage from leaking batteries in the long run.

Applying the adhesive

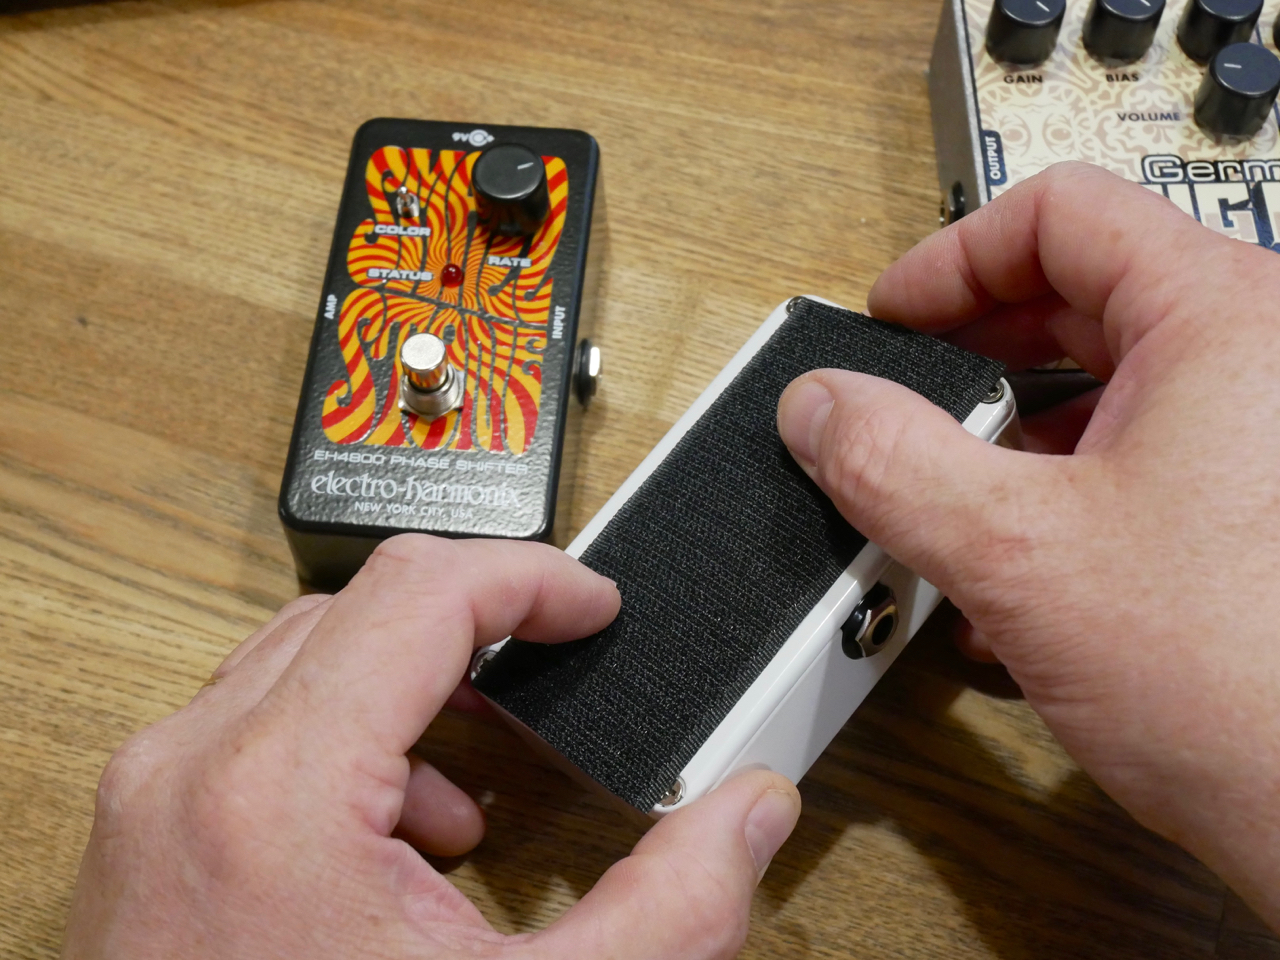
Now it’s time for the velcro to go on the base plates of the pedals. Make sure the adhesive tape sits nice and flat with no air bubbles.

The Palmer Pedalbay 50S comes with the loop side adhesive already installed on the frame. Most other models require you to glue the loop side yourself. If I were to use 3M Dual Lock on this ’board, on the other hand, I’d have to remove the pre-installed adhesive first and clean up all glue residue, before putting on the Dual Lock.

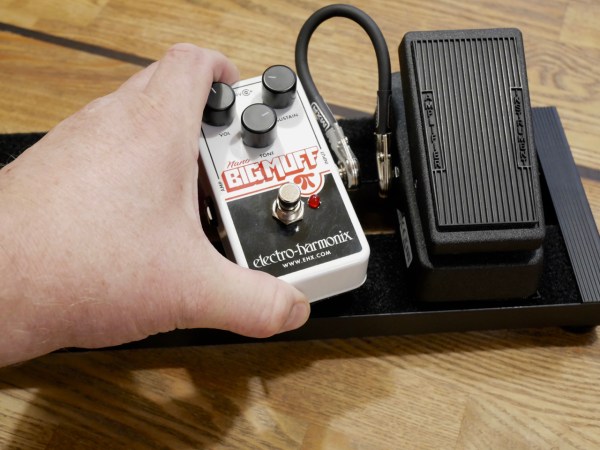
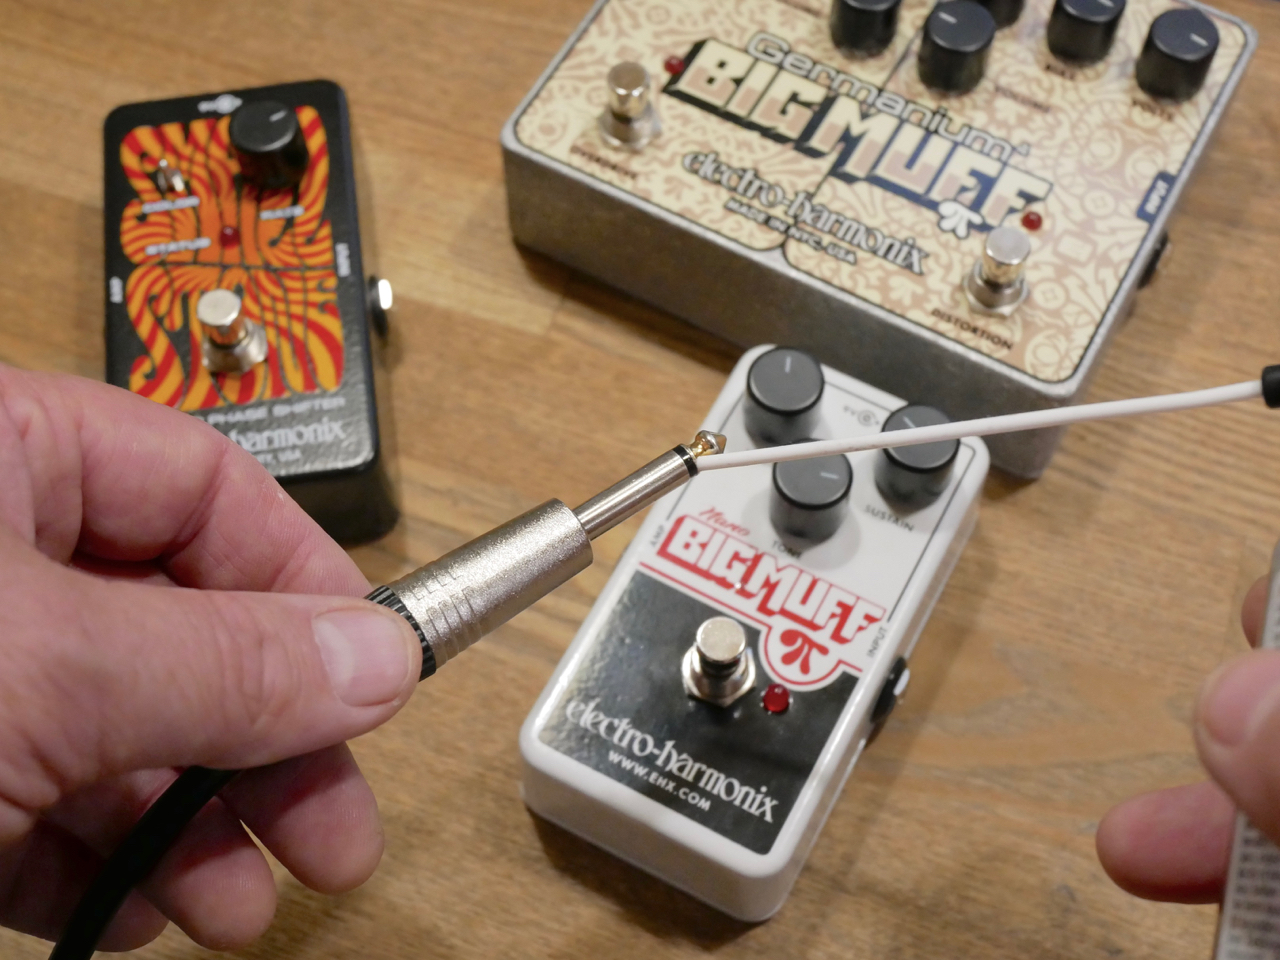
Installing the effects and patch cables

As there’s usually only a certain amount of space on a pedalboard, an effect pedal has to be installed on the frame with the patch cable already inserted in the previous effect’s output and this effect’s input. A 1/4″ plug is too long to be inserted after you’ve put all the pedals next to each other.

Installing the DC-cables with security clips

You’ll achieve a very clean and professional look by wiring the power supply cables from the ’board frame’s underside.

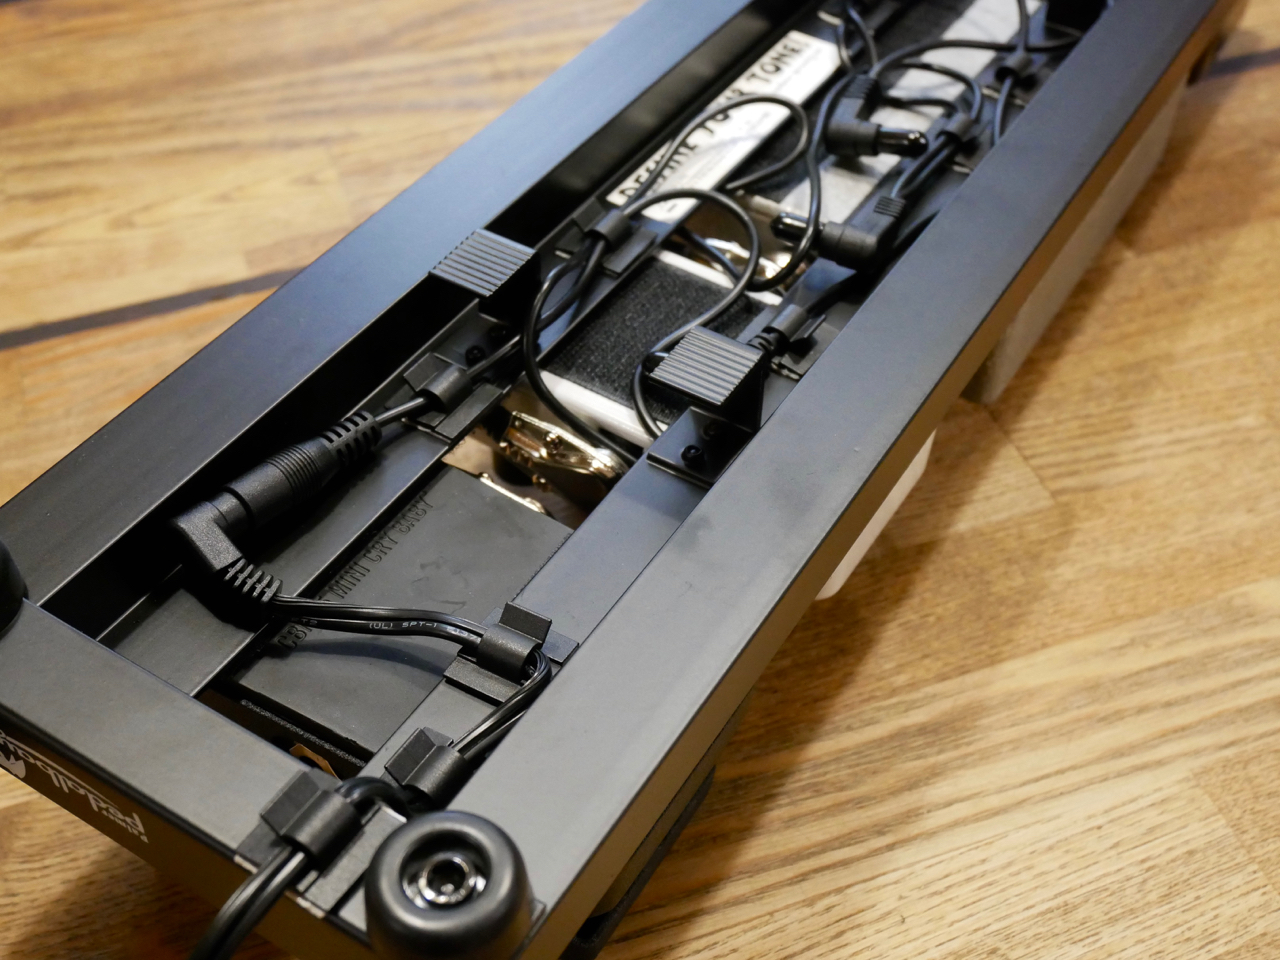
Many guitar shops also sell stick-on plastic security clips, which are just the ticket to keep all the DC-cables in place and securely out of harm’s way.

Time to check out your new pedalboard

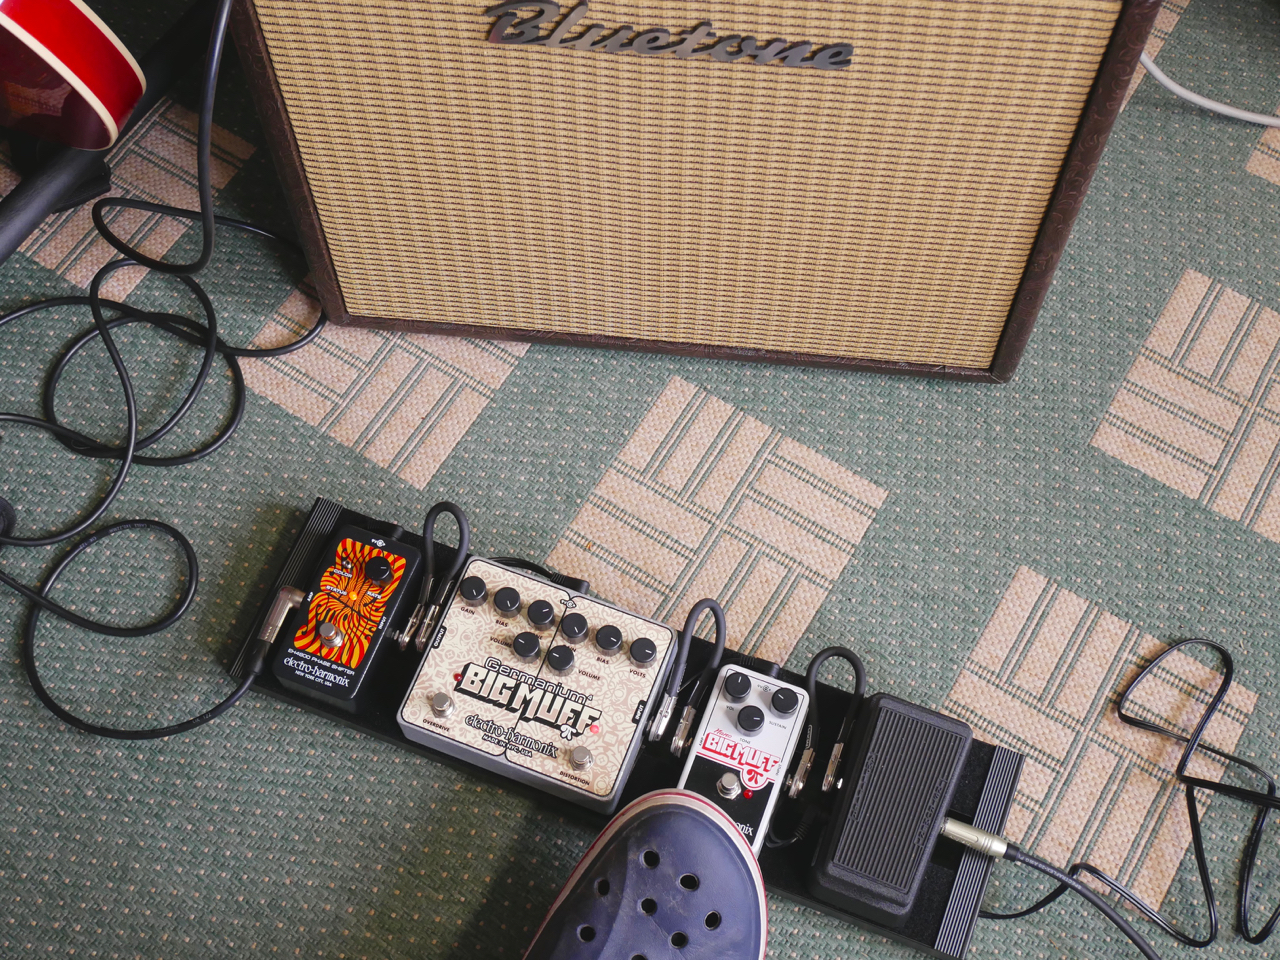
This is a good time for a trial run of your new pedalboard with a guitar and an amp. Check out if the placement and the distance between the footswitches is convenient for you. Do all effects power on and off as they should? Is the signal going to the amp free from extraneous noise and hum?

In my project everything worked fine, but if you need help troubleshooting your pedal, you should consult Custom Boards’ builder’s guide.

Securing the patch cables

Because I’ve used off-the-shelf MXR patch cables for my project, and the cables had a relatively large diameter and flat, but wide, plug bodies, securing the patch cables with small plastic clips wasn’t really feasible. This is why I’ve chosen cable ties.

The idea is to keep the patch cables out of harm’s way – or should that be foot’s way – so that it’s impossible to step on them. You apply only a minimal amount of pull on the cable ties. You only want to keep the patch cables from moving around, you don’t want to damage the cables’ outer insulating layer.

Many DIY patch cables are thin enough to be secured with the same type of stick-on security clips used for the DC-cables.

Review: Bluetone Amps Fried Eye & Bugaboo distortion pedals

Finnish valve amp specialist Bluetone Custom Amplifiers has broken new ground by releasing a trio of handmade pedal effects, comprising a delay/reverb-unit, called Echoes, as well as two different preamp/distortion boxes, the Fried Eye and the Bugaboo.

****

Bluetone’s Fried Eye Distortion (269 €) offers two high-quality effects in one box:

The boost circuit can be run separately from the pedal’s distortion side. It offers a considerable amount of boost (up to 12 dB), which is adjustable with the pedal’s Boost control.

But the Fried Eye Distortion’s main raison d’être is, of course, its comprehensive distortion section. The pedal’s distortion circuit is a solid-state version of the acclaimed Bluetone Fried Eye tube amplifier’s crunch channel. Its aim is to give you a wide range of Marshall-inspired crunch and distortion tones.

Bluetone’s Fried Eye Distortion pedal runs on nine to eighteen volts DC supplied by a PSU (not included) via a standard 2.1 mm plug (centre negative). A look under the hood reveals a large circuit board and clean and neat wiring.

Soundwise the Fried Eye pedal hits the bull’s-eye in my opinion, offering a wide range of Marshall-type tones from a light crunch to full blast. The effect’s three-band EQ works really well in tailoring the effects sound to your musical needs.

This short audio clip gives you an idea of the Fried Eye’s basic sound with the Gain control set to 12 o’clock. The first half showcases the distortion side on its own, with the boost kicking in for the second half. I used a Hamer USA Studio Custom with the bridge humbucker engaged. The clip was recorded direct off a Blackstar HT-1R’s speaker emulated output:

The Muse-inspired demo song shows you how the Fried Eye performs in a band mix. I used a Bluetone Shadows Jr. combo and a Shure SM57 to record all guitar tracks.

The demo features the following guitars:

• rhythm guitars – Hamer USA Studio Custom (left channel), Gibson Melody Maker SG (centre), Fender Stratocaster (right channel)

• reverse guitar – Gibson Melody Maker SG

• lead guitar – Hamer USA Studio Custom, Morley wah-wah

****

The Bluetone Bugaboo Distortion pedal (249 €) is based on the company’s none-more-Metal Bugaboo valve amplifier’s crunch channel.

The Bugaboo is aimed more squarely at the Hard Rock- and Metal-crowd, offering much more gain and a lot more juicy compression than the Fried Eye pedal.

The wiring inside our review unit looks a bit less tidy, due to the long wires going from the circuit board to the pots and switches. I’d like to stress, though, that this specific pedal is a very early production model that has been superseded by a more compact version (but with completely identical specs and features) recently!

The Bugaboo-pedal, too, runs on nine to eighteen volts DC supplied by a PSU (not included) via a standard 2.1 mm plug (centre negative).

Bluetone’s Bugaboo does exactly what is says on the tin:

This pedal turns any amp into a fire breathing thing of beauty, offering plenty of gain. The three-band EQ has been bolstered by two very nifty mini-switches. Bite offers a presence boost that will help your guitar to cut through even the densest mix, while Tight helps you keep the bottom end from becoming too boomy.

This short audio clip gives you an idea of the Bugaboo’s basic sound with the Gain control set to 12 o’clock, Bite engaged and Tight turned off. I used a Hamer USA Studio Custom with the bridge humbucker engaged. The clip was recorded direct off a Blackstar HT-1R’s speaker emulated output:

The demo song shows you how the Bugaboo performs in a band mix. All guitar tracks were recorded direct off a Blackstar HT-1R’s speaker emulated output. The song contains the following guitar tracks:

• Rhythm guitars – Fender Stratocaster (left) & Gibson Melody Maker SG (right)

• Lead guitar – Hamer USA Studio Custom

****

In my view, the clean, business-like look of the new Bluetone-pedals is a clear bonus, especially on stage. Sure, the Fried Eye and Bugaboo don’t sport any flashy paint jobs that scream ”Hey, man, I’m a weird boutique pedal”, but at least you can tell instantly what type of pedal you’re dealing with, and which knob (or switch) does what.

In terms of their sounds both units are winners, each offering a wide array of different shades of distortion, with the Fried Eye being a bit more ”Rock” and the Bugaboo a tad more ”Metal” in character. These are professional grade, handmade effect pedals at a fair price.Save

Save

Save

Save

Save

Now on Soundcloud: Bluetone Fried Eye Distortion

Bluetone Fried Eye Distortion

• handcrafted in Finland

• distortion & boost

****

Demo based on Muse’s song ”Supermassive Black Hole”

• rhythm guitars – Hamer USA Studio Custom (left channel), Gibson Melody Maker SG (centre), Fender Stratocaster (right channel)

• lead guitar – Hamer USA Studio Custom, Morley wah-wah

• reverse guitar – Gibson Melody Maker SG

• amp used – Bluetone Shadows Jr.

Testipenkissä: Nux Mini Core -pedaalit + Cerberus-multiefekti

Kiinalainen valmistaja Nux tarjoaa laajan valikoiman elektronisia musiikkituotteita – sähkörummuista langattomiin järjestelmiin – jotka kaikki lupaavat muusikoille mahdollisimman paljon vastinetta rahalle.

Uusi Nux Mini Core -sarja minikokoisia kitarapedaaleja on hyvä esimerkki firman filosofiasta, sillä useimmissa Mini Core -pedaaleissa piilee hyödyllisiä lisäominaisuuksia.

Saimme kahdeksan sarjan pedaaleista Nuxin maahantuojalta testiin.

Kaikki Mini Core -pedaalit toimivat Boss-standardin mukaisella virtalähteellä.

Säätimien asennot näkyvät hyvin myös pimeällä lavalla, sillä nuppien merkkiviivat fluoresoivat (= loistavat pimeässä).

Malliston digitaalisten efektien (modulaatiot, loopperi jne.) käyttöjärjestelmät voi päivittää mini-USB-portin kautta.

****

Mini Core -malliston viritysmittarin nimi on HD Pitch (74 €). Nux JTC Drum & Loop -pedaali (99 €) yhdistää helppokäyttöisen rumpukoneen laadukkaaseen loopperiin.

HD Pitch on erittäin hyvin speksattu viritysmittari, joka tarjoaa kaksi erilaista viritystilaa – Arrow Mode ja Strobe Mode – hyvin onnistuneella graafisella käyttöliittymällä.

Lisäksi HD Pitch tarjoaa mahdollisuuden valita kahden bypass-tyypin välillä. True Bypass on paras valinta, jos käytössä on vain pari-kolme efektiä tai jos pedaalilaudalla pyörii jo toinen bufferoitu efekti. Bufferoitu bypass taas on oiva apuväline silloin, kun käytössä on monta true bypass -pedaalia ja/tai matka pedaalilaudasta vahvistimeen on pitkä. Bufferi muuttaa kitarasignaalin impedanssia korkeasta matalaksi, jonka ansiosta signaalin dynamiikka ja diskantti ei kärsi pitkästä signaalitiestä.

Nuxin JTC on tietääkseni tällä hetkellä maailman ainoa minikokoinen rumpukoneen ja audioloopperin yhdistelmä.

JTC Drum & Loopin rumpukone ei luonnollisesti pysty korvaamaan oikeata rumpalia, sillä pedaalin rumpuosastoa ei pysty ohjelmoimaan. Mutta rumpupatternien laatu ja soundi toimivat tällaisen pedaalin yhteydessä enemmän kuin tyydyttävästi.

JTC:n looperiosasto taas edustaa aitoa pro-laatua. Tarjolla on 24-bittinen audiolaatu ja peräti kuuden minuutin äänitysaikaa (ilman päällesoiton rajoituksia). Niin kuin kaikissa yhden kytkimen looppereissa on aluksi opittava Nux JTC:n loopperin käyttölogiikka. Pedaalin loogisen käyttöliittymän ansiosta looperin kanssa pääsee kuitenkin todella nopeasti sinuksi.

****

Saimme testiin kolme Nux Mini Core -sarjan modulaatiopedaalia – Oceanic Reverbin (76 €), Konsequent Delayn (76 €), sekä Monterey Viben (76 €).

Vaikka Ocean Reverb -kaiku on äärimmäisen helppo käyttää, tarjoaa pedaali kuitenkin hyvin laajan skaalan kaikutiloja.

Ocean Reverbin prosessointi perustuu nimittäin digitaalisten kaikualgoritmien morfaukseen, jossa Decay-säätimen käyttö ei ainoastaan muuta kaiun pituutta, vaan kaiun luonne muuttuu pituudesta riippuen kaakeloidusta pikkuhuoneesta plate reverbin kautta suureksi halliksi. Morfauksen ansiosta kaikutyyppien väliset vaihdot tapahtuvat täysin portaattomasti ja ikään kuin huomaamattomasti.

Myös Konsequent Delayssä löytyy konepellin alta mielenkiintoisia ominaisuuksia:

Konsequent tarjoaa kaksi eri viivemoodia – Regular Pattern ja Groove Pattern. Regular-moodissa toistot ovat tasaisia (neljäsosasia, kahdeksasosasia jne.), kun taas Groove-moodissa pisteelliset kahdeksasosaset astuvat mukaan kuvaan, The Edge -tyyliseen menoon.

Konsequentiin lisätty saturaatiopiiri lämmittää laitteen toistojen soundia juuri sopivasti.

Yksi Jimi Hendrixin lempiefekteistä oli japanilainen Uni-Vibe, joka oli ensimmäinen yritys pakata Leslie-urkukaapin soundi suhteellisen kompaktiin laitteeseen. Uni-Vibe tarjosi runsaasti säätövaraa, ja sen soundit ulottivat pehmeästä choruksesta phaserin kautta väkevään vibratovatkaukseen.

Nuxin Monterey Vibe on onnistunut pakkaamaan Uni-Viben tärkeimmät soundit hyvin kompaktiin muotoon. Lisäksi pedaalin nykyaikainen digitaalinen signaaliprosessointi tuottaa nämä soundit luotettavasti ilman alkuperäisefektin kohinaa.

Uni-Viben tavoin myös Monterey Vibe tarjoaa kaksi käyttötilaa – miedompi Chorus, sekä rajumpi Vibrato.

****

Saimme testiin myös Mini Core -malliston analogisia säröpedaaleja – punainen Brownie Distortion (51 €), vihreä Tube Man (51 €), sekä vaaleansininen Morning Star Overdrive (59 €).

Vaikka Nuxin Tube Man on Tube Screamerin tavoin vihreä, se ei ole legendaarisen säröpedaalin kopio.

Tube Man -pedaalin kytkentä perustuu nimittäin FET-vahvistinpiiriin, joka käyttäytyy jo luonnostaan enemmänkin yliohjatun vahvistimen lailla, kuin Tube Screamerin alkuperäinen operaatiovahvistin (op-amp).

Mini Core Tube Manin soundi on hyvin dynaaminen ja luonnollinen.

Nux on yhdistänyt eri distortion-pedaalien parhaimmat ominaisuudet yhteen pedaaliin – Brownie Distortioniin.

Brownie Distortion -pedaalin uumenissa toimii kolme peräkkäistä säröpiiriä. Ketjun alussa signaaliin lisätään mietoa asymmetristä säröä BJT-transistorilla, mikä jälkeen alipäästösuodatin mallintaa Variac-laitteen soundia. Lopuksi signaali ajetaan sekä yhden op-amp- että yhden LED-piirin läpi, jotka lisäävät päätevahvistimen säröä muistuttavaa klippausta soundiin.

Brownie Distortion särö on erittäin kermainen ja muhkeasti kompressoiva.

Nuxin Morning Star ei ole Tube Screamer -tyypinen overdrive-pedaali, vaan selvästi nykyaikaisempi efekti.

Morning Starin Drive-säädin tarjoaa laajemman skaalan eri gain-asetuksia – miedosta reunasäröstä suhteellisen rankkaan menoon. Kytkettävällä Shine-ominaisuudella saa lisättyä särösignaalin diskantiin lisää hohtoa.

****

Kitaristipiireissä harrastetaan (valitettavasti) usein kilpavarustelua ja efektivoodoota. Muotivirtauksien mukaan tiettyjen ”boutique-efektien” maine joko kasvaa tai laskee, ja jotkut kitaristit kilpailevat suorastaan efektilautansa varustuksella.

Käytännöllisesti ajatteleva soittaja taas osaa arvostaa uusimman teknologian tuomat edut ja massatuotannon tuomat säästöt. Nux Mini Core -pedaalit eivät ole statussymboleja, vaan erittäin kompakteja, käteviä ja käytännöllisiä lattiaefektejä. Mini Core -pedaaleilla saa jokainen kasattua itselleen helposti ja edullisesti erittäin toimivan ja hyvältä kuulostavan kokonaisuuden.

Demobiisin rumpuraita tulee JTC:n rumpuosastolta. Sähköpianoraita, sekä kaikki kitararaidat käyttävät Mini Core -sarjan pedaaleja. Kitarat on äänitetty linjasoitolla Blackstar HT-1R -kombon kautta.

****

Nux Cerberus (299 ) on firman upouusi multiefektien lippulaiva.

Cerberus on erittäin kompakti ja hyvin varusteltu ohjelmoitava multiefekti, joka tarjoaa runsaasti efektejä ja muistitilaa, sekä monta pro-tason lisäominaisuutta.

****

Nux Cerberus tarjoaa 16 eri efektiä neljässä pääryhmässä – Drive, Distortion, Modulation ja Delay/Reverb.

Cerberuksen muistissa on tilaa 128 presetille 32 pankissa.

Useampiin samankaltaisiin laitteisiin nähden yksi Cerberuksen suurimmista valteista on signaalitien muokattavuus, joka alkaa jo kahden säröpalikoittensa kytkennässä:

Kahdella painonapilla pystyy valitsemaan Driven ja Distortionin järjestyksen signaalitiellä nopeasti ja vaivattomasti. Overdrive-särö voi olla ennen distortionia tai sen jälkeen, tai molemmat säröt voivat myös toimia rinnakkaiskytkennässä.

Säröosastot toimivat muuten Cerberuksessa täysin analogisesti ja True Bypass -periaatteella. Vasta niiden jälkeen signaali muunnetaan laadukkaasti digitaaliseksi (88,2 kHz/32-bit).

Vaikka Nux Cerberuksessa on neljä efektiryhmää, voidaan käyttää jopa kuutta efektiä jokaisessa presetissä, koska sekä Modulation- että Delay-ryhmä tarjoavat kumpikin kaksi samanaikaista efektiä käytettäväksi. Ryhmän toisen efektin saa päälle ja pois Control/Down-jalkakytkimellä.

Modulation-ryhmän ”pääefekti” on chorus, josta saa valittua yhden kolmesta vaihtoehdosta. Lohkon toiseen puoliskoon voi valita yhden kolmesta efektistä. Tarjolla on tremolo, phaser, sekä Uni-Vibe.

Delay/Reverb-osastossa pystyy valita kolmesta kytkentävaihtoehdosta – viive ensin, kaiku ensin tai molemmat rinnakkaiskytkennällä.

Viivepuoli tarjoaa kolme efektityypiä, jotka ovat 1960-luvun nauhakaiku, 70-luvun analogiviive, sekä nykyaikainen digidelay. Viiveaika säädetään joko manuaalisesti tai Tap Tempo -toiminnolla (Tap/Up-jalkakytkimellä), jolloin viiveen jako voidaan asettaa vaivattomasti Time-nupilla.

Reverb-puoliskosta taas löytyy jousikaiku, plate-kaiku ja halli.

Suoraa linjasoittoa (ja kuulokekäyttöä) varten Nux-laudassa on oma digitaalinen kaiutinmallinnus (on/off-kytkimellä). Mallinnus toimii impulssivaste-periaatteella (Impulse Response). Cerberukseen pystyy lataamaan sekä omia että myös muiden valmistajien impulssivasteita.

Takapaneelin liitintarjonta ei todellakaan jätä toivomiseen varaa, ja se antaa enemmän kuin pienen vihjeen Cerberuksen monipuolisuudesta.

Cerberusta voi käyttää sekä itsenäisenä stand-alone-laitteena että integroida järjestelmään ulkoisia efektejä ja laitteita, Drive- ja Distortion-osastojen suoran lähdön ja modulaatio- ja kaikuosastojen oman tulon ansiosta. Näillä lisätuloilla ja -lähdöillä pystyy kytkemään myös Cerberuksen säröt suoraan vahvistimen tuloon, samalla kun modulaatio- ja kaiku-/viive-efektit toimivat vahvistimen omassa efektilenkissä. Jos styrkkarin efektilenkki on rinnakkaislenkki, pystyy myös poistaa kuivan signaalin Cerberuksen digiosastosta yhdellä napinpainalluksella (Kill Dry).

Tässä vielä Nuxin grafiikat Cerberuksen signaalitiestä ja mahdollisista kytkennöistä (kaikki jutun kuvat voi klikata isommiksi):

****

Vau, mikä laite! Jos kompakti, mutta monipuolinen multiefekti on hakusessa, kannattaa minun mielestäni ehdottomasti tutustua Nux Cerberukseen.

Firman päätös rakentaa multiefektillä analogisia säröpiirejä kannatti, sillä Cerberuksen säröosastot ovat todella maukkaita ja luonnollisia. Mutta myös Nuxin digitaaliset efektit kuulostavat erittäin hyviltä. Uni-Vibe-tyylinen vatkaus on multiefekteissä melko harvinainen herkku.

Nux Cerberus -multiefektiä on erittäin helppo käyttää, laite vaikuttaa kestävältä, ja se on erittäin helppo integroida monenlaisiin rigeihin. Cerberus toimii yhtä suvereenisti suoraan vahvistimen (tai äänikortin) edessä kuin osana isompaa järjestelmää.

****

NUX Mini Core -pedaalit & Cerberus-multiefekti

Maahantuoja: Musiikki Silfverberg

Kiitos Vantaan Musiikille testilaitteiden lainaamisesta!Save

Save

Save

Save

Save

Save

Save

Save

Save

Save

Save

Save

Nux Cerberus – the Kitarablogi-video

Nux Cerberus

• Multi-function effect pedal for electric guitar
• 16 different effect types in 4 effect groups (delay/reverb, mod, distortion, drive)
• 128 presets in 32 banks
• Analog overdrive and distortion circuits
• True bypass (overdrive/distortion)
• Realistic speaker simulation with impulse response loader
• MIDI compatible
• USB port for upgrading the software editor
• Converter: 88.2 kHz/32-bit AD/DA
• Kill-dry switch
• Integrated chromatic tuner
• Tap function
• Multiple inputs and outputs
• Dimensions: 320 x 100 x 65 mm
• Weight: 1.26 kg
• Power supply not included

Info: Musiikki Silfverberg

Nux mini-pedals – now on SoundCloud

Nux mini-sized guitar effects

• Drum loop: Nux JTC Drum & Loop
• Electric piano: Korg SP-200 through Monterey Vibe & Konsequent Delay
• Rhythm guitars (Strat + Tele): Konsequent Delay & Oceanic Reverb
• Lead 1 (Strat): Tube Man Overdrive & Konsequent Delay & Oceanic Reverb
• Lead 2 (Strat): Morning Star Overdrive & Konsequent Delay & Oceanic Reverb
• Lead 3 (Strat): Brownie Distortion & Konsequent Delay & Oceanic Reverb
• Amp used: Blackstar HT-1R

Info: Musiikki Silfverberg

Pidä blogia WordPress.comissa.

Ylös ↑