Assembling Your First Pedalboard
Tätä juttua on alun perin julkaistu suomeksi Rockway-blogissa.
****
Even though the first guitar effects were already introduced in the mid-1960s, guitar pedals only started to become affordable and widely available in the late-1970s with brands such as Boss. Ibanez and MXR.
****
Why do I need a pedalboard?

Back in the early Seventies most guitarists used one to three effects at the most on stage, if any. Back then the signal chain was straightforward and easy to set up and tear down. There were maybe a couple of guitars, a guitar lead, a couple of effect pedals, a short patch cable, as well as a long cable from the front of the stage to the amplifier.
In the early days most guitarists weren’t even too particular with their live sound. If the guitar sounded a little different from one show to another, who cares? The main objective was to keep the show on the road.
These days both the musician and his/her audience are much more discerning, and want to hear a fairly accurate version of a song’s recorded guitar and bass sounds live as well. Most players are very knowledgeable and specific when it comes to their signature sounds, as well as the pedals they use. A dependable and ”secure” signal chain is a prerequisite for the professional musician of today.
If you carry your effects around in a sports bag, setting up your signal chain – and troubleshooting it in case of problems – is much more time-consuming than pulling a clean pedalboard out of its gig bag (or case) and connecting only a couple of audio cables; one for the guitar and one for the amp.
A pedalboard also protects your effects and patch cables from damage by keeping them firmly in place during transport. Additionally, powering all your effect pedals is much easier using one central power supply for the whole board.
Luckily, the 2020s offer us a wide array of different solutions for the budding ’board builder, making even the assembly of a complex signal chain relatively easy.
If you want to find out all there is to know about pro-grade pedalboard assembly, I can heartily recommend you check out Kimmo Aroluoma’s in-depth online guide.
Kimmo Aroluoma, who is the founder of Custom Boards Finland, has spent years on the road as one of Finland’s most sought-after guitar technicians. Kimmo has worked for acts such as The Rasmus, HIM, or Hanoi Rocks. These days Kimmo spends most of his time running Custom Boards, a company dedicated to making world-class pedalboards, as well as supplying pro-grade components to DIY pedalboard builders.
Is there a ”correct” order for effect groups?

Making music is a creative process, so any type of experimentation is highly encouraged, but if you want to ensure that your ’board will work in the desired way with the least amount of hassle, the above picture will get you there. Of course this effect order works also with effects that are not placed on a pedalboard.
The yellow box is home to such effects that will only work reliably with a pure/dry guitar signal. The orange box contains effects that add gain and texture to your signal. Next up are modulation effects. The green box adds space to your signal, as well as providing a good spot for a master volume pedal. And if you use an audiolooper and/or a booster pedal they should be placed last.
Plan before you act
You should definitely plan your new pedalboard, before you buy anything. Otherwise you can easily end up buying something that isn’t right for what you’re trying to achieve.
Choosing the effect pedals
What is the purpose of the ’board? What type of music do you play? Are you in a Metal band or do you play Top 10 covers?
The fact that there’s an old pedal lying around somewhere in a box isn’t a good enough reason to add this pedal to your new pedalboard. There should be a logical, musical or practical reason behind any addition to your effect chain, because any unnecessary addition could potentially degrade your guitar signal.
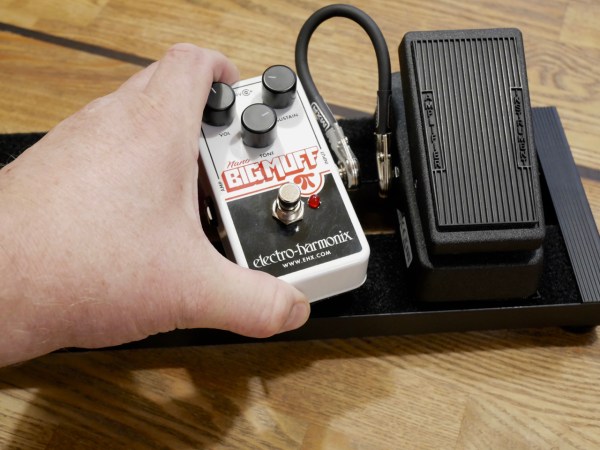
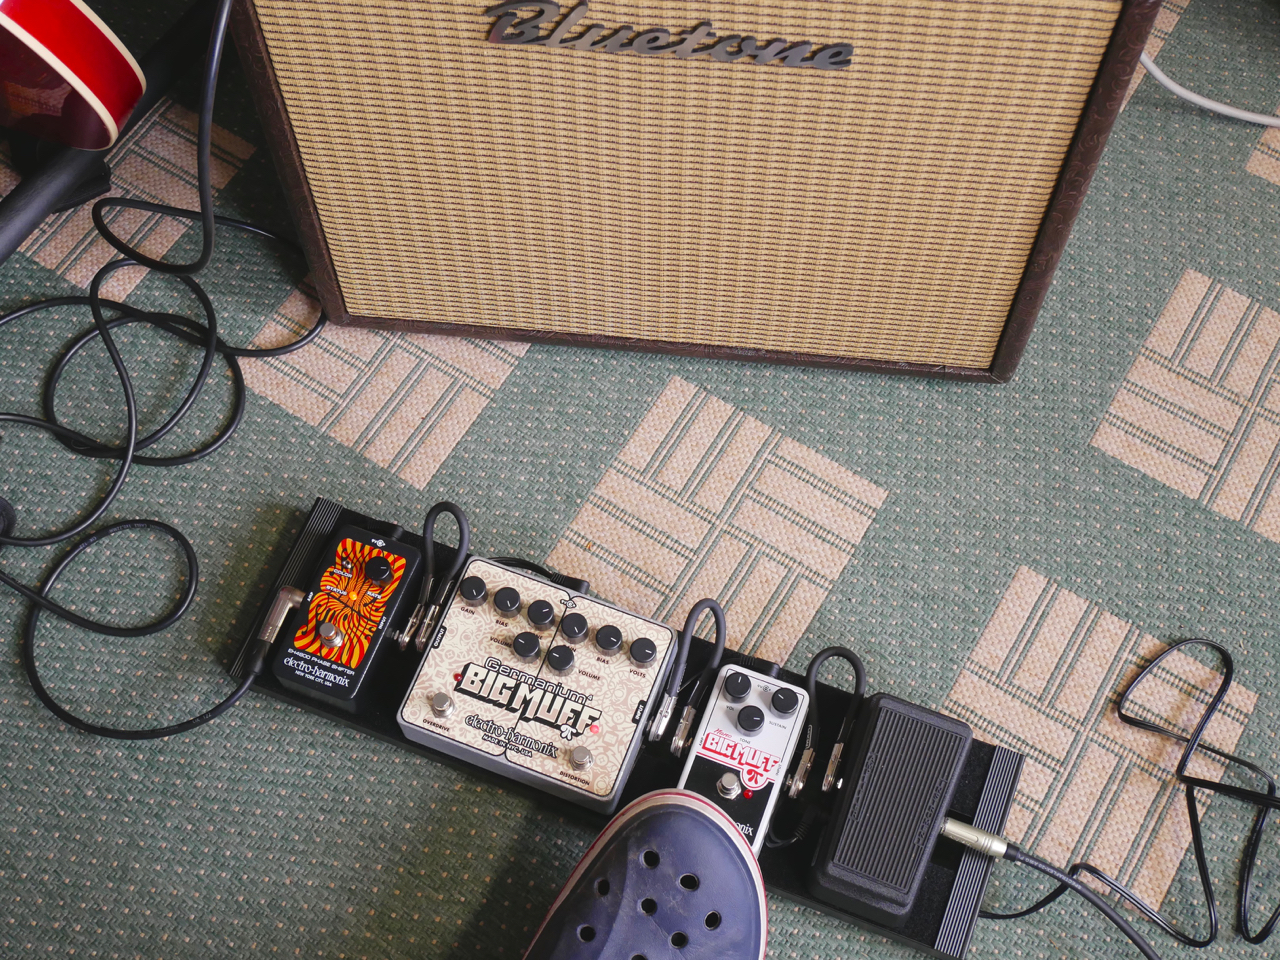
I had been dreaming about a compact board for playing Psychedelic Rock music – a bit ”Hendrix-ey”, but not necessarily totally authentic.
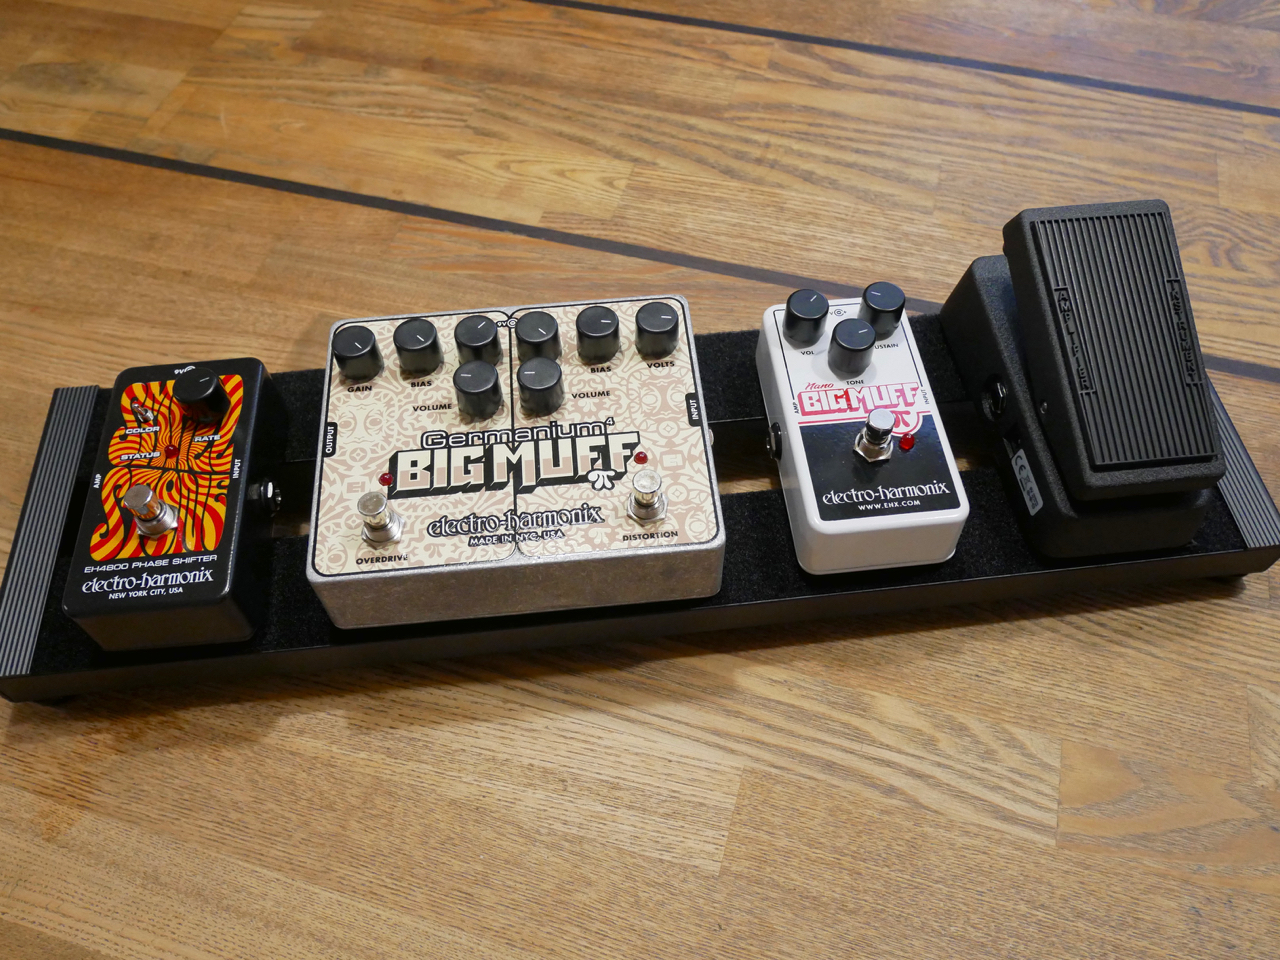
Because my main objective is ”compact” I have chosen a Jim Dunlop CBM95 Mini Crybaby-wah-wah for this project, as it is small enough to fit almost any ’board. Next up there are three blocks of different gain effects – a fuzz-style Electro-Harmonix Nano Big Muff Pi, as well as an EHX double-pedal – the Germanium 4 Big Muff Pi – to provide slightly wonky overdrive and distortion effects. The last pedal is a vintage-style phaser – the EHX Small Stone Nano. Tremolo, reverb and additional boosting are provided by my combo amp.
Patch cables


You should buy the best patch cables you can afford, because a poor quality cable will degrade your sound noticeably by ”eating away” your signal’s dynamic and treble content (especially with traditional passive pickups). There are many different models of ready-made patch cables available.
The number of patch cables you’ll need is dependent on the number of effect pedals you’re going to use. The individual length of each patch cable is determined by the physical placement of the pedals on the ’board. You should also remember to make sure that the plug design on a patch will fit in the space between two pedals. Choosing a relatively fat cable with large-bodied plugs will automatically mean that your pedals will have to be placed a little bit further apart.

Many professional pedalboard makers use bespoke patch cables for their clients’ pedalboards, using top-grade thin cable material coupled with special (no-solder) screw-on plugs. These patch cables save a lot of real estate on the ’board, while also being thin enough to be secured with the same security clips used for the ’board’s DC-power cables.
The physical placement of pedals and patch cables

My compact pedalboard will need no complicated wiring. I will place the effects in the physical order in which they appear in the signal chain in one simple row. This makes it very easy to use pre-made, off-the-shelf patch cables, because the signal continues straight on from one effect to the next.
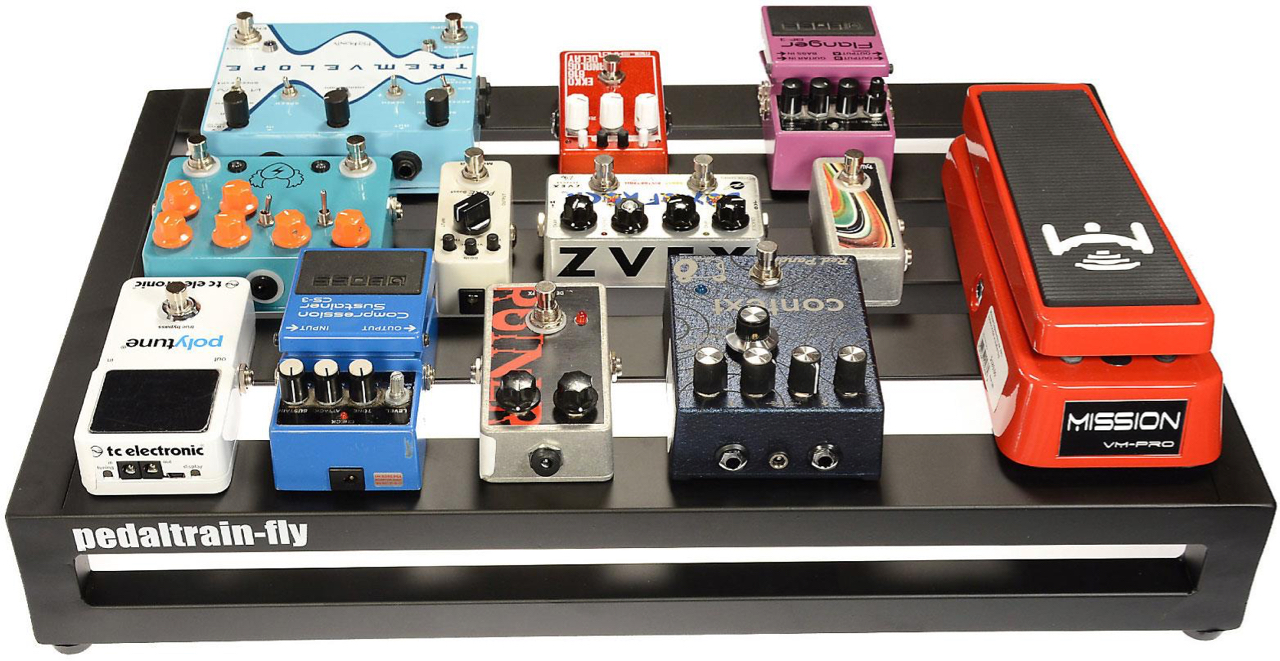
In larger and more complex cases it may be more convenient to place the pedals that are used most in the bottom row of a ’board, with lesser-used effects placed farther away in the second row. On such ’boards the signal flow can be decidedly different from the physical order of the pedals. In such cases you should prepare a signal flow chart for yourself, so you can easily look up how you have planned to hook up all of the effects. Placing the pedals in their approximate place on the ’board frame will make it easy to measure the lengths of all the patch cables needed.
Choosing your pedalboard frame

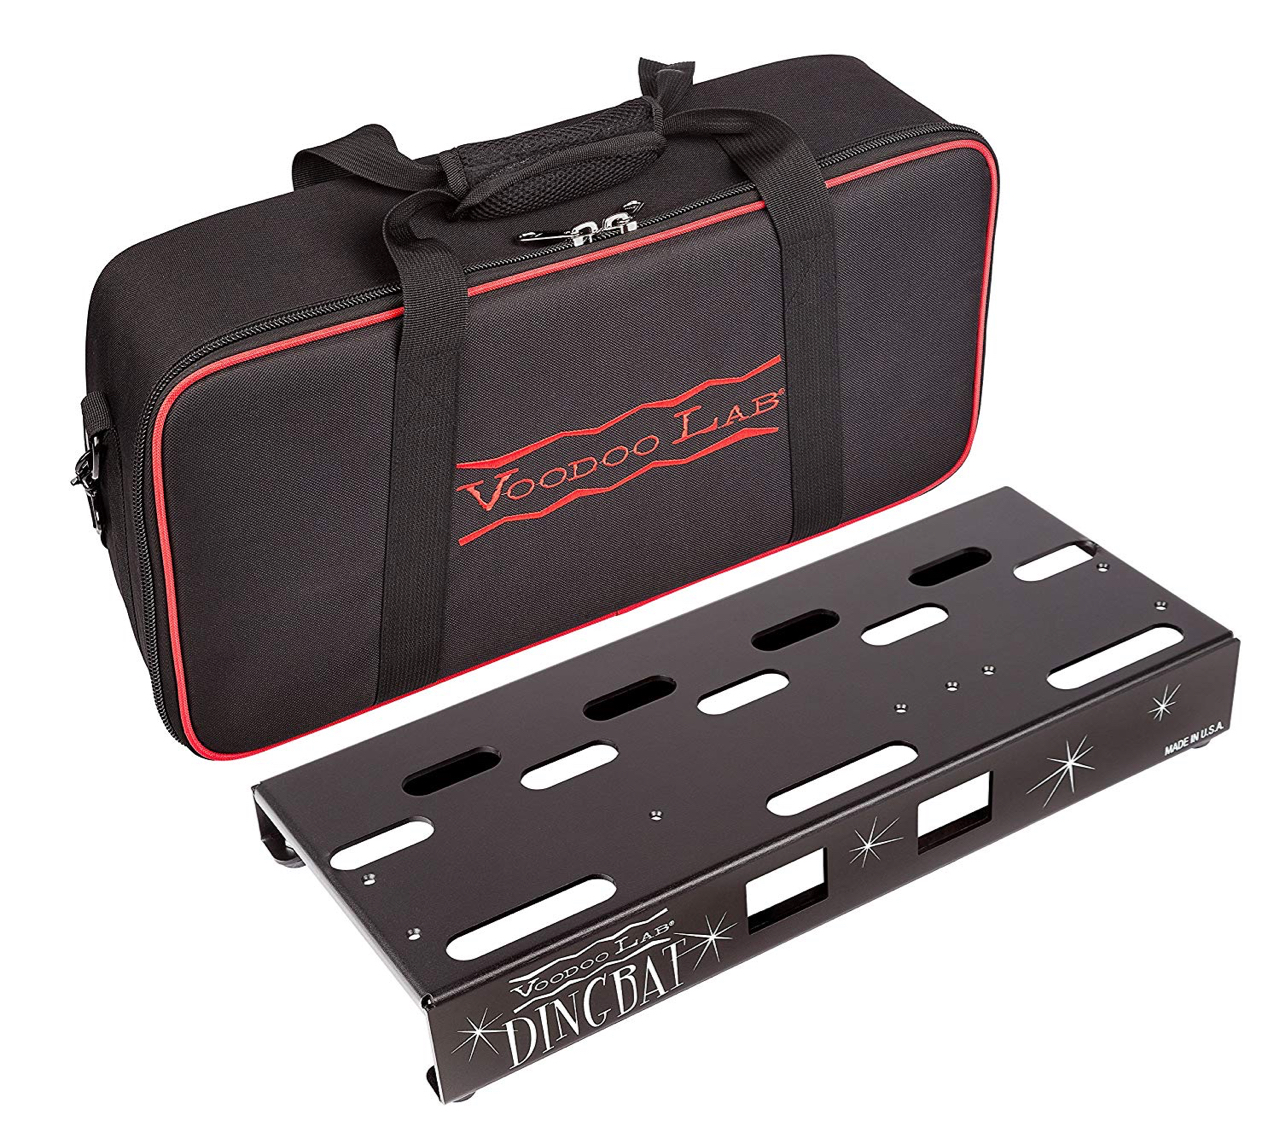
To find the best pedalboard frame for your project you have to measure the outer dimensions (width and height) of your effect array, but you shouldn’t forget to take into account how you plan to install your pedals on your board. Most ’board frames these days are made from metal, and the pedals are installed with adhesive hook-and-loop fastener tapes – either generic velcro (sold with most frames) or industry-grade 3M Dual Lock-tape (bought separately).
There are also a few companies who use their own types of screw-on bottom plates or side clamps on their board frames.
Choosing a power supply aka PSU


You have to choose your PSU according to the physical space of your ’board frame, as well as according to the power needs of your effect pedals. There is a plethora of different PSUs available on the market these days; some pedalboard brands also offer frames with pre-installed power supply units.
Do check the power requirements of each of the pedals that will go on your pedalboard. You should check for voltage (9, 12 or 18 V), for milliamperes, and for the type and polarity of the connector plug. Note that there are a few pedals out there that will require alternating current (AC) in contrast to most effects that run on DC! Pro-grade PSUs come with a whole set of different pedal power cables. Make sure that the set includes all the cables (and connectors) you require. If not you will have to buy the additional cables you need.
Because a pedalboard runs audio effects the power supplied by the PSU has to be ”clean”, e. g. free from extraneous noise, buzz and hum. Most traditional pedalboard PSUs provide this type of isolated power with the help of a whole row of tiny transformers. The transformers make sure no mains hum gets into the pedals’ power cables, while also isolating each of the outputs individually.

Because I have chosen the very compact and flat Palmer Pedalbay 50S frame, most professional PSUs cannot be mounted underneath the pedalboard in my case. Luckily, a 1Spot ”wall-wart” can be a viable option, if you forsake the additional safety and dependability of a ’board-mounted PSU. I’m not planning on touring with this pedalboard, and all the transporting will be done either by car or public transport, meaning the long cable between the transformer and the daisy chain cable will not be a problem for me. Additionally, I’m not running more than four pedals concurrently, and there’s no power-hungry digital multieffect in the group, so a simple daisy-chain set-up will work here.
Building my pedalboard
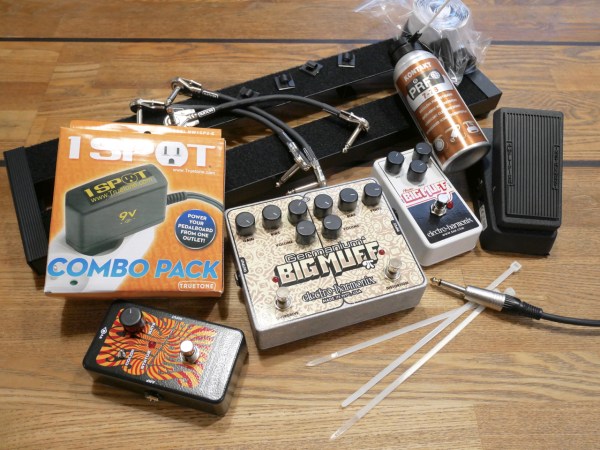
Here’s where it starts

Here’s what everything looks like at the beginning. I forgot to put the scissors in the picture, used to cut the velcro to size. Additionally, I made a last-minute switch to black cable ties, because they looked better, after all.
Cleaning all connectors
Should one of your chosen pedals be faulty, you should have it repaired before it goes on the pedalboard. One faulty pedal will have a very detrimental effect on the whole signal chain and the reliability of your new ’board.
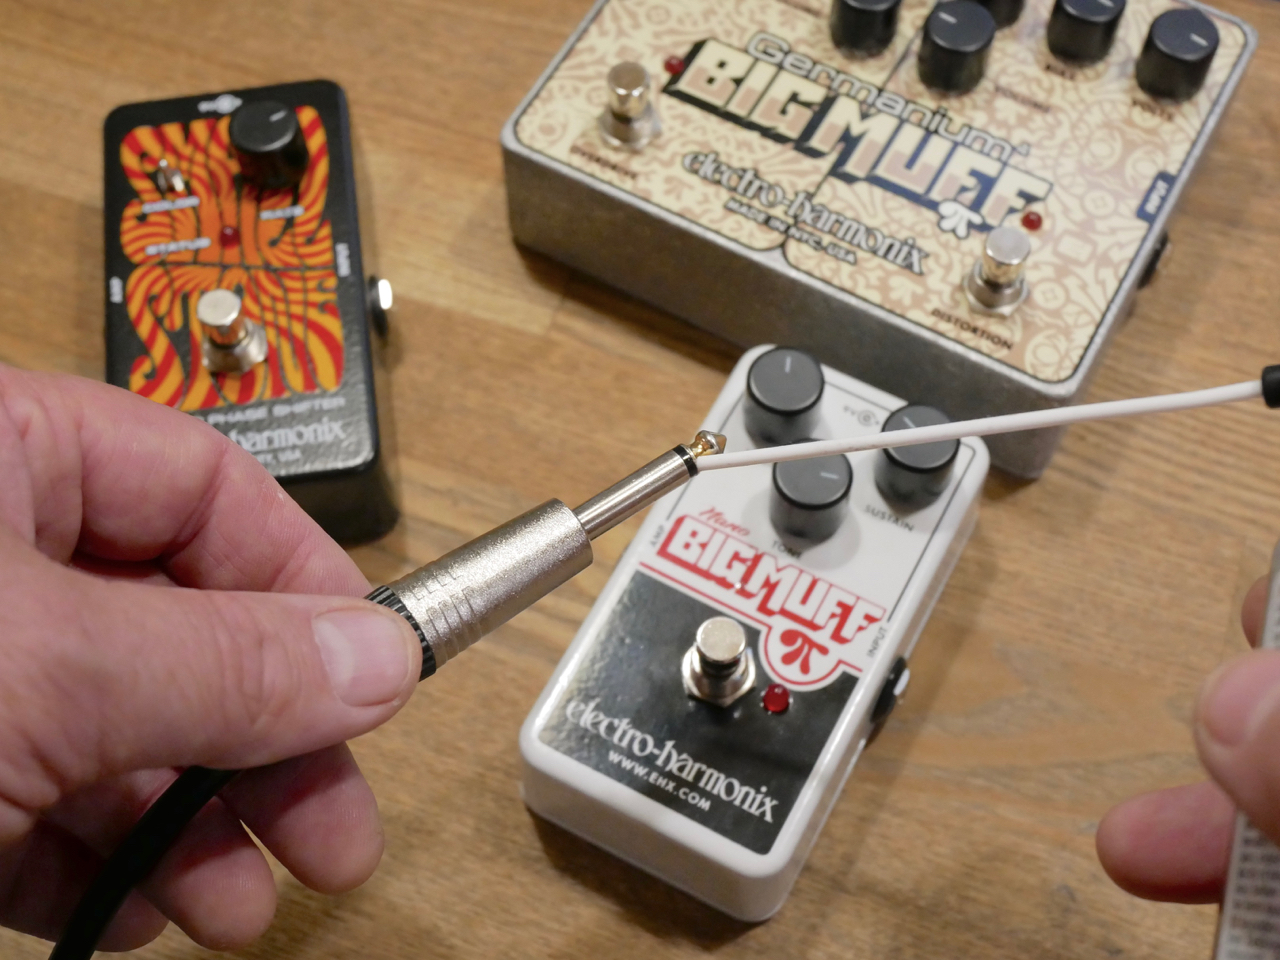
You should clean all audio jacks before you assemble your ’board by squirting a little bit of switch cleaner (like PRF 7-78 Kontakt) on a 1/4″ plug, and then inserting and unplugging the plug several times from the jack. Repeat for each audio input and output.
Cleaning all bottom plates

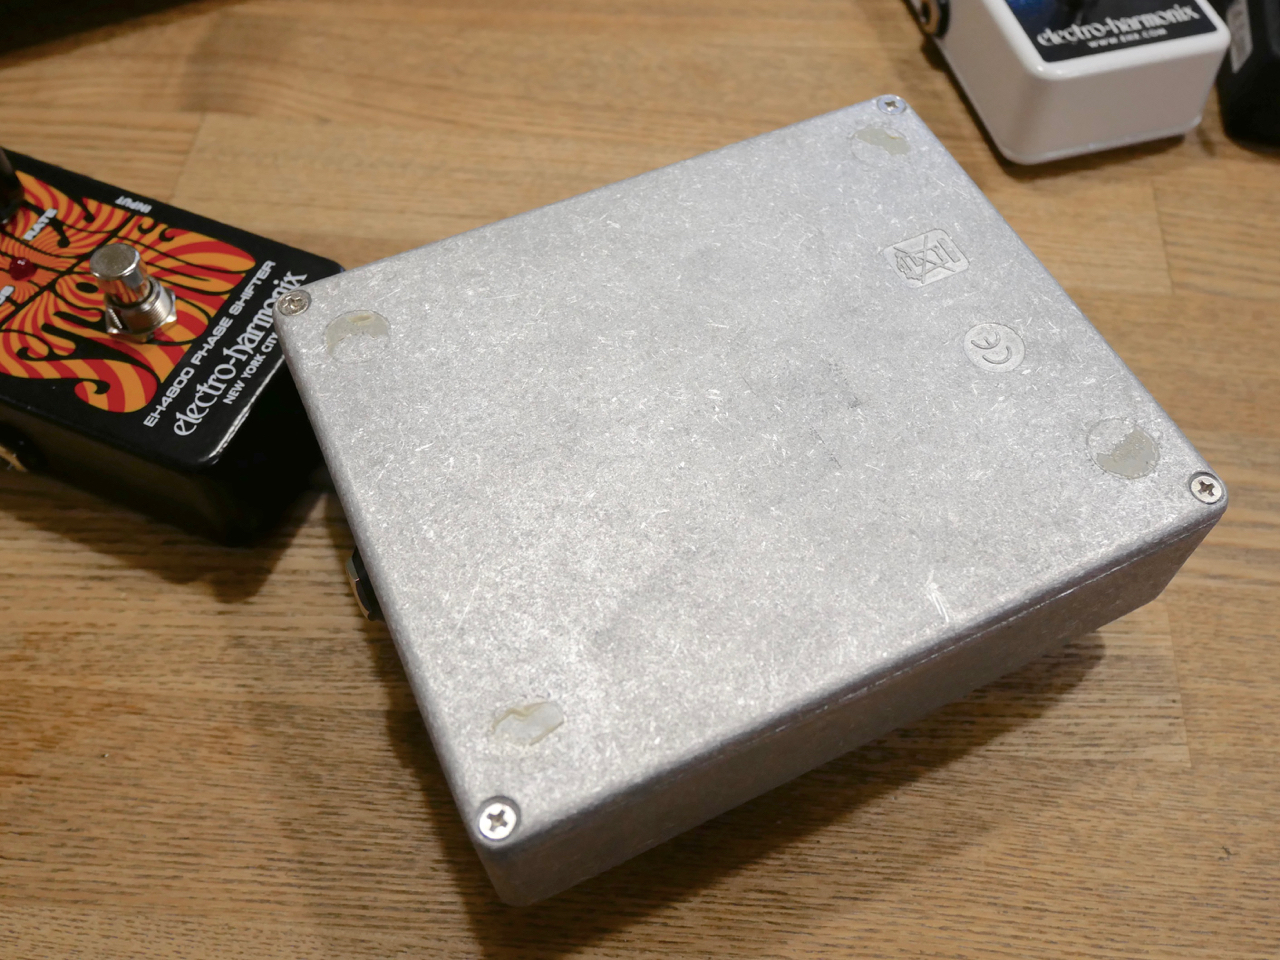
Before you can use any adhesive material on a pedal’s base plate, you will have to take off all rubber feet from the pedal. Velcro and 3M Dual Lock need a smooth and clean surface for them to stick reliably to a pedal’s bottom plate. Sometimes using an additional cleaning agent (like PRF Label Off) can help to get rid of any old glue residue.
On my Electro-Harmonix effects my work is made easier by the separate little rubber feet this company uses. Most Boss and Ibanez pedals, on the other hand, use large rubber or silicone mats, which are much harder to get to grips with. I’d recommend looking for the appropriate removal techniques in the Custom Boards online guide or on Internet forums.
Prevent leakage!

Remove all batteries from the pedals that go on your ’board. The patch cables stay inserted in each pedal’s input jack, which means any battery will be drained in a matter of hours (or a couple of days at the most). Taking the batteries out will prevent damage from leaking batteries in the long run.
Applying the adhesive
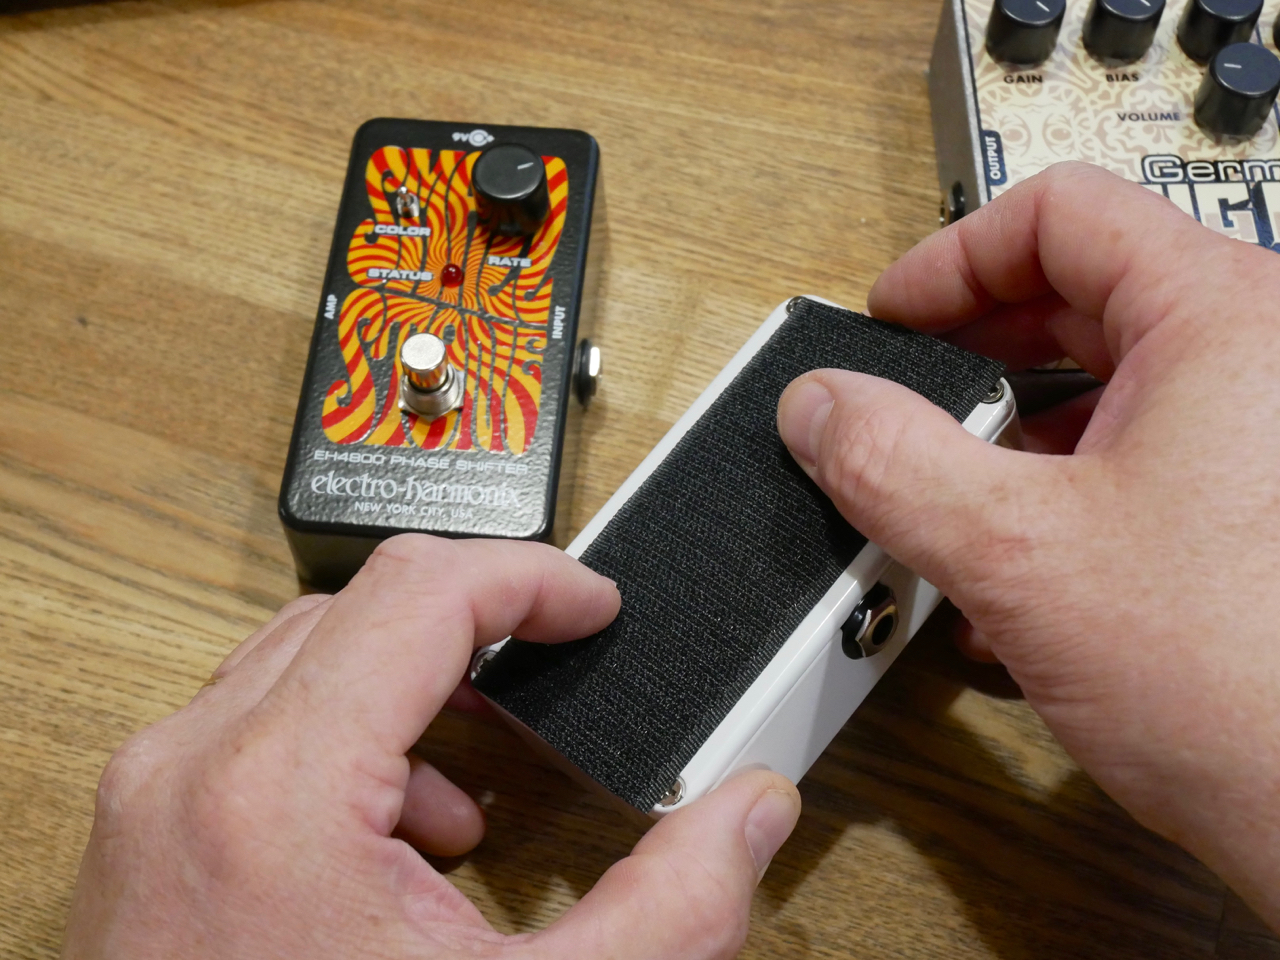
Now it’s time for the velcro to go on the base plates of the pedals. Make sure the adhesive tape sits nice and flat with no air bubbles.
The Palmer Pedalbay 50S comes with the loop side adhesive already installed on the frame. Most other models require you to glue the loop side yourself. If I were to use 3M Dual Lock on this ’board, on the other hand, I’d have to remove the pre-installed adhesive first and clean up all glue residue, before putting on the Dual Lock.
Installing the effects and patch cables

As there’s usually only a certain amount of space on a pedalboard, an effect pedal has to be installed on the frame with the patch cable already inserted in the previous effect’s output and this effect’s input. A 1/4″ plug is too long to be inserted after you’ve put all the pedals next to each other.
Installing the DC-cables with security clips

You’ll achieve a very clean and professional look by wiring the power supply cables from the ’board frame’s underside.
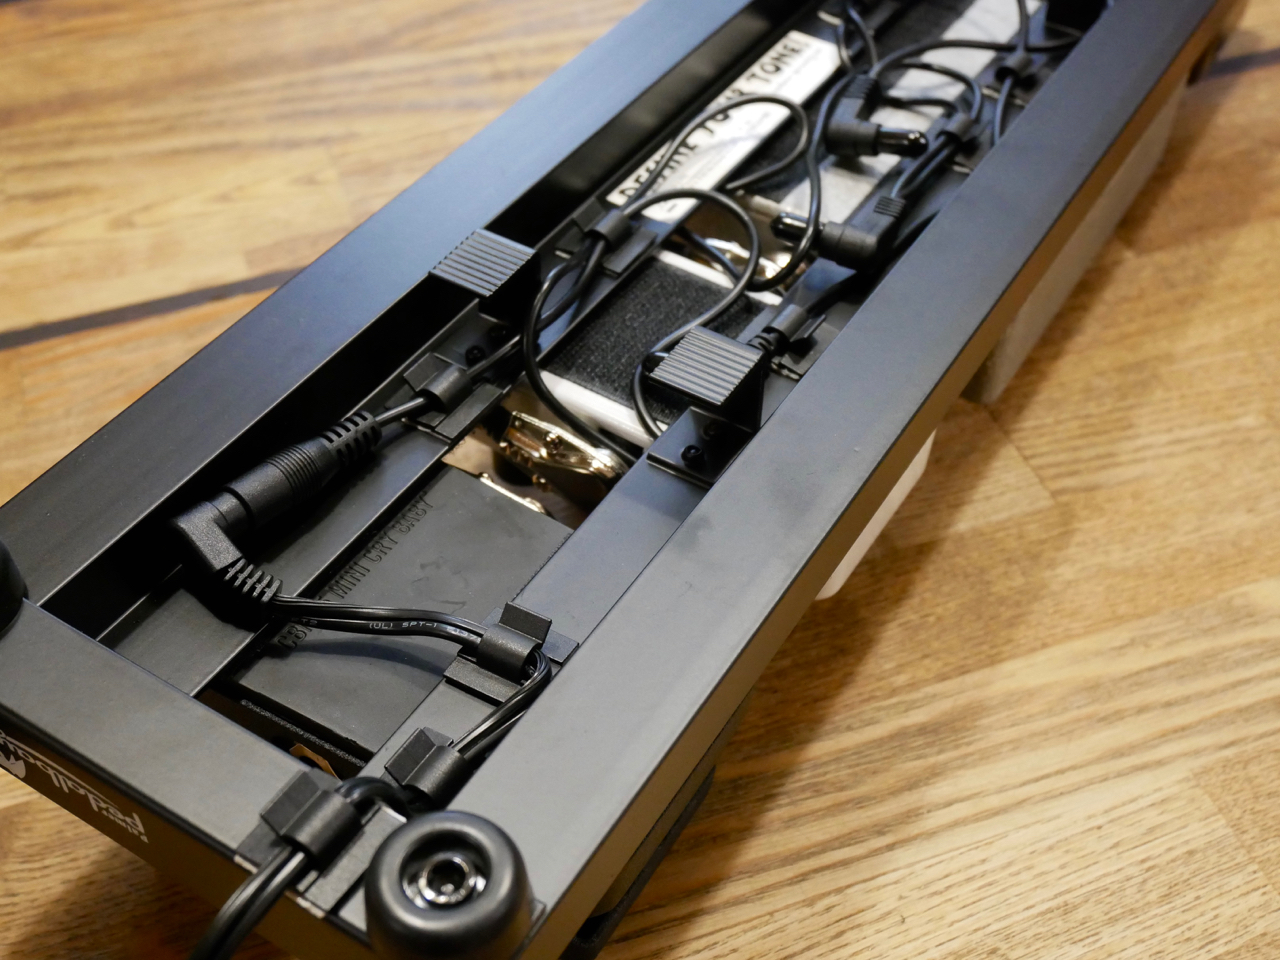
Many guitar shops also sell stick-on plastic security clips, which are just the ticket to keep all the DC-cables in place and securely out of harm’s way.
Time to check out your new pedalboard
This is a good time for a trial run of your new pedalboard with a guitar and an amp. Check out if the placement and the distance between the footswitches is convenient for you. Do all effects power on and off as they should? Is the signal going to the amp free from extraneous noise and hum?
In my project everything worked fine, but if you need help troubleshooting your pedal, you should consult Custom Boards’ builder’s guide.
Securing the patch cables

Because I’ve used off-the-shelf MXR patch cables for my project, and the cables had a relatively large diameter and flat, but wide, plug bodies, securing the patch cables with small plastic clips wasn’t really feasible. This is why I’ve chosen cable ties.
The idea is to keep the patch cables out of harm’s way – or should that be foot’s way – so that it’s impossible to step on them. You apply only a minimal amount of pull on the cable ties. You only want to keep the patch cables from moving around, you don’t want to damage the cables’ outer insulating layer.
Many DIY patch cables are thin enough to be secured with the same type of stick-on security clips used for the DC-cables.


Tulossa Rockway-blogille helmikuussa: Hendrix pienellä budjetilla
Kuinka lähelle Hendrixin soundia pääsee 600:n euron budjetilla?
Kitararaidat äänitetty Shure SM57 -mikrofonilla. Suuri kiitos DLX Musiikille laitteiden lainaamisesta!
Särön sävyt: Fuzz, Overdrive & Distortion – nyt Rockway-blogissa


Säröpedaalien katsaus on nyt luettavissa Rockwayn blogissa.

Review: Fender Jimi Hendrix Stratocaster

Jimi Hendrix’ simply doesn’t seem to wane, even though the genial guitar hero himself died in London in 1970 at 27 years of age. There’s still so much interest in Hendrix’ music that he continues to rank among the top ten of best-earning dead celebrities in Forbes magazine.
The Fender Stratocaster was the master’s favourite instrument, so it’s not really surprising that the man has been honoured with a signature model by Fender last year. This guitar is now also available in Finland.
The new Made-in-Mexico Fender Jimi Hendrix Stratocaster isn’t the first Hendrix model that Fender has released:
In 1980 a small, semiofficial run of Hendrix Strats was made, sporting a white body and a left-handed neck with a large headstock. Fender’s Custom Shop came out with 100 Monterey Stratocasters, which where close copies of the guitar instrument played and burned at the 1967 festival. It was a right-handed Stratocaster with a small headstock and a hand-painted body, set up for left-handed playing. Along with the guitar the Monterey Set also included a flight case and a leather gig bag. In the same year (1997) Fender USA started to produce the Jimi Hendrix Voodoo Strat. The Voodoo Strat was in fact a a left-handed (!) copy of Hendrix’ (right-handed) Woodstock Stratocaster, with the headstock decals turned into mirror images, so that you would look (a bit) like Hendrix, whenever you stepped in front of a mirror. 😀
****

The brand-new Fender Jimi Hendrix Stratocaster (approx. 950 € in Finland) also has some features resembling the guitar Hendrix used at the Woodstock festival:
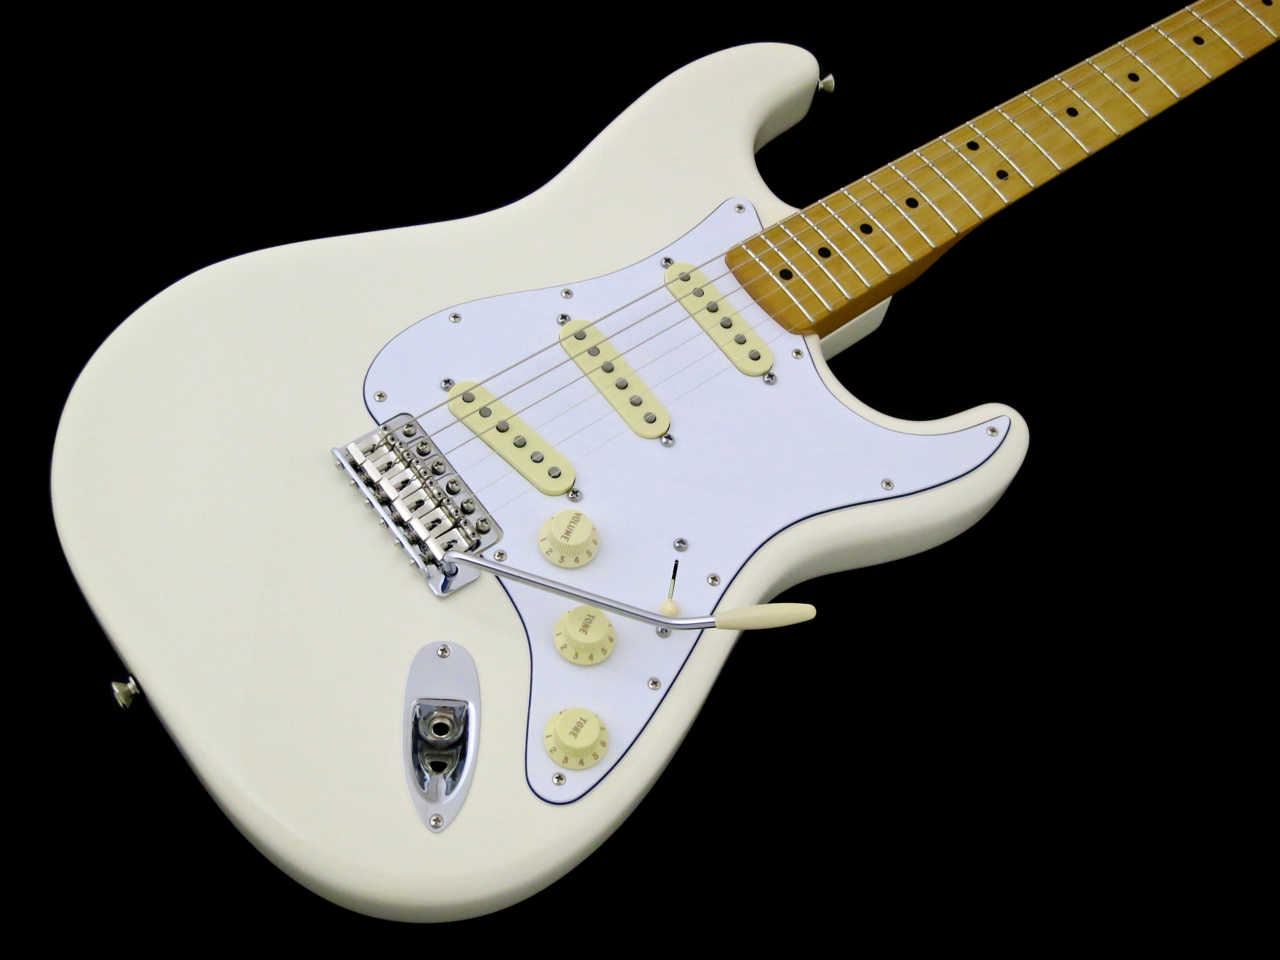
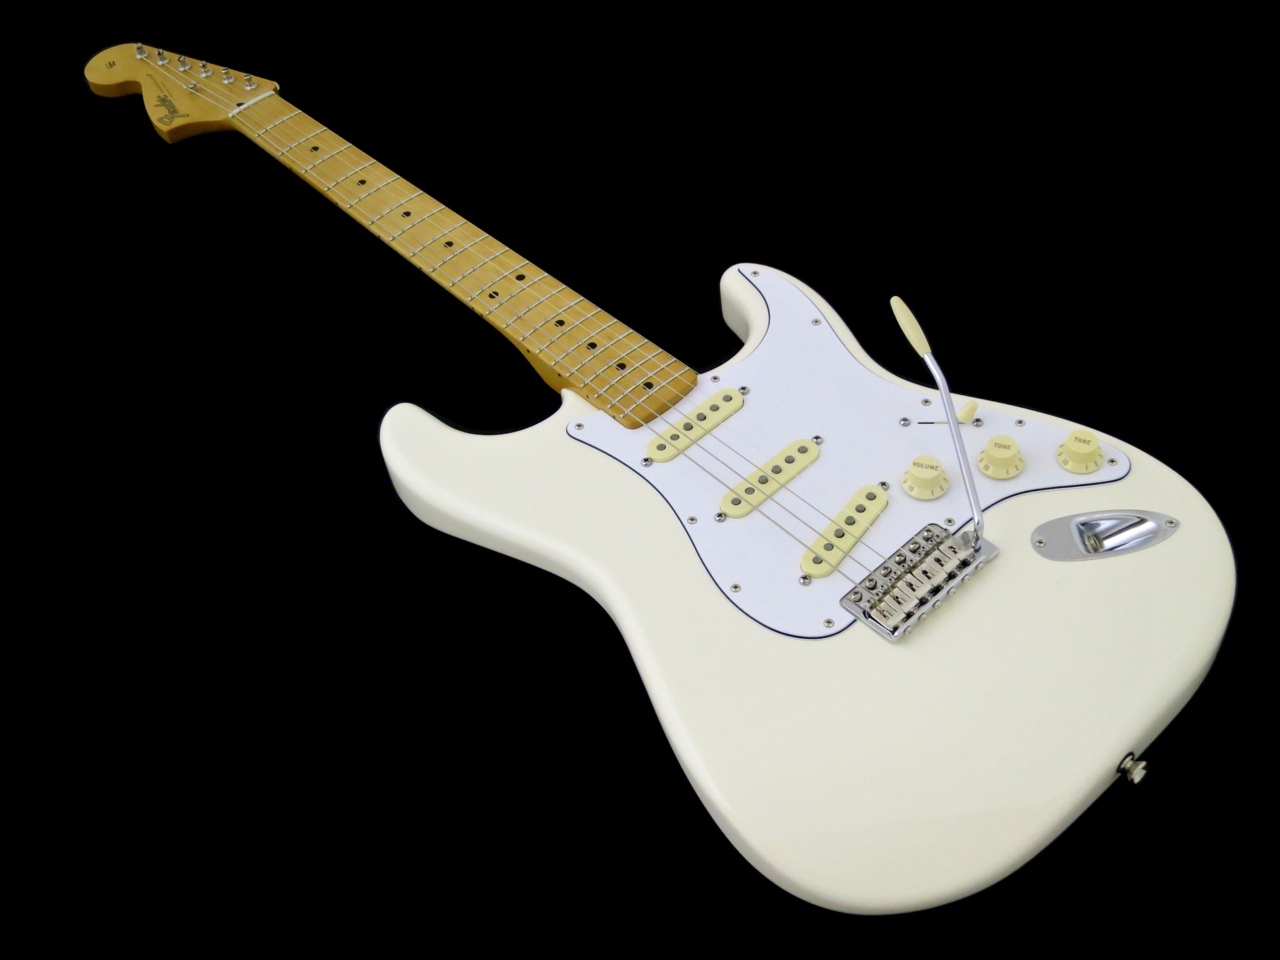
The right-handed alder body is finished either in black or in white, while the neck is a large headstock-carrying, left-handed, all-maple affair.

The headstock carries the so-called transition logo from the mid-Sixties, which was much larger than the Fifties’ spaghetti logo, but still gold coloured. By the end of the Sixties the logo was changed to black and the model name was written in large, bold lettering – that would be called the the CBS logo.
Modern improvements on the Hendrix Strat include truss rod access from the headstock side, as well as a flatter, more bend-friendly fretboard radius of 9.5 inches.

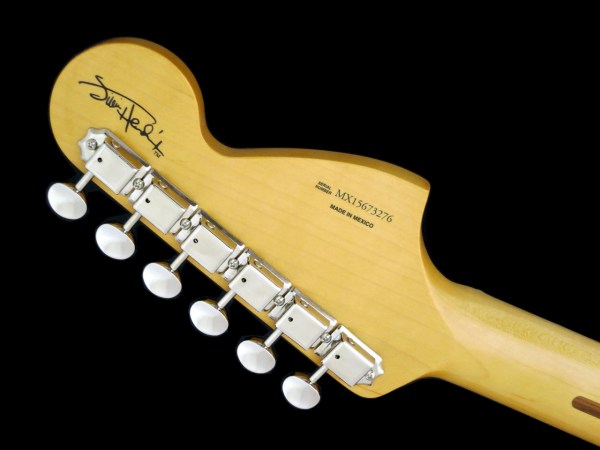
The headstock’s flip side displays Hendrix’ signature, and a very decent set of Kluson copies.

The neck joint has been kept very traditional, but for the Authentic Hendrix-logo on the neck plate.

The most important differences between the Hendrix model and a bog standard Strat can be found in the pickup department:
The Mexican signature guitar comes equipped with a pukka set of American Vintage ’65 Gray-Bottom Fender-pickups, which have been installed into this guitar, as if this were a left-handed model turned over. Both the neck and middle pickup have been flipped over by 180 degrees, while the bridge pickup has been flipped over first, before being installed at a reverse angle. Usually the bridge pickup is placed so that its bass side is closer to the neck with the treble side being closer to the bridge. On the Hendrix Strat the bridge pickup’s bass side is closer to the bridge and the treble side closer to the neck.
This reverse installation means that the magnet stagger is ”wrong”, changing slightly the balance between the strings in terms of output. Furthermore, the bridge pickup will give you a slightly changed range of overtones, due to its reverse angle.
We’ll find out in the listening test, whether these changes really make any discernible difference.

The controls follow the vintage recipe – master volume, neck tone, middle tone – while the pickup selector on the Hendrix model is a modern five-way unit.
The American Vintage ’65 pickup set is true to the original specs and does not feature a reverse-wound/reverse-polarity middle pickup for hum-cancelling in positions two and four, like many updated Strats!

Fender’s vintage vibrato bridge (the ”Sychronized Tremolo”) sports bent steel saddles.
****

Fender Strats are well-known for their excellent ergonomic properties and the Hendrix signature model stays true to this heritage.
Our review instrument was of comfortable moderate weight. The neck’s mid-Sixties C-profile feels great, thanks to not being overly chunky.
The guitar arrived strung with a set of 010s and tuned to E-flat, but the setup wasn’t quite spot-on. The vibrato bridge was tipped a little too steeply, and the intonation was a bit off on the bass strings. But it only took me a couple of minutes (and the correct pair of screwdrivers) to get this Strat shipshape. The result was a great-playing and great-sounding guitar (string height at 12th fret: bottom-E: 2.2 mm/high-e: 1.7 mm).
The flatter-than-vintage fretboard radius really helps to make the Hendrix Strat a very bend-friendly guitar, while also minimising the possibility of fret choke during large-interval bends.
I must admit that I’m not quite sure, whether I really hear much of a difference in the amplified sound of the reversed pickups, though.
Jimi’s guitar tech and effects guru, Roger Mayer, has often stated that Hendrix was satisfied with the sound of his (right-handed) Strats right off the peg. According to Mayer, the only ”customisation” the pair ever did on newly bought guitars, was to take off the neck and remove all possible finish residue inside the neck pockets to improve the stability of the neck joints. Hendrix’ effects, on the other hand, were a regular target for fine-adjustment and electronic customisation.
Anyway, the new Fender Jimi Hendrix signature guitar sounds just like a great Strat should. Here’s a clean clip first:
Here’s an example of the Hendrix Strat’s distorted tone:
I was eager to start recording with the Fender Hendrix model. The first demo track puts the signature Strat into a slightly more contemporary context. The signal chain for this track was: Fender Hendrix Stratocaster –> Electro-Harmonix Germanium 4 Big Muff Pi –> Morley M2 Wah/Volume –> Blackstar HT-1R:
Next I recorded a demo track with a more Hendrix-like arrangement. The signal path was: Hendrix Stratocaster –> Morley M2 Wah/Volume –> Electro-Harmonix Nano Big Muff Pi –> Blackstar HT-1R. The Uni-Vibe style sound at the end of the track was achieved with a phaser plug-in during mixdown:

****

Hendrix’ Live Sound
Even though Jimi Hendrix was known for his avant-garde use of effects in the studio – buoyed by the creativity of his sound engineer Eddie Kramer – his signal chain on stage was surprisingly straightforward. Here’s a short and basic rundown of Hendrix’ live rig.
1. Marshall Model 1959 ”Plexi” stack
Jimi Hendrix used what we now call a vintage-type, non-master volume amplifier stack, which wasn’t especially high-gain by today’s standards. Usually Hendrix had two 100 Watt Marshall-stacks running in parallel, which meant things got very loud. His Strats would cause his amp to break up, but the type of distortion was closer to what we’d now call a 60s Blues sound than to 70s Metal, and far removed from the high-gain saturation of our time.
I simulated this type of amp response by turning my Blackstar HT-1R’s gain control up to get the clean channel to overdrive.
2. Dallas-Arbiter Fuzz Face
In my view, the fuzz pedal is the most important ingredient in Jimi’s sound, because it adds a lot of oomph, creamy compression, and aggression to proceedings.
A British importer of musical equipment, a man called Ivor Arbiter, came up with the Fuzz Face in 1966, because he wanted to have a fuzz pedal in his product range. He came up with a chunky package by having the Fuzz Face circuit built into the base of a 60s microphone stand. The round enclosure, coupled with the unit’s two controls and single footswitch, looked like a smiley face, which is where the pedal got its name from.
Fuzz Faces are built by the Jim Dunlop company these days. There are also cheap alternatives available, from companies such as Mooer or Rowin. I’m using an Electro-Harmonix Nano Big Muff Pi for the demo tracks:
3. Vox Wah-Wah
Hendrix generally used his Vox Wah in front of his Fuzz Face, but keeping it behind the fuzz will also result in some cool tones. Great wah-pedals can also be head from Boss, Mission Engineering or Jim Dunlop.
I’ve used my Morley M2 Wah/Volume pedal in front of the Big Muff Pi:
4. Octavia +Uni-Vibe
Roger Mayer’s Octavia-pedal was sometimes used as an additional ingredient in Jimi’s live sound. This strange-sounding effect combines distortion with an artificial upper octave and some slight ring-modulation. Hendrix also used a Uni-Vibe effect, which was one of the first pedals that tried to create a Leslie-like sound in a compact format.
A genuine Octavia-pedal is only made by Roger Mayer, but Joyo’s inexpensive JF-12 Voodoo Octave stomp box sets you off in a very similar direction.
Korg has introduced the NuVibe, which is a pukka re-imagination of the original Uni-Vibe-pedal. Voodoo Lab’s Micro Vibe is a high-quality proposition at a fair price.
You can also simulate Uni-Vibe-style tones by using a suitable phaser. The Boss PH-3 is a modern and versatile phaser. If you want something even more affordable, you could check out Mooer’s range of effects.
This clip uses a combination of two phaser plug-ins in my audio sequencer:
****
If you want to go all the way to ”become Hendrix”, you will need to buy a left-handed Stratocaster and turn it into a right-handed instrument. The result will be authentic, but also much less comfortable than a regular Strat, because the controls are all in the wrong place.
Fender’s new Jimi Hendrix Stratocaster will give you the (very slight) difference a reversed headstock brings to the playing feel, as well as the (very slight) tonal differences of the reversed pickups, while keeping all of the Stratocaster’s great ergonomics intact.
Fender’s Hendrix model is a fine Strat, which you can use for all types of music. Still, it’s the ”Hendrix-thing” this guitar does the best!
If I could only have the maestro’s long fingers and musical imagination…
****
Fender Jimi Hendrix Stratocaster
Price approx. 950 €
Contact: Fender
A big ”thank you” goes to DLX Music Helsinki for the kind loan of the review guitar!
Pros:
+ musician-friendly price tag
+ workmanship
+ American Vintage pickups
+ playability
+ sound
Cons:
– factory setup

Testipenkissä: Fender Jimi Hendrix Stratocaster
Jimi Hendrixin suosio ei näytä hiipumisen merkkejä, vaikka tämä valovoimainen kitarasankari itse kuoli jo vuonna 1970 27-vuotiaana Lontoossa. Kiinnostus Hendrixin musiikkia kohti on yhä niin suuri, että hän on sijalla yhdeksän Forbes-lehden listalla parhaiten tienaavista kuolleista henkilöistä.
Fenderin Stratocaster oli mestarin suosikkisoitin, eikä ole siis ihme, että Fender hiljattain esitteli uuden Jimi Hendrix -nimikkomallin, joka on nyt myös saatavilla Suomessakin.
Uusi meksikolainen Fender Jimi Hendrix Stratocaster ei ole kuitenkaan firman ensimmäinen kunniaosoitus legendaariselle kitaristille:
Vuonna 1980 tehtiin pieni ”epävirallinen” erä Hendrix-Stratoja (tuotantoerä vain muutama tusina) valkoisella rungolla ja vasenkätisellä, isolla viritinlavalla varustetulla kaulalla. Vuonna 1997 ilmestyi Custom Shopin 100 kitaran erä Hendrixin Monterey-Stratosta, joka oli tarkka kopio soittimesta, jota Hendrix käytti Monterey-festivaalilla 1967. Se oli käsin maalattu vasenkätiselle sopivaksi muutettu oikeankätinen Strato pienellä lavalla. Monterey Strat -settiin kuului myös flight case -laukku, nahkahihna, sekä nahasta tehty topattu pussi. Vuonna 1997 ilmestyi myös Fender USA:n Jimi Hendrix Voodoo -Strato, joka oli oikeakätiselle tarkoitettu kopio Hendrixin legendaarisesta Woodstock-kitarasta. Voodoo-Straton juju oli, että kitaran logo oli alkuperäisen peilikuva, minkä ansiosta nimikkomallin käyttäjä näytti peilin edessä enemmän Hendrixiltä. 😀
****
Upouudessa Fender Jimi Hendrix Stratocasterissa (hinta-arvio noin 950 €) on myös vahvoja vivahteita mestarin Woodstock-kitarasta:
Tässä tapauksessa kitaran leppärunko on saatavilla joko valkoisena tai mustana, ja siihen on liitetty yksiosainen vaahterakaula isolla, vasenkätisellä lavalla.
Viritinlavalta löytyy ns. transition logo 60-luvun keskiväliltä, joka on isompi kuin 50-luvun spaghetti logo, mutta vielä kultainen. Logo muuttui 60-luvun lopulla mustaksi CBS logoksi.
Nykyaikaisia parannuksia Hendrix Stratocasterissa ovat lavanpuoleinen kaularaudan säätöruuvi, sekä otelaudan loivempi kaarevuus (9,5 tuumaa), joka helpottaa kielten venytyksiä.
Lavan kääntöpuolelta löytyy Jimi Hendrixin nimikirjoitus, kitaran sarjanumero, sekä sulavasti toimivat Kluson-kopiot.
Kaulaliitos on hyvin perinteistä sorttia, mutta kaulalevyyn on kaiverrettu Authentic Hendrix -tuotteiden logo.
Tärkein ja ratkaisevin ero rivi-Stratoon piilee Fender Jimi Hendrix -mallin mikrofoneissa:
Meksikolaisessa nimikkomallissa käytetään laadukkaita American Vintage ’65 Gray-Bottom Fender-mikrofoneja, jotka on asennettu niin kuin tämä kitara olisi vasenkätinen. Kaula- ja keskimikrofoni on siis käännetty 180 asteella. Myös tallamikrofoni on ensin käännetty, mutta tämän lisäksi se on myös asennettu käänteisen kulmaan. Tavallisesti tallamikin bassopuoli on lähempänä kaulaa, Hendrix-Stratossa taas mikin diskanttipuoli on lähempänä soittimen kaulaa.
Tämä toimenpide kääntää mikrofonien erikorkoisten magneettien järjestystä, ja se myös muuttaa tallamikin tapauksessa mitkä ylä-äänet mikki poimii kielistä.
Vasta käyttötestissä selviää onko ero kuultavissa.
Säädinosasto on vintage-reseptin mukainen – master volume, kaulamikin tone ja keskimikin tone – mutta Hendrix-mallissa on nykyaikainen viisiasentoinen kytkin.
American Vintage ’65 -mikkisetissä kaikki mikrofonit on käämitty samaan suuntaan, niin kuin aidoissa 60-luvun Stratoissa. Tämän takia yksikelaisten hurina ei poistu mikkiasennoissa kaksi ja neljä, niin kuin monissa nykyaikaisissa Stratocastereissa!
Vibratalla on Fenderin vintage vibrato (”Sychronized Tremolo”) teräksisillä tallapaloilla.
****
Fender Stratot tunnetaan niiden hyvästä ergonomiasta, eikä Fender Jimi Hendrix -malli poikkea tästä linjasta.
Testiyksilö on mukavasti keskipainoinen ja sen runko hyvin sulavalinjainen. Fender on valinnut 1960-luvun C-profiilin tähän Hendrix-Stratoon, joka tuntuu todella hyvältä kädessä myös hyvin maltillisen paksuutensa ansiosta.
Testikitara saapui Es-vireessä 010-satsilla, mutta sen säädöt eivät olleet täysin kohdallaan suoraan laatikosta. Vibratallan kulma oli hieman liian jyrkkä ja myös soittimen intonaatio oli bassokielillä vähän pielessä. Oikean kokoisilla ristipääruuvareilla ongelmat hoidettiin nopeasti ja helposti pois päiväjärjestykseltä. Lopputulos oli erittäin hyvin soiva sähkökitara mukavalla tatsilla (kieltenkorkeus 12. nauhalla: matala-E: 2,2 mm/diskantti-e: 1,7 mm).
Loivasta otelautaradiuksesta (9,5 tuumaa) on todellakin paljon hyötyä bendaamisessa. Kielten venyttäminen on helpompaa, eivätkä kielet rämise isoissa intervalleissa ylimpiä nauhoja vastaan kuin usein kuperammalla vintage-radiuksella (7,25 tuumaa).
En ole ihan varma kuuluuko käänteisten mikrofonien soundillisia vaikutuksia ratkaisevasti Hendrix-Stratocasterin sähköisessä soundissa.
Hendrixin tekniikon ja soundigurun, Roger Mayerin, mukaan muusikko itse oli tyytyväinen tuotantolinjan Stratoihin. Mayer on sanonut useissa haastatteluissa, että ainoat toimenpiteet, joita tehtiin juuri ostettuihin soittimiin, olivat kaulataskujen siivoaminen lakkausjäämiltä. Sen sijaan Hendrixin efekteihin tehtiin kaikenlaista kustomointia.
Oli niin tai näin, uusi Fender Jimi Hendrix -malli soi kuin laadukas Strato. Tässä ensin puhdas pätkä:
Ja tässä esimerkki Hendrix-kitaran särösoundista:
Halusin ensin kokeilla Jimi Hendrix -Stratoa nykyaikaisessa soundiympäristössä, ja äänitin tämän pienen demon. Signaaliketju on Hendrix Stratocaster –> Electro-Harmonix Germanium 4 Big Muff Pi –> Morley M2 Wah/Volume –> Blackstar HT-1R:
Äänitin sitten vielä toisen, Hendrix-tyylisen demokappaleen. Signaaliketju on tässä Hendrix Stratocaster –> Morley M2 Wah/Volume –> Electro-Harmonix Nano Big Muff Pi –> Blackstar HT-1R. Kappaleen lopussa simuloin Uni-Vibe-efektin soundia nopealla phaser-efektillä miksausvaiheessa:
****
Hendrixin live-soundi
Vaikka Jimi Hendrix oli – ääniteknikko Eddie Kramerin avulla – melkoinen edelläkävijä efektien käytössä studiossa, perustui hänen live-soundinsa yllättävän pieneen efektiarsenaaliin. Tässä todella lyhyt johdanto Hendrixin signaaliketjuun lavalla.
1. Marshall Model 1959 ”Plexi” -stäkki
Jimi Hendrix käytti mitä tänään kutsutaan vintage-tyylisiksi stäkeiksi, joiden vahvistimissa ei ollut high-gain säröpiirejä, eikä master volume säätimiä. Hänellä oli tavallisesti käytössä jopa kaksi 100-watista Marshall-stäkkiä, mikä tarkoitti että äänenpaine oli melkoinen. Stratollakin nämä vahvistimet menevät särölle, mutta soundi on enemmän Blues-tyylinen, kuin mitä saadaan nykyaikaisista high-gain stäkeistä.
Simuloin tätä soundia kääntämällä Blackstar HT-1R -kombon clean-kanavalla gain-säätimen reilusti auki.
2. Dallas-Arbiter Fuzz Face -säröpedaali
Fuzz-tyypinen säröpedaali on mielestäni Hendrix-soundin kannalta ratkaisevassa asemassa, koska se lisää soundiin sekä lihaksia ja kermaista sustainea että runsaasti rosoisuutta.
Englantilainen musiikkilaitteiden maahantuoja Ivor Arbiter halusi saada firmalleen 1966 oman säröpedaalin. Hän keksi Fuzz Facen rakentamalla fuzz-piirin mikrofoniständin jalkaan. Pyöreä jalka näytti kahdella säätimellään ja yhdellä jalkakytkimellään naamalta, josta pedaalin nimi tulee.
Fuzz Faceja valmistaa nykyään Jim Dunlop. Edullisia vaihtoehtoja saa myös Mooerilta tai Rowinilta. Itse käytin tässä Electro-Harmonix Nano Big Muff Pi -pedaalia:
3. Vox Wah-Wah
Hendrix käytti Vox Wahiaan tavallisesti kytkettynä Fuzz Face -särön tuloon, mutta myös fuzzin jälkeen saadaan monta käyttökelpoista soundia. Hyviä wah-pedaaleja on saatavilla esimerkiksi Bossilta, Mission Engineeringiltä tai Jim Dunlopilta.
Itse käytin tässä omaa Morley M2 Wah/Volume -pedaalia (ennen fuzzia):
4. Octavia +Uni-Vibe
Lisämausteina Hendrix käytti vielä Roger Mayerin rakentamaa Octavia-efektiä, jossa säröefekti ja yläoktaaveri tuottavat hyvin erikoisia soundeja, sekä alun perin Leslie-simulaatioksi tarkoitettua Uni-Vibe-pedaalia.
Oikean Octavia-efektin saa vain Roger Mayerilta, mutta Joyo JF-12 Voodoo Octave -tuplapedaali tarjoaa hyvin edullisen vaihtoehdon.
Korgilta saa nykyään NuVibe-nimeä kantavan Uni-Vibe-uusintapainoksen, mutta pedaali on melko kallis hankinta. Voodoo Labin Micro Vibe on jo hieman edullisempi, mutta silti laadukas ratkaisu.
Uni-Vibe-tyylisiä soundeja voi simuloida myös phaser-efektillä. Bossin PH-3 on nykyaikainen phaser-pedaali monipuolisilla ominaisuuksilla, kun taas Mooerilta saa hyvin edullisen phaserin.
Esimerkkipätkässä ketjutin miksausvaiheessa kaksi phaser-plugaria audiosekvensserissä:
Tässä vielä LINKKI Kimmo Aroluoman erinomaiselle jutulle Hendrixin signaaliketjusta, sekä toinen LINKKI pro-luokan Hendrix-pedaalilaudan testille.
****
Jos haluaa soittaa kitaraa täysin autenttisesti Hendrixin hengessä, pitää hankkia itselleen vasenkätisten Strato, vaihtaa (tai kääntää) kitaran satula oikeankätiseksi ja soittaa sitä kitaraa sitten väärinpäin. Lopputulos on autenttinen, mutta samalla ergonomialta ongelmallinen, koska esimerkiksi säätimet ovat huonolla paikalla.
Uudelta Fender Jimi Hendrix Stratocasterilla saa vasenkätisen viritinlavan tuomaa (hieman) erilaista soittotuntumaa, sekä käännettyjen mikrofonien tuomaa (hieman) erilaista perussoundia oikeankätisen kitaran ergonomialla.
Fenderin Hendrix-malli on todella hyvä Strato, jolla voi soittaa myös muuta musiikkia kuin vain Hendrixiä, mutta Hendrix onnistuu kyllä erityisen hyvin.
Nyt pitäisi ”vain” olla mestarin pitkät sormet ja Hendrixin idearikkautta…
****
Fender Jimi Hendrix Stratocaster
hinta-arvio noin 950 €
Lisätiedot: Fender
Kiitos DLX Musiikille testikitaran lainaamisesta!
Plussat:
+ muusikkoystävällinen hinta
+ työnjälki
+ American Vintage -mikkisetti
+ soitettavuus
+ soundi
Miinukset:
– tehtaan säädöt
