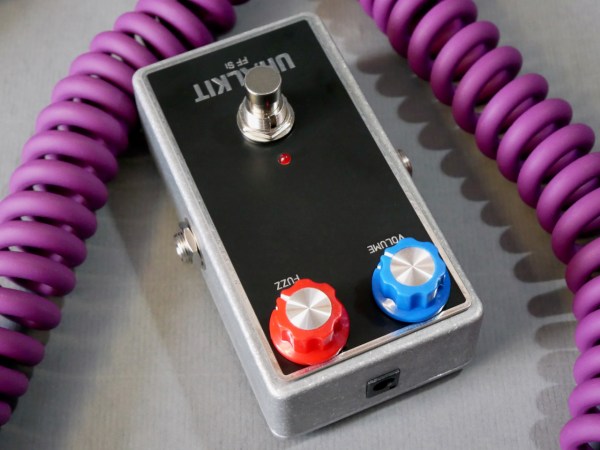
Here’s a demo of the Tonefest 2025 version of Uraltone’s UralKit Les Love Electra overdrive pedal. The demo is based on the Finnish version of Neil Young’s ”Cinnamon Girl”, called ”Kanelipuun alla” by Kirka.
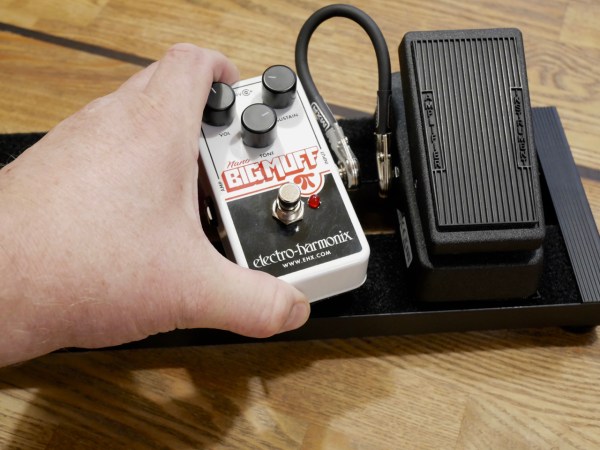
I thought it would be fun to do a direct comparison between these two fuzz pedals by Uraltone. In the first half of the video I play the guitar with the volume control backed off to about 7.5 of 10. For the second part of the video I turned my guitar up to full volume. The UralKit Ge Rouhi used here isn’t the regular version, but rather the Helsinki Tonefest 2023 special edition that I assembled at the guitar show. **** • Guitar used: Harley Benton DC-60 Junior • Amp used: Bluetone Black Prince Reverb • Mic used: Shure SM57 • Preamp used: Cranborne Audio Camden EC2 • Interface used: Universal Audio Volt 2 • The Squier (Japan) Jazz bass was recorded using the Cranborne preamp
Even though the first guitar effects were already introduced in the mid-1960s, guitar pedals only started to become affordable and widely available in the late-1970s with brands such as Boss. Ibanez and MXR.
****
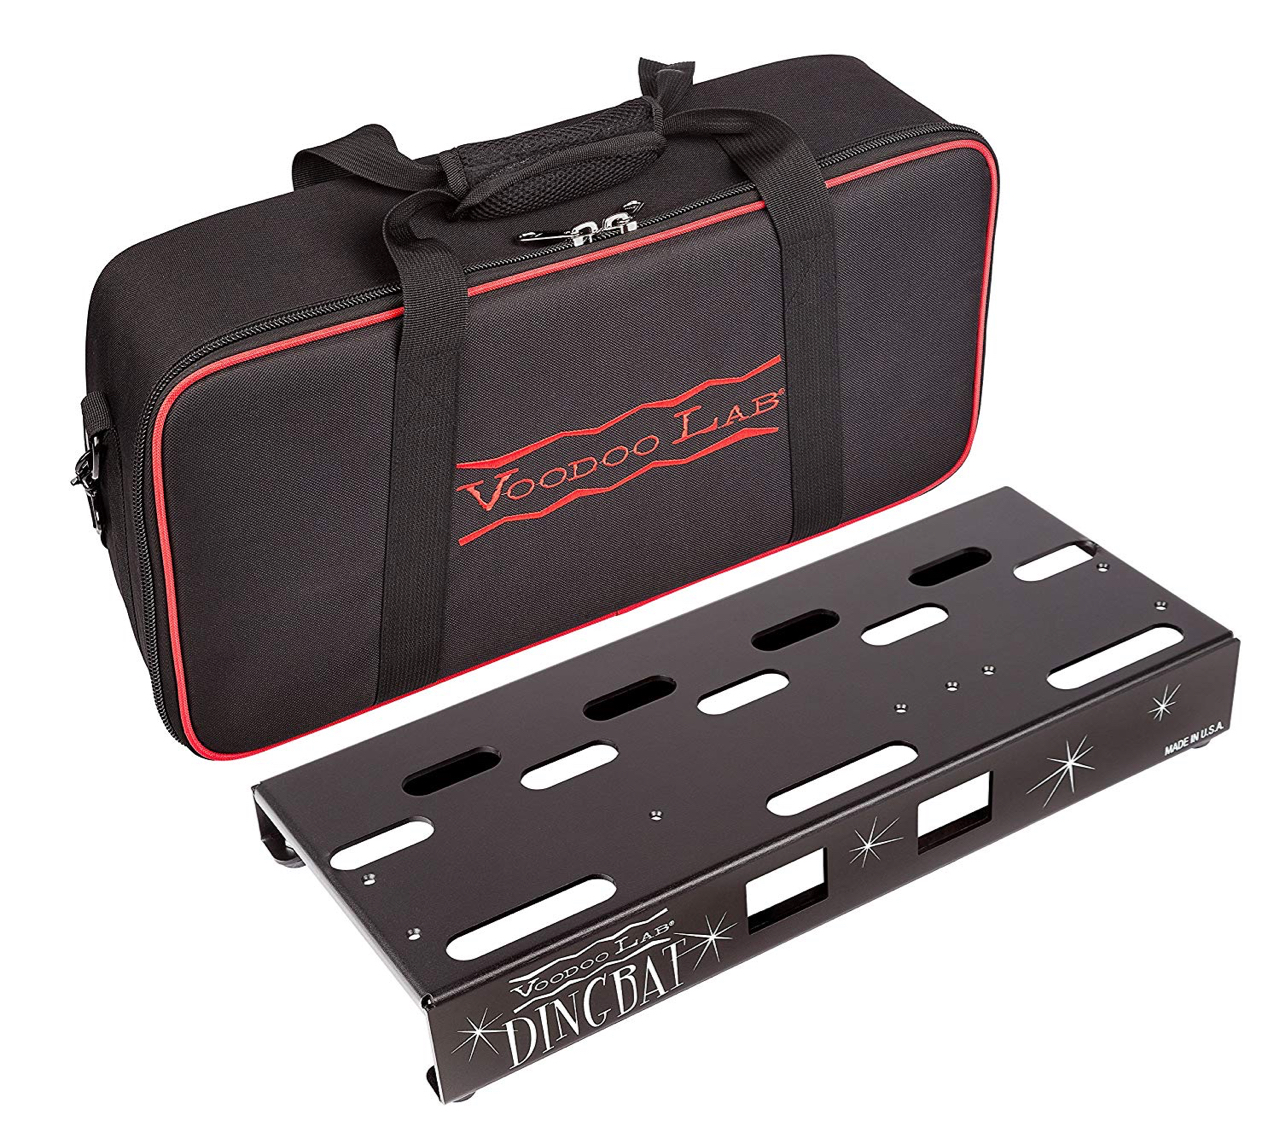
Why do I need a pedalboard?
Back in the early Seventies most guitarists used one to three effects at the most on stage, if any. Back then the signal chain was straightforward and easy to set up and tear down. There were maybe a couple of guitars, a guitar lead, a couple of effect pedals, a short patch cable, as well as a long cable from the front of the stage to the amplifier.
In the early days most guitarists weren’t even too particular with their live sound. If the guitar sounded a little different from one show to another, who cares? The main objective was to keep the show on the road.
These days both the musician and his/her audience are much more discerning, and want to hear a fairly accurate version of a song’s recorded guitar and bass sounds live as well. Most players are very knowledgeable and specific when it comes to their signature sounds, as well as the pedals they use. A dependable and ”secure” signal chain is a prerequisite for the professional musician of today.
If you carry your effects around in a sports bag, setting up your signal chain – and troubleshooting it in case of problems – is much more time-consuming than pulling a clean pedalboard out of its gig bag (or case) and connecting only a couple of audio cables; one for the guitar and one for the amp.
A pedalboard also protects your effects and patch cables from damage by keeping them firmly in place during transport. Additionally, powering all your effect pedals is much easier using one central power supply for the whole board.
Luckily, the 2020s offer us a wide array of different solutions for the budding ’board builder, making even the assembly of a complex signal chain relatively easy.
If you want to find out all there is to know about pro-grade pedalboard assembly, I can heartily recommend you check out Kimmo Aroluoma’s in-depth online guide.
Kimmo Aroluoma, who is the founder of Custom Boards Finland, has spent years on the road as one of Finland’s most sought-after guitar technicians. Kimmo has worked for acts such as The Rasmus, HIM, or Hanoi Rocks. These days Kimmo spends most of his time running Custom Boards, a company dedicated to making world-class pedalboards, as well as supplying pro-grade components to DIY pedalboard builders.
Is there a ”correct” order for effect groups?
Find out more on the best order for effects placement HERE.
Making music is a creative process, so any type of experimentation is highly encouraged, but if you want to ensure that your ’board will work in the desired way with the least amount of hassle, the above picture will get you there. Of course this effect order works also with effects that are not placed on a pedalboard.
The yellow box is home to such effects that will only work reliably with a pure/dry guitar signal. The orange box contains effects that add gain and texture to your signal. Next up are modulation effects. The green box adds space to your signal, as well as providing a good spot for a master volume pedal. And if you use an audiolooper and/or a booster pedal they should be placed last.
Plan before you act
You should definitely plan your new pedalboard, before you buy anything. Otherwise you can easily end up buying something that isn’t right for what you’re trying to achieve.
Choosing the effect pedals
What is the purpose of the ’board? What type of music do you play? Are you in a Metal band or do you play Top 10 covers?
The fact that there’s an old pedal lying around somewhere in a box isn’t a good enough reason to add this pedal to your new pedalboard. There should be a logical, musical or practical reason behind any addition to your effect chain, because any unnecessary addition could potentially degrade your guitar signal.
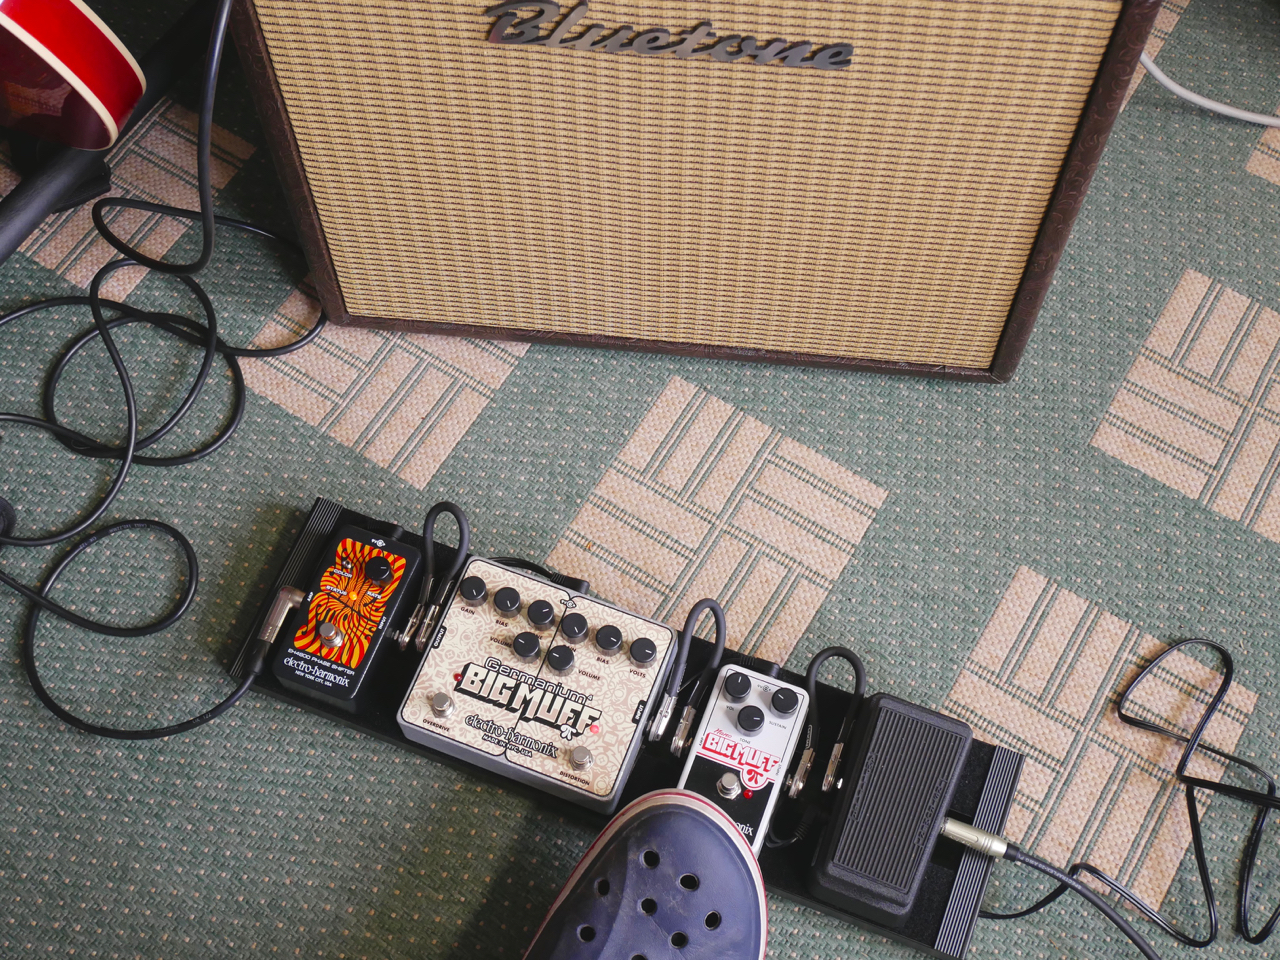
I had been dreaming about a compact board for playing Psychedelic Rock music – a bit ”Hendrix-ey”, but not necessarily totally authentic.
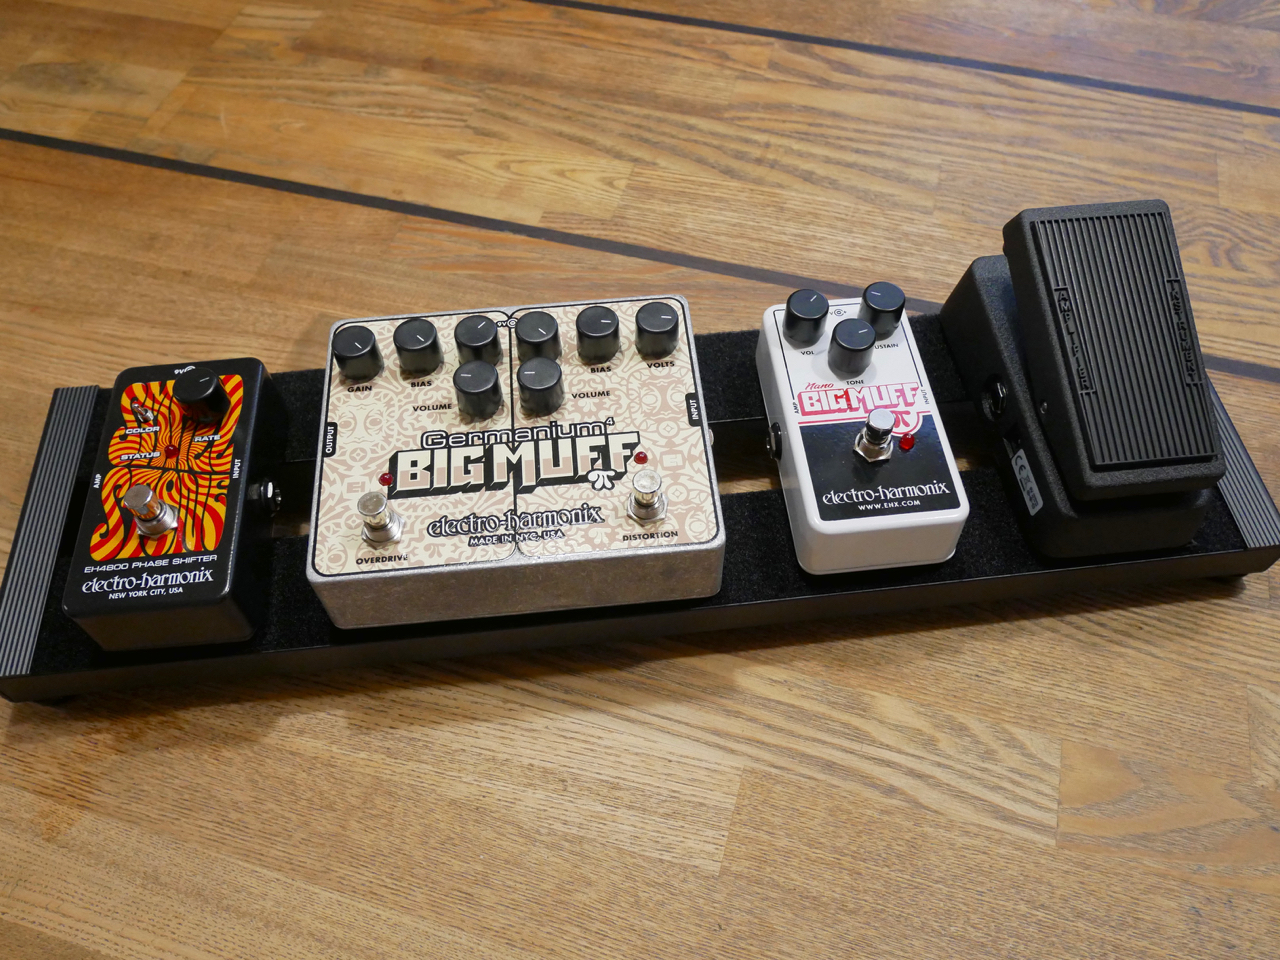
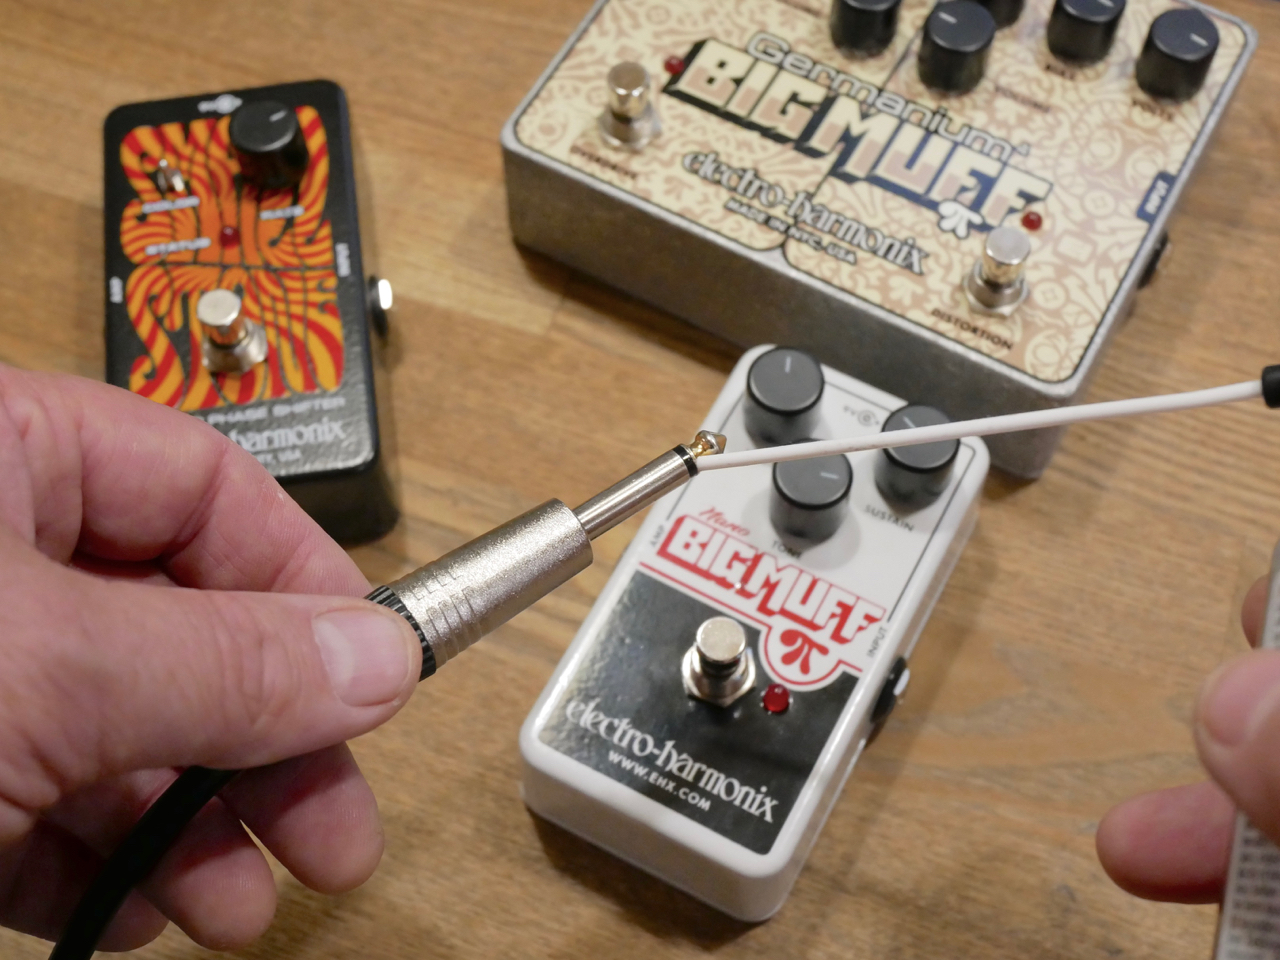
Because my main objective is ”compact” I have chosen a Jim Dunlop CBM95 Mini Crybaby-wah-wah for this project, as it is small enough to fit almost any ’board. Next up there are three blocks of different gain effects – a fuzz-style Electro-Harmonix Nano Big Muff Pi, as well as an EHX double-pedal – the Germanium 4 Big Muff Pi – to provide slightly wonky overdrive and distortion effects. The last pedal is a vintage-style phaser – the EHX Small Stone Nano. Tremolo, reverb and additional boosting are provided by my combo amp.
Patch cables
You should buy the best patch cables you can afford, because a poor quality cable will degrade your sound noticeably by ”eating away” your signal’s dynamic and treble content (especially with traditional passive pickups). There are many different models of ready-made patch cables available.
The number of patch cables you’ll need is dependent on the number of effect pedals you’re going to use. The individual length of each patch cable is determined by the physical placement of the pedals on the ’board. You should also remember to make sure that the plug design on a patch will fit in the space between two pedals. Choosing a relatively fat cable with large-bodied plugs will automatically mean that your pedals will have to be placed a little bit further apart.
Many professional pedalboard makers use bespoke patch cables for their clients’ pedalboards, using top-grade thin cable material coupled with special (no-solder) screw-on plugs. These patch cables save a lot of real estate on the ’board, while also being thin enough to be secured with the same security clips used for the ’board’s DC-power cables.
The physical placement of pedals and patch cables
My compact pedalboard will need no complicated wiring. I will place the effects in the physical order in which they appear in the signal chain in one simple row. This makes it very easy to use pre-made, off-the-shelf patch cables, because the signal continues straight on from one effect to the next.
In larger and more complex cases it may be more convenient to place the pedals that are used most in the bottom row of a ’board, with lesser-used effects placed farther away in the second row. On such ’boards the signal flow can be decidedly different from the physical order of the pedals. In such cases you should prepare a signal flow chart for yourself, so you can easily look up how you have planned to hook up all of the effects. Placing the pedals in their approximate place on the ’board frame will make it easy to measure the lengths of all the patch cables needed.
Choosing your pedalboard frame
To find the best pedalboard frame for your project you have to measure the outer dimensions (width and height) of your effect array, but you shouldn’t forget to take into account how you plan to install your pedals on your board. Most ’board frames these days are made from metal, and the pedals are installed with adhesive hook-and-loop fastener tapes – either generic velcro (sold with most frames) or industry-grade 3M Dual Lock-tape (bought separately).
There are also a few companies who use their own types of screw-on bottom plates or side clamps on their board frames.
Choosing a power supply aka PSU
You have to choose your PSU according to the physical space of your ’board frame, as well as according to the power needs of your effect pedals. There is a plethora of different PSUs available on the market these days; some pedalboard brands also offer frames with pre-installed power supply units.
Do check the power requirements of each of the pedals that will go on your pedalboard. You should check for voltage (9, 12 or 18 V), for milliamperes, and for the type and polarity of the connector plug. Note that there are a few pedals out there that will require alternating current (AC) in contrast to most effects that run on DC! Pro-grade PSUs come with a whole set of different pedal power cables. Make sure that the set includes all the cables (and connectors) you require. If not you will have to buy the additional cables you need.
Because a pedalboard runs audio effects the power supplied by the PSU has to be ”clean”, e. g. free from extraneous noise, buzz and hum. Most traditional pedalboard PSUs provide this type of isolated power with the help of a whole row of tiny transformers. The transformers make sure no mains hum gets into the pedals’ power cables, while also isolating each of the outputs individually.
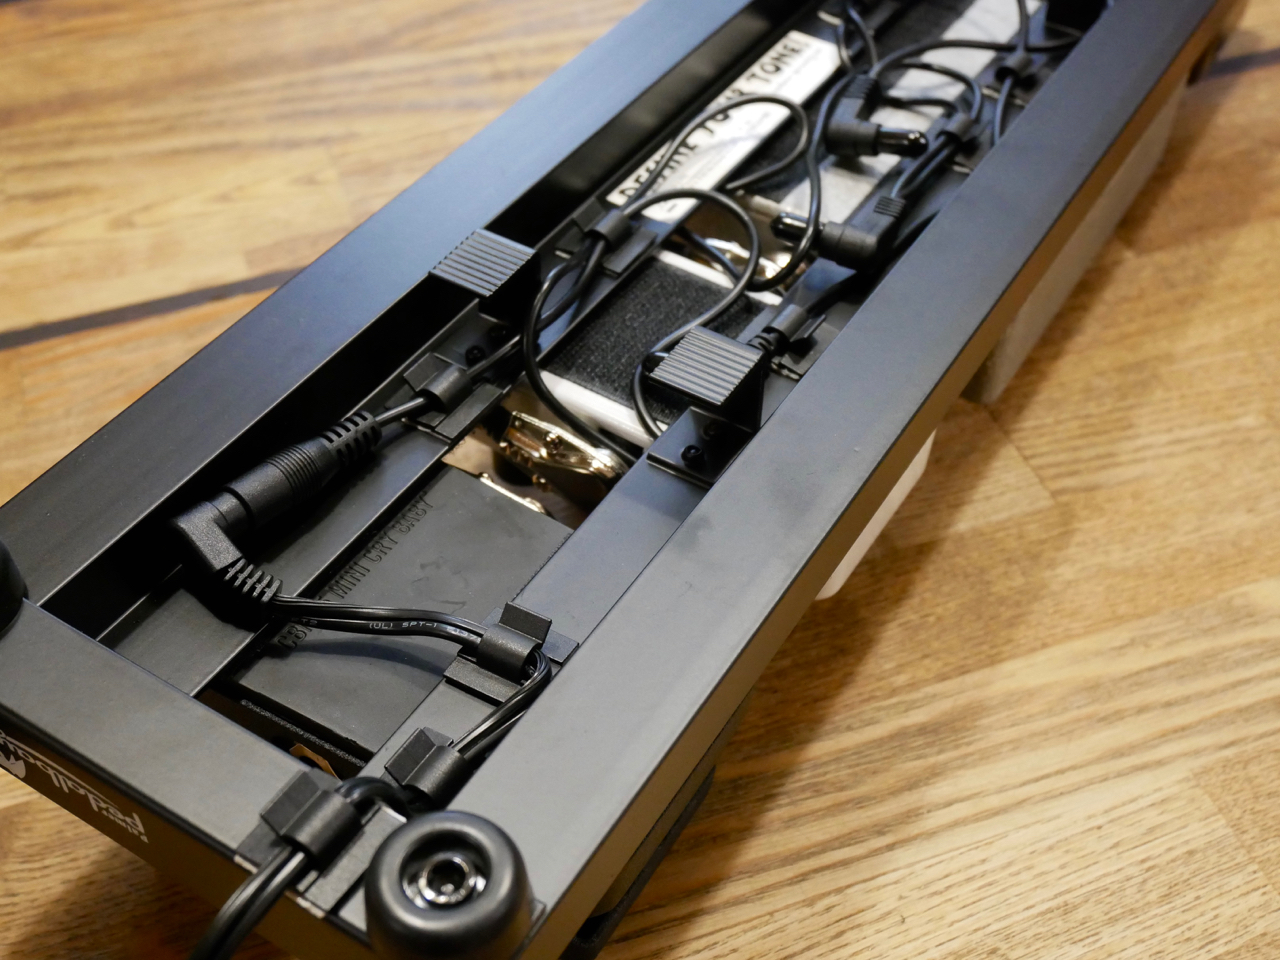
Because I have chosen the very compact and flat Palmer Pedalbay 50S frame, most professional PSUs cannot be mounted underneath the pedalboard in my case. Luckily, a 1Spot ”wall-wart” can be a viable option, if you forsake the additional safety and dependability of a ’board-mounted PSU. I’m not planning on touring with this pedalboard, and all the transporting will be done either by car or public transport, meaning the long cable between the transformer and the daisy chain cable will not be a problem for me. Additionally, I’m not running more than four pedals concurrently, and there’s no power-hungry digital multieffect in the group, so a simple daisy-chain set-up will work here.
Building my pedalboard
Here’s where it starts
Here’s what everything looks like at the beginning. I forgot to put the scissors in the picture, used to cut the velcro to size. Additionally, I made a last-minute switch to black cable ties, because they looked better, after all.
Cleaning all connectors
Should one of your chosen pedals be faulty, you should have it repaired before it goes on the pedalboard. One faulty pedal will have a very detrimental effect on the whole signal chain and the reliability of your new ’board.
You should clean all audio jacks before you assemble your ’board by squirting a little bit of switch cleaner (like PRF 7-78 Kontakt) on a 1/4″ plug, and then inserting and unplugging the plug several times from the jack. Repeat for each audio input and output.
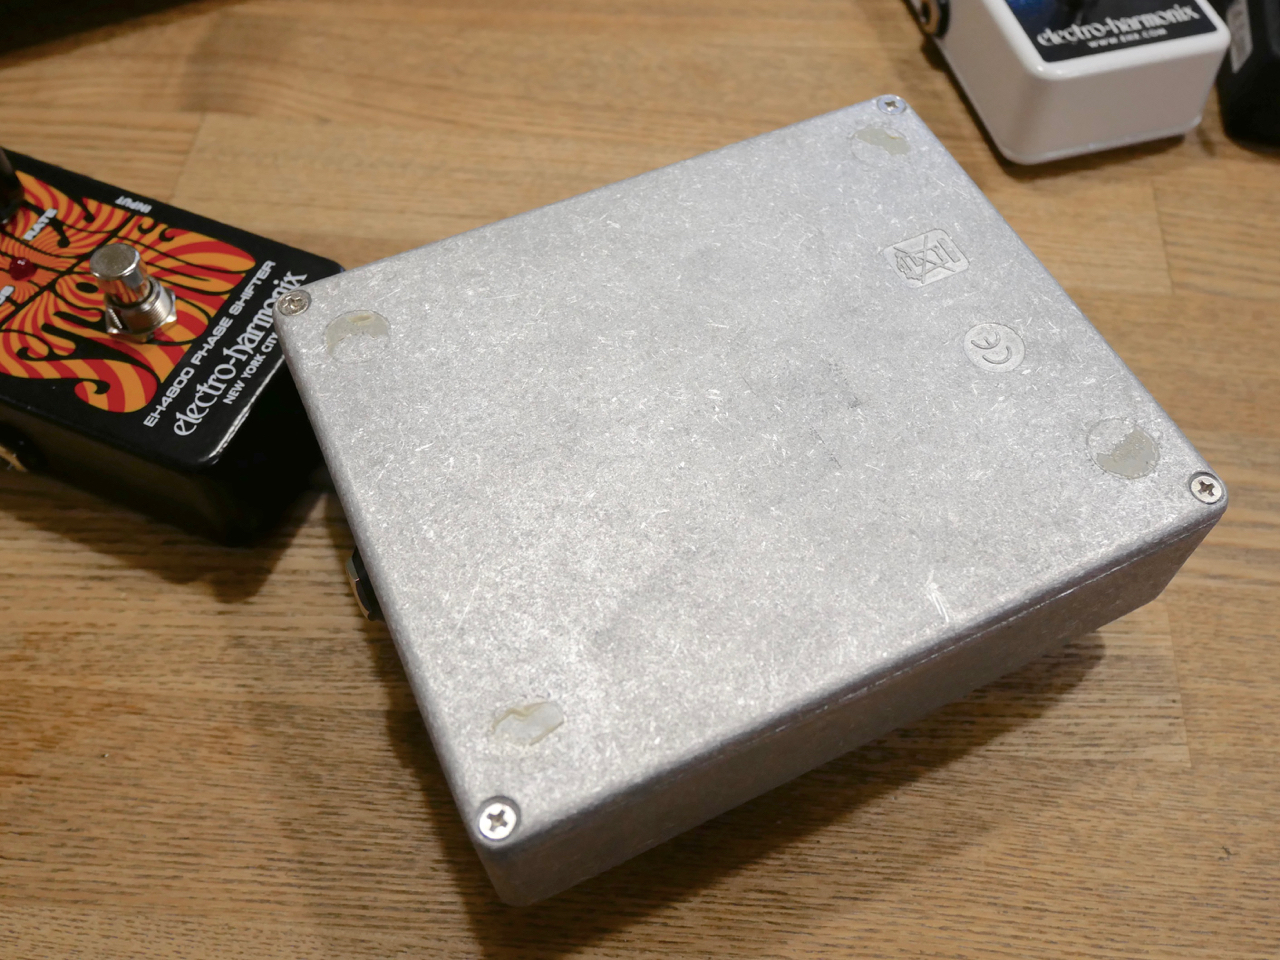
Cleaning all bottom plates
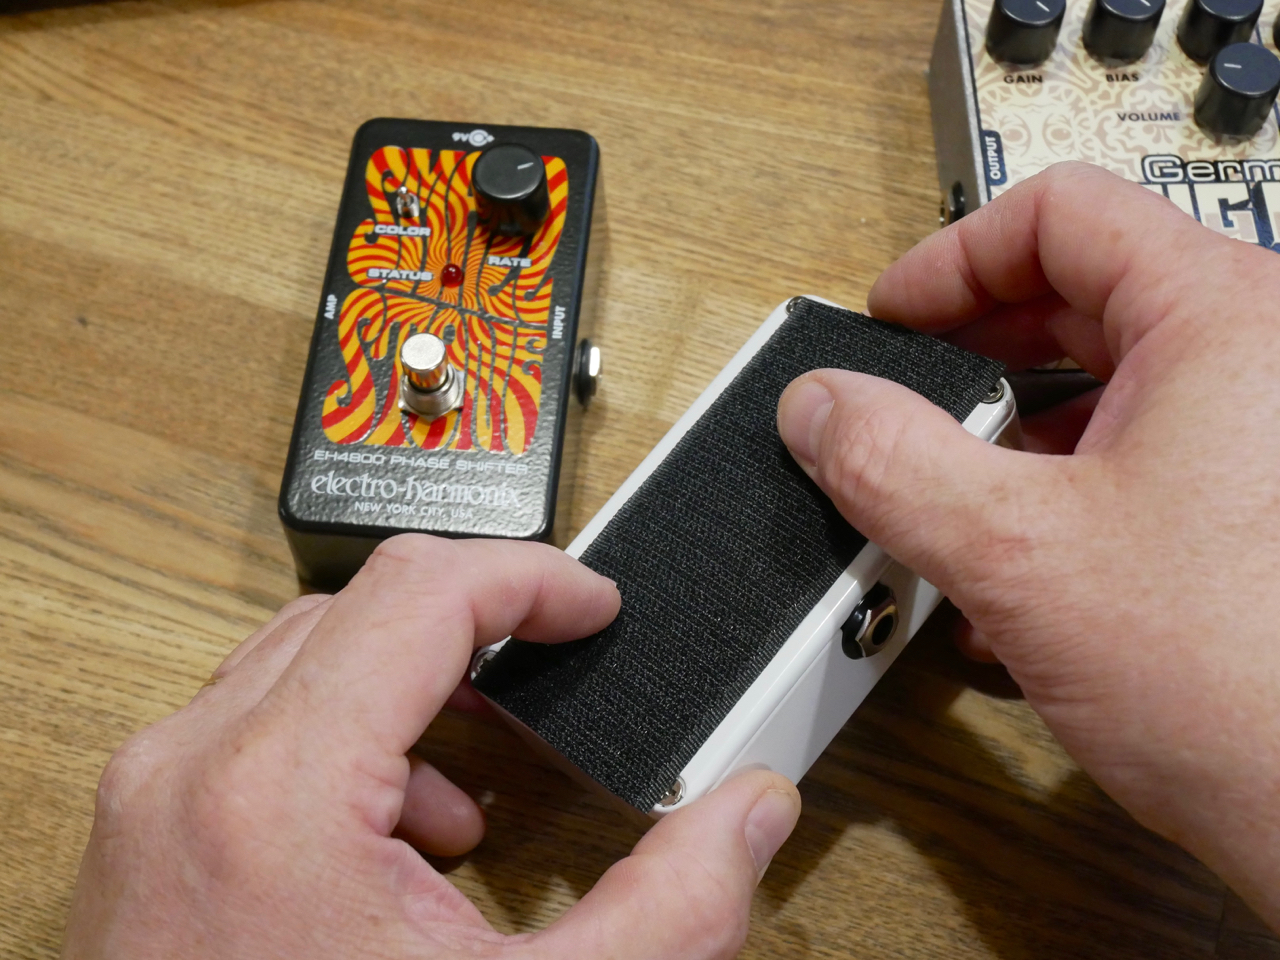
Before you can use any adhesive material on a pedal’s base plate, you will have to take off all rubber feet from the pedal. Velcro and 3M Dual Lock need a smooth and clean surface for them to stick reliably to a pedal’s bottom plate. Sometimes using an additional cleaning agent (like PRF Label Off) can help to get rid of any old glue residue.
On my Electro-Harmonix effects my work is made easier by the separate little rubber feet this company uses. Most Boss and Ibanez pedals, on the other hand, use large rubber or silicone mats, which are much harder to get to grips with. I’d recommend looking for the appropriate removal techniques in the Custom Boards online guide or on Internet forums.
Prevent leakage!
Remove all batteries from the pedals that go on your ’board. The patch cables stay inserted in each pedal’s input jack, which means any battery will be drained in a matter of hours (or a couple of days at the most). Taking the batteries out will prevent damage from leaking batteries in the long run.
Applying the adhesive
Now it’s time for the velcro to go on the base plates of the pedals. Make sure the adhesive tape sits nice and flat with no air bubbles.
The Palmer Pedalbay 50S comes with the loop side adhesive already installed on the frame. Most other models require you to glue the loop side yourself. If I were to use 3M Dual Lock on this ’board, on the other hand, I’d have to remove the pre-installed adhesive first and clean up all glue residue, before putting on the Dual Lock.
Installing the effects and patch cables
As there’s usually only a certain amount of space on a pedalboard, an effect pedal has to be installed on the frame with the patch cable already inserted in the previous effect’s output and this effect’s input. A 1/4″ plug is too long to be inserted after you’ve put all the pedals next to each other.
Installing the DC-cables with security clips
You’ll achieve a very clean and professional look by wiring the power supply cables from the ’board frame’s underside.
Many guitar shops also sell stick-on plastic security clips, which are just the ticket to keep all the DC-cables in place and securely out of harm’s way.
Time to check out your new pedalboard
This is a good time for a trial run of your new pedalboard with a guitar and an amp. Check out if the placement and the distance between the footswitches is convenient for you. Do all effects power on and off as they should? Is the signal going to the amp free from extraneous noise and hum?
In my project everything worked fine, but if you need help troubleshooting your pedal, you should consult Custom Boards’ builder’s guide.
Securing the patch cables
Because I’ve used off-the-shelf MXR patch cables for my project, and the cables had a relatively large diameter and flat, but wide, plug bodies, securing the patch cables with small plastic clips wasn’t really feasible. This is why I’ve chosen cable ties.
The idea is to keep the patch cables out of harm’s way – or should that be foot’s way – so that it’s impossible to step on them. You apply only a minimal amount of pull on the cable ties. You only want to keep the patch cables from moving around, you don’t want to damage the cables’ outer insulating layer.
Many DIY patch cables are thin enough to be secured with the same type of stick-on security clips used for the DC-cables.
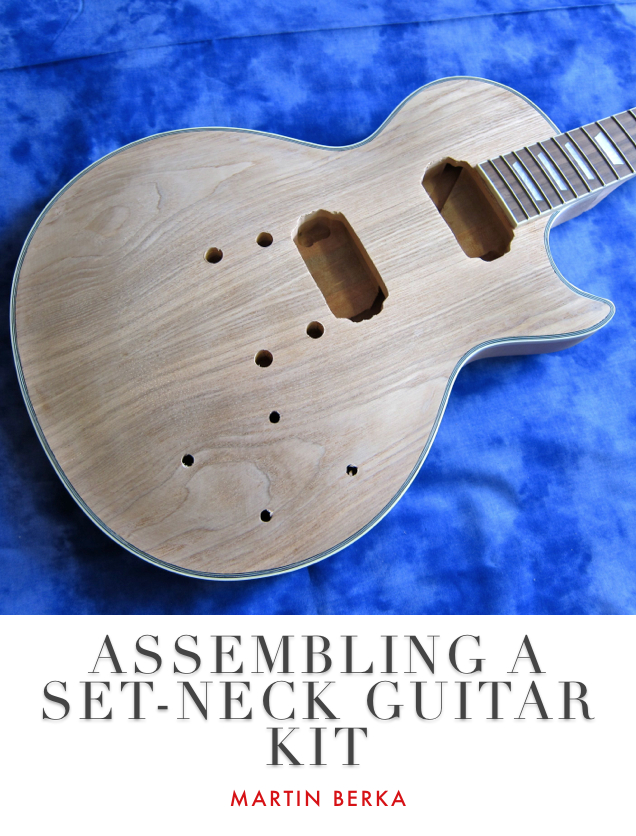
The brand-new eBook from ”Mr Kitarablogi” – Martin Berka – takes you through the process of assembling a guitar kit from the viewpoint of a novice.
”Assembling a Set-Neck Guitar Kit” is not meant as an all-encompassing encyclopedia of guitar-building knowledge, but rather as a description of how this affordable kit was transformed from a heap of components into a working electric guitar.
This is a review of an electric guitar kit I have assembled myself:
I had ordered an LP-style kit from ML-Factory in Germany (the price is around 200 €, depending on the chosen model).
One of the most critical and tricky operations has already been executed in this kit – it comes with the mahogany neck already glued into the body.
If you stick to an easy-to-apply oil and wax finish, the assembly of a kit such as this is a nice project for one day (or, maybe better, one weekend). The only slightly more advanced step left to you would then be sinking the back plates into the routings in the body’s back.
I had decided to apply an Osmo Color wood wax finish to the kit, which, naturally, added a few days more to the process, due to wood preparation, masking, and drying times.
Interestingly, I found it harder to apply a consistent finish to the top’s ash veneer, compared to the mahogany used for both body and neck. The wax colour was harder to get even and flat, and much more red seeped beneath the masking tape onto the multi-ply binding.
On the back and the neck working with Osmo Color was much more fun, easier, and quicker in drying. The end result is a nice tomato soupish red hue, with the finish feeling quite organic – a bit like Gibson’s Faded-series.
In my opinion the bound headstock on this ML-Factory kit is rather pretty, even though there are a couple of discoloured spots on the mahogany veneer (glue, perhaps?). I left the headstock face au naturel, using oil and wax.
The eagle-eyed may notice that the headstock isn’t 100-percent straight, which is why the tuners on the left are not quite on the same height as the ones on the right side. Luckily, this is merely a small cosmetic issue, which doesn’t affect the finished guitar’s functionality and playability in the slightest.
The kit’s sealed tuners work well.
The fingerboard oil I applied brings out the beauty of the rosewood.
ML-Factory’s LP-style kit has a body that is a tad flatter (by about 3 mm) compared to a real Gibson Les Paul. You notice the difference only when you measure the guitar, especially as my kit guitar has a similarly substantial weight as many Gibson originals.
The bridge and tailpiece are of similar quality as those used on many affordable-to-mid-priced guitars. The Tune-o-Matic-copy here is even a modern version, which doesn’t need the annoyingly rattling retaining wire found on so many other bridges of this type.
The humbuckers supplied with this kit are wax potted to reduce their susceptibility to feedback howling. We found straight-bottomed bezels for this arched top guitar – perhaps not the most stylish and sturdy choice…
The toggle switch came supplied with both the classic knurled thumb wheel (which needs a specialist tool for tightening), as well as a standard nut. I used the nut, because the switch’s thread was rather tight and the switch couldn’t be mounted without resorting to a spanner.
The kit’s controls work well.
Here’s the view from a player’s perspective.
****
Let’s get this message out of the way first: No – you cannot get quality akin to a 3.000 € custom shop guitar from a 200 € DIY-kit! The quality of the wood used, as well as the workmanship and the supplied parts (at least, judging from my guitar) are simply of a much more modest standard.
But: If you’re good at woodworking and fret dressing, and if you have some experience in applying sprayed-on lacquer finishes, you can easily get a kit such as this up to the standard of a 600–800 € instrument. And once you get these things sorted, there’s no reason why you shouldn’t be able to customise a kit guitar even further.
****
I would have liked to have seen cleaner woodwork on this Far-Eastern kit. The router bits and drills used on my kit left the cavities and holes rather messy. Nothing that would have stood in the way of completing the instrument, but not really pretty workmanship either.
I probably will give the frets a little more care later, as they feel a little rough beneath the strings right out of the box. I also had to file the 10th fret down carefully by a fraction of a millimetre beneath the high e-string, as the fret was a little high in this spot, causing sitar-like rattling. Certainly nothing a complete rookie would be able to diagnose or rectify easily.
I might also exchange the top nut some time in the future. There isn’t anything really wrong about the supplied nut; it’s only that I am a rather forceful player, and this nut is cut a whiff too low for my playing style, meaning I get rattling open strings (E, A and D) every once in a while.
The not quite flat finish, as well as the colour smeared onto the bindings are all my own doing, and down to my inexperience in all matters dealing with paints and lacquers.
****
But in the greater scheme of things, and keeping in mind the extremely affordable price of thiskit, there’s really a lot to like about the ML-Factory LP-style guitar kit.
Assembling this guitar was a pleasant experience, and I now have one more working guitar in my arsenal.
The truss rod works well, same goes for the tuners and the bridge. As supplied, the fretwork isn’t top notch, but I had no problems in setting up this kit to my favoured action (low E: 2.4 mm/high e 2.0 mm) using a 10–52 gauge set of strings.
The guitar was easy to intonate and it plays in tune across the whole fretboard.
The neck profile on my guitar is a straight copy off of Gibson’s 60s-neck – a very comfortable, medium-thickness ”D”.
Acoustically, the ML-Factory guitar is in the right ballpark for an LP-type guitar, displaying a fresh, but round-nosed attack, a warm overall character, and bags of sustain.
The pickups supplied with the ML-Factory-kit are surprisingly good. Naturally, nobody should expect Harry Häussel-, Jason Lollar- or Seymour Duncan Antiquity -type clarity, tone and panache – remember: This kit costs less than many high-end pickups.
The pickups on my guitar have a slightly higher-than-vintage output, but still enough clarity and character for my taste. In light of the low price of this kit, the pickups aren’t bad at all.
I’ve recorded three soundbites for you. Each example starts with the three-way toggle set to the neck pickup:
Tämä oli siis alkutilanne: ML-Factorylta Saksasta tilattu sähkökitaran rakennussarja (hinta noin 200 €, tarkasta mallista riippuen).
Yksi vaikeimmista ja tärkeimmista työvaiheista on tässä setissä jo suoritettu etukäteen – mahonkikaula oli valmiiksi liimattu runkoon.
Jos käytetään viimeistelyyn ainoastaan oljyä ja vahaa, kitaran kasaaminen on yhden päivän (tai viikonlopun) projekti. Ainoa vaativampi toimenpide on silloin kahden muovikansien upottaminen runkoon.
Itse halusin nimenomaan kokeilla maalin-kaltaista Osmo Color -öljyvahaa tässä projektissa, mikä lisää luonnollisesti työvaiheita, sekä odottelua, kunnes maali on kuiva.
Saarniviilun värjääminen oli tuntuvasti vaikeampi kuin mahonkikaulan ja -rungon viimeistely. Kannelle oli vaikeampi saada tasaista maalipintaa, kuivuminen kesti kauemmin, ja sain reunalistoitukselle melkoisen määrän punaisia jälkiä teippauksesta huolimatta.
Kitaran takapuolen viimeistely oli sujuvampi saada aikaiseksi Osmo Colorilla. Lopputulos on hauskan värinen – muistuttaa jotenkin tomaattisoppaa – ja tuntuu hyvin orgaaniselta, vähän Gibsonin Faded-sarjan tyylisesti.
Mielestäni ML-Factory-kitaran hyvin kompakti, reunalistoitettu viritinlapa on kaunis, vaikka sen mahonkiviilu on pikkusen epäsiisti (liimajälkeä?). Viimeistelin lavan etupuolen öljyllä ja (antiikki-) vahalla.
Tarkkasilmäinen huomaa, että lapapala on liimattu kaulaan hieman vinosti, minkä takia viritinparit eivät ole sataprosenttisesti samoilla linjoilla keskenään. Tämä pieni kosmeettinen haitta ei kuitenkaan vaikuta kitaran toimintaan lainkaan – etenkin kun muistaa rakennussarjan erittäin edullisen hinnan.
Suljetut virittimet toimivat moiteettomasti.
Pieni tilkka öljyä tuo palisanteriotelaudan kauneuden esiin.
ML-Factory LP-tyylisen rakennussarjan runko on hivenen verran (noin 3 mm) ohuempi kuin sen esikuva. Eron huomaa vain mittaamalla, etenkin kuin itsekasatun soittimen paino on samassa keskiraskaassa luokassa kuin moni alkuperäinen Les Paul.
ML-kitaran talla ja kieltenpidin ovat samaa asiallista laatua kuin useissa edullisissa kitaroissa. Tässä Tune-o-Matic-kopiossa ei käytetä muuten sitä vintage-tyylistä jousta tallapalojen alaspitämiseen, mikä on mielestäni plussaa, koska tässä mikään ei surise soitettaessa häiritsevästi mukaan.
Rakennussarjan humbuckerit on edullisesta hinnasta huolimatta vahattu feedback-ulinaa vasten. Mikrofonit istuvat suorissa kehyksissä, joita on ruuvaamalla pakotettu kitaran kaarevan kanteen sopiviksi – ei ehkä tyylikkäin tai kestävin ratkaisu…
Vipukytkimen mukaan tulivat kaksi mutteria – alkuperäistyylinen pikkuhampailla (johon tarvitsee erikoistyökalun) ja tavallinen mutteri. Käytin tavallisen kuusikanttisen mutterin, koska kytkimen kierre jumiutti hieman ja mutterin tiukentamiseen tarvittiin avain.
ML-Factory-kitin pienet potentiometrit toimivat jouhevasti, ja myös muuten elektroniikka toimii kuin pitää.
Tältä kitara näyttää soittajan suunnasta.
****
Ensin se tärkein viesti:
Ei – kahdensadan euron kitaran rakennussarjasta ei saa kolmentuhannen euron custom shop -laatua! Moiseen kitissä käytetyt puut ja osat, sekä (ainakin tässä testitapauksessa) puutyön laatu ei yksinkertaisesti riitä.
Jos osaa puutyöt, nauhahiontaa, oikeanoppista lakkaamista ja lakkapinnan viimeistelyä, tämänkaltaisesta edullisesta rakennussarjasta voi kuitenkin saada kauniin ja toimivan soittopelin, joka painaa jo samassa sarjassa kuin useat 600–800 euron soittimet. Ja kun kerran alusta on toimiva, ei ole syyttä pidättäytyä lisäkustomoinista.
****
Omassa kitarassani olisin toivonnut, että tehtaassa käytettäisin paremmat (terävämmät) työkalut. Runkoon jyrsityt kolot ovat kaikki epäsiistiä – pahimmat olivat aukot mikrofoneille – ja myös poraukset virittimiä varten olisivat nekin voineet olla siistimpiä.
Nauhatyöhön pitää luultavasti vielä vähän satsatta – suoraan paketista nauhat olivat pikkuisen karheat. Kymmenes nauha oli myös aavistuksen verran liian korkea ylä-e-kielen alla, joka surisi vähän sitä vasten. Sain sen varovaisesti viilaamalla korjattua, mutta tällaisen ongelman oikea tunnistaminen vaati jo vähän kokemusta.
Vaihdan ehkä myös joskus myöhemmin uuden satulan tähän kitaraan. Valmiiksi asennettu toimii sinänsä, mutta minulla on taipumus soittaa vähän raskaamalla kädellä, joten satula voisi olla minunkaltaiselle soittajalle hieman korkeampi.
Muut sotkut menevät täysin minun tilille, minun kokemattomuuteni maalausasioissa takia.
****
Plussapuolella täytyy mainita, että minulla on nyt yksi toimiva sähkökitara lisää.
Kaularauta toimii, samoin virittimet ja talla. Vaikka nauhatyö suoraan paketista ei ole aivan täydellinen, sain kitarani säädettyä 10–52-kielisatsilla minun käyttämälle korkeudelle (Matala E: 2,4 mm/korkea e: 2,0 mm).
Kitara soi puhtaasti koko otelaudalla.
Kaulaprofiili on minun kitarassani suora kopio Gibsonin 60s-kaulaprofiilista – mukavan matala, muttei liian ohut.
Akustinen soundi täyttää sopivasti kaikki tyypillisimmät kriteerit LP-tyyliselle kitaralle. Soinnissa on tuorehko, selkeä, muttei piikkikäs atakki, lämmin perusluonne, sekä pitkä sustainvaihe.
ML-Factory-setin mikrofonit ovat asiallista laatua. Tässä ei luonnollisesti voi odottaa Harry Häussel-, Jason Lollar- tai Seymour Duncan Antiquity -tyylistä äärimmäistä tyylikkyyttä ja laatua – kitarasetti kun maksaa vähemmän kuin jotkut yksittäiset mikrofonit.
Rakennussarjan mikrofoneilla on hieman vintagea korkeampi lähtötaso, mutta soinnissa silti riittävästi avoimuutta minun makuuni. Hintaan nähdän laatu ei todellakaan ole hassumpaa.
Tässä kolme esimerkkipätkää, jossa aloitan aina kaulamikrofonilla, jatkan kytkimen keskiasennolla, ja lopetan tallamikrofonilla.