Even though the first guitar effects were already introduced in the mid-1960s, guitar pedals only started to become affordable and widely available in the late-1970s with brands such as Boss. Ibanez and MXR.
****
Why do I need a pedalboard?
Back in the early Seventies most guitarists used one to three effects at the most on stage, if any. Back then the signal chain was straightforward and easy to set up and tear down. There were maybe a couple of guitars, a guitar lead, a couple of effect pedals, a short patch cable, as well as a long cable from the front of the stage to the amplifier.
In the early days most guitarists weren’t even too particular with their live sound. If the guitar sounded a little different from one show to another, who cares? The main objective was to keep the show on the road.
These days both the musician and his/her audience are much more discerning, and want to hear a fairly accurate version of a song’s recorded guitar and bass sounds live as well. Most players are very knowledgeable and specific when it comes to their signature sounds, as well as the pedals they use. A dependable and ”secure” signal chain is a prerequisite for the professional musician of today.
If you carry your effects around in a sports bag, setting up your signal chain – and troubleshooting it in case of problems – is much more time-consuming than pulling a clean pedalboard out of its gig bag (or case) and connecting only a couple of audio cables; one for the guitar and one for the amp.
A pedalboard also protects your effects and patch cables from damage by keeping them firmly in place during transport. Additionally, powering all your effect pedals is much easier using one central power supply for the whole board.
Luckily, the 2020s offer us a wide array of different solutions for the budding ’board builder, making even the assembly of a complex signal chain relatively easy.
If you want to find out all there is to know about pro-grade pedalboard assembly, I can heartily recommend you check out Kimmo Aroluoma’s in-depth online guide.
Kimmo Aroluoma, who is the founder of Custom Boards Finland, has spent years on the road as one of Finland’s most sought-after guitar technicians. Kimmo has worked for acts such as The Rasmus, HIM, or Hanoi Rocks. These days Kimmo spends most of his time running Custom Boards, a company dedicated to making world-class pedalboards, as well as supplying pro-grade components to DIY pedalboard builders.
Is there a ”correct” order for effect groups?
Find out more on the best order for effects placement HERE.
Making music is a creative process, so any type of experimentation is highly encouraged, but if you want to ensure that your ’board will work in the desired way with the least amount of hassle, the above picture will get you there. Of course this effect order works also with effects that are not placed on a pedalboard.
The yellow box is home to such effects that will only work reliably with a pure/dry guitar signal. The orange box contains effects that add gain and texture to your signal. Next up are modulation effects. The green box adds space to your signal, as well as providing a good spot for a master volume pedal. And if you use an audiolooper and/or a booster pedal they should be placed last.
Plan before you act
You should definitely plan your new pedalboard, before you buy anything. Otherwise you can easily end up buying something that isn’t right for what you’re trying to achieve.
Choosing the effect pedals
What is the purpose of the ’board? What type of music do you play? Are you in a Metal band or do you play Top 10 covers?
The fact that there’s an old pedal lying around somewhere in a box isn’t a good enough reason to add this pedal to your new pedalboard. There should be a logical, musical or practical reason behind any addition to your effect chain, because any unnecessary addition could potentially degrade your guitar signal.
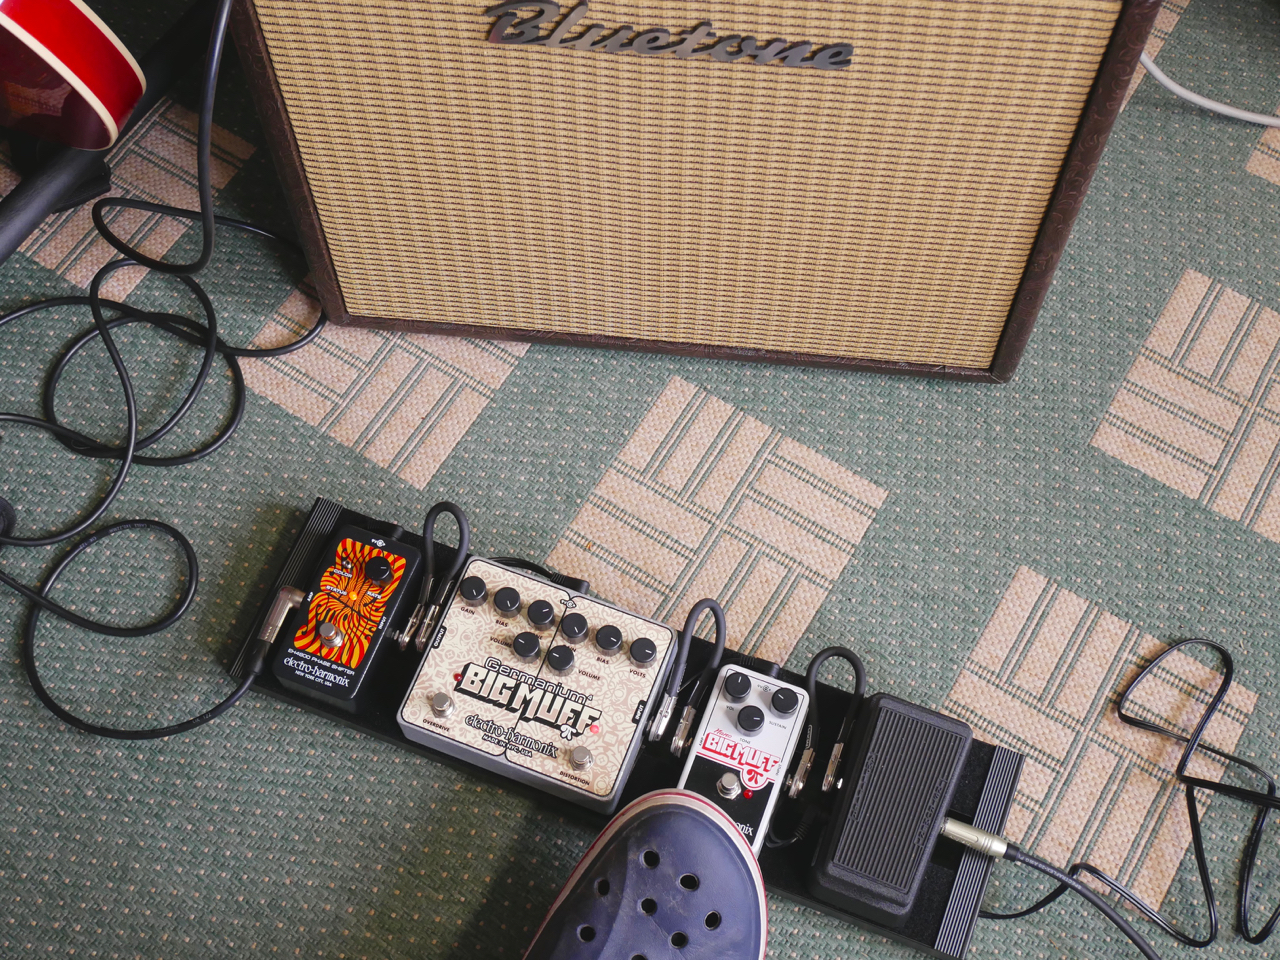
I had been dreaming about a compact board for playing Psychedelic Rock music – a bit ”Hendrix-ey”, but not necessarily totally authentic.
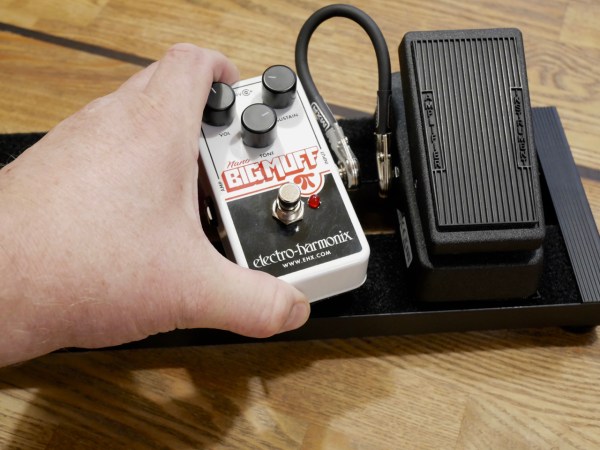
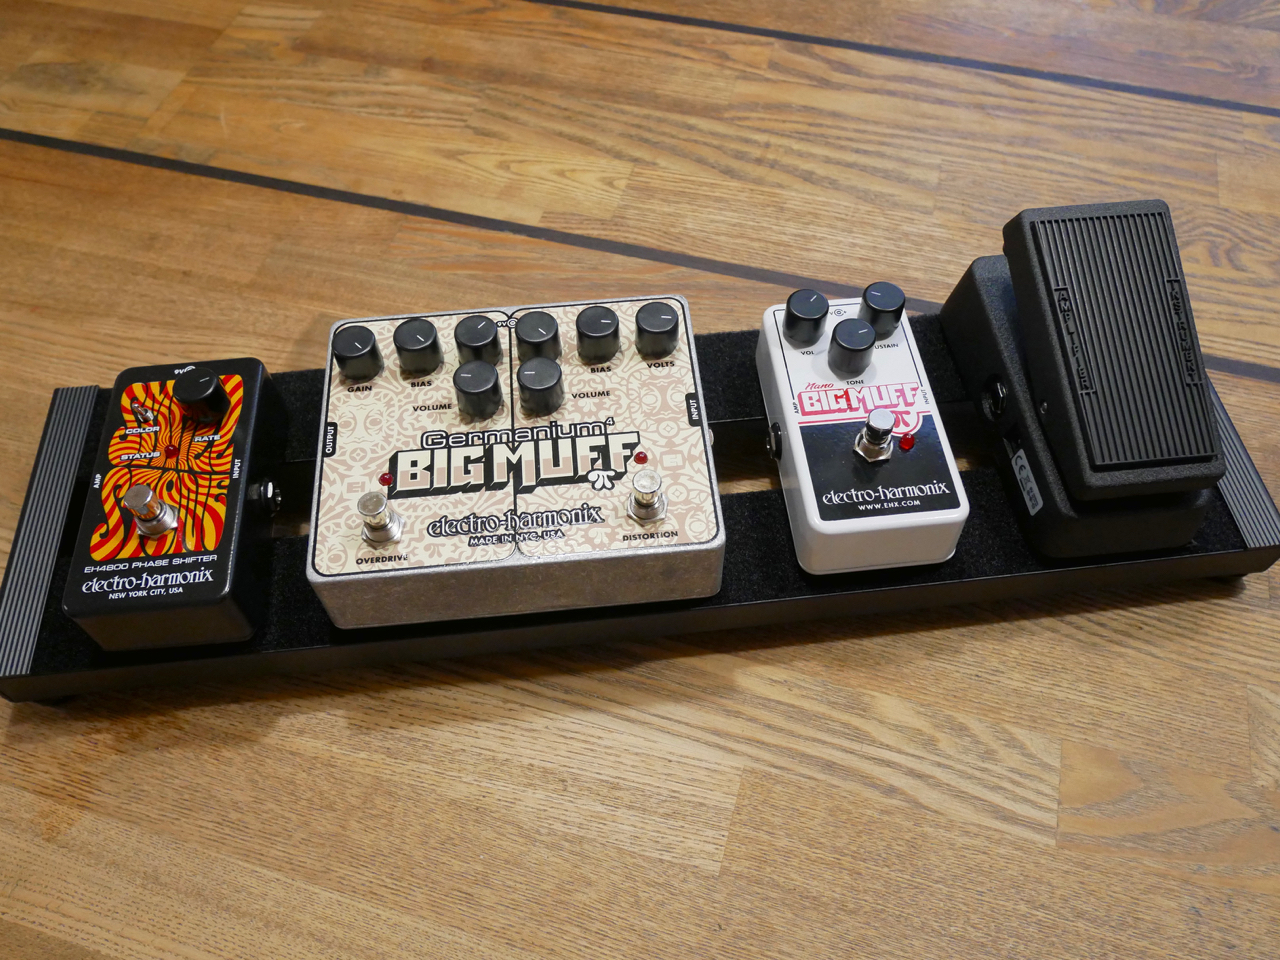
Because my main objective is ”compact” I have chosen a Jim Dunlop CBM95 Mini Crybaby-wah-wah for this project, as it is small enough to fit almost any ’board. Next up there are three blocks of different gain effects – a fuzz-style Electro-Harmonix Nano Big Muff Pi, as well as an EHX double-pedal – the Germanium 4 Big Muff Pi – to provide slightly wonky overdrive and distortion effects. The last pedal is a vintage-style phaser – the EHX Small Stone Nano. Tremolo, reverb and additional boosting are provided by my combo amp.
Patch cables
You should buy the best patch cables you can afford, because a poor quality cable will degrade your sound noticeably by ”eating away” your signal’s dynamic and treble content (especially with traditional passive pickups). There are many different models of ready-made patch cables available.
The number of patch cables you’ll need is dependent on the number of effect pedals you’re going to use. The individual length of each patch cable is determined by the physical placement of the pedals on the ’board. You should also remember to make sure that the plug design on a patch will fit in the space between two pedals. Choosing a relatively fat cable with large-bodied plugs will automatically mean that your pedals will have to be placed a little bit further apart.
Many professional pedalboard makers use bespoke patch cables for their clients’ pedalboards, using top-grade thin cable material coupled with special (no-solder) screw-on plugs. These patch cables save a lot of real estate on the ’board, while also being thin enough to be secured with the same security clips used for the ’board’s DC-power cables.
The physical placement of pedals and patch cables
My compact pedalboard will need no complicated wiring. I will place the effects in the physical order in which they appear in the signal chain in one simple row. This makes it very easy to use pre-made, off-the-shelf patch cables, because the signal continues straight on from one effect to the next.
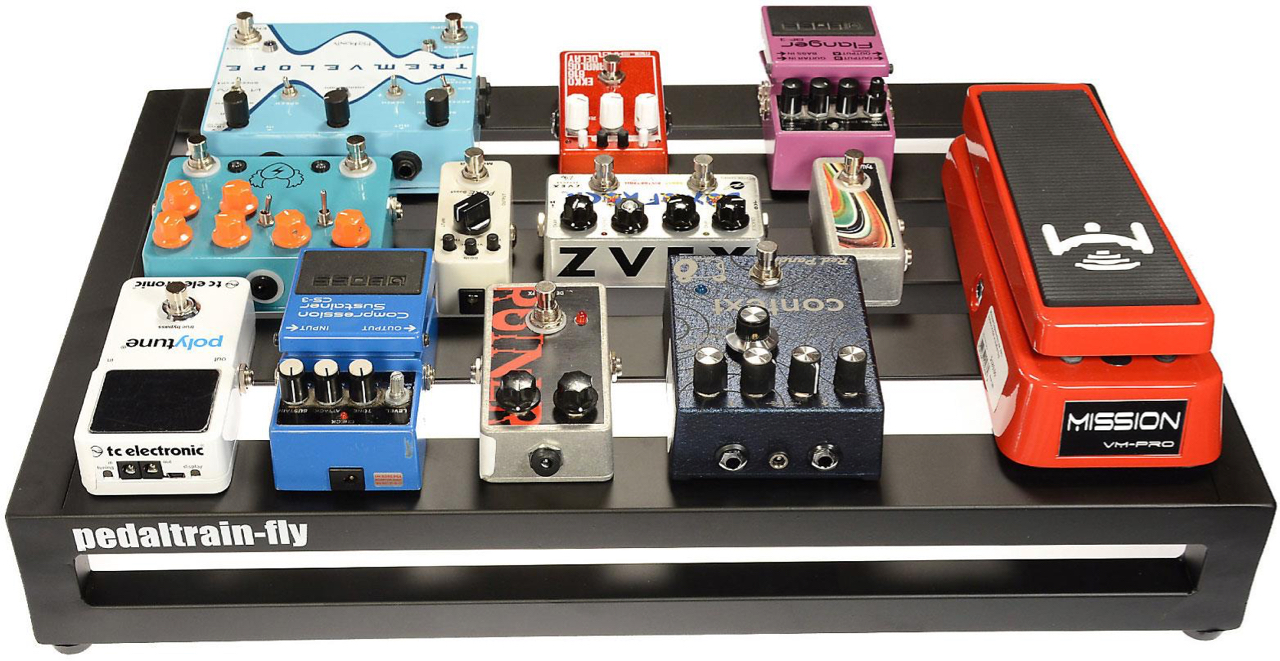
In larger and more complex cases it may be more convenient to place the pedals that are used most in the bottom row of a ’board, with lesser-used effects placed farther away in the second row. On such ’boards the signal flow can be decidedly different from the physical order of the pedals. In such cases you should prepare a signal flow chart for yourself, so you can easily look up how you have planned to hook up all of the effects. Placing the pedals in their approximate place on the ’board frame will make it easy to measure the lengths of all the patch cables needed.
Choosing your pedalboard frame
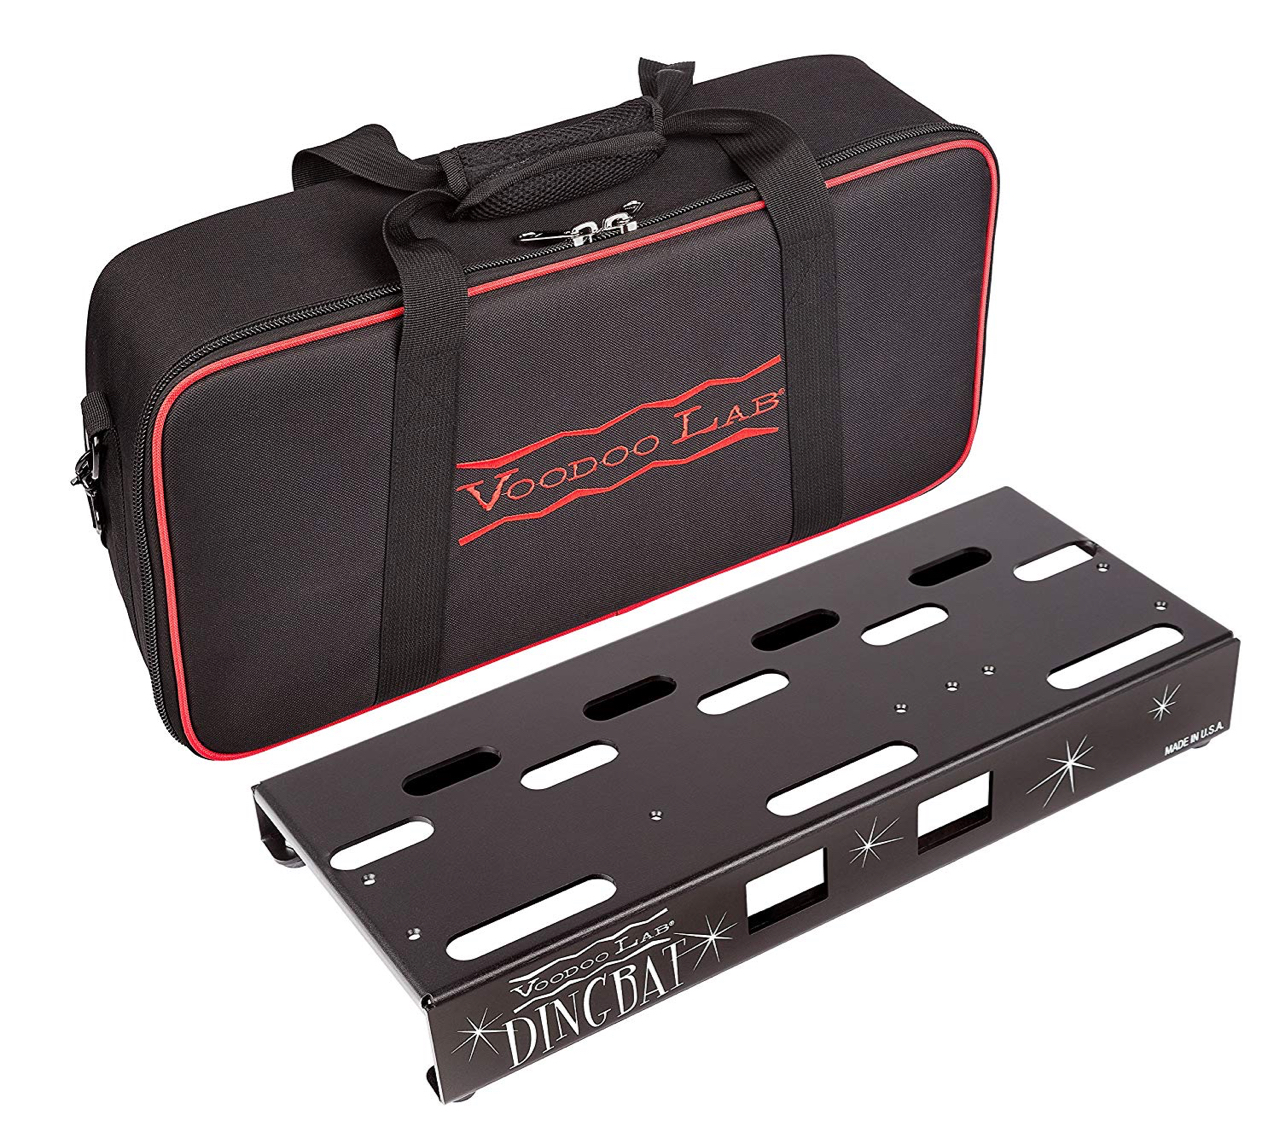
To find the best pedalboard frame for your project you have to measure the outer dimensions (width and height) of your effect array, but you shouldn’t forget to take into account how you plan to install your pedals on your board. Most ’board frames these days are made from metal, and the pedals are installed with adhesive hook-and-loop fastener tapes – either generic velcro (sold with most frames) or industry-grade 3M Dual Lock-tape (bought separately).
There are also a few companies who use their own types of screw-on bottom plates or side clamps on their board frames.
Choosing a power supply aka PSU
You have to choose your PSU according to the physical space of your ’board frame, as well as according to the power needs of your effect pedals. There is a plethora of different PSUs available on the market these days; some pedalboard brands also offer frames with pre-installed power supply units.
Do check the power requirements of each of the pedals that will go on your pedalboard. You should check for voltage (9, 12 or 18 V), for milliamperes, and for the type and polarity of the connector plug. Note that there are a few pedals out there that will require alternating current (AC) in contrast to most effects that run on DC! Pro-grade PSUs come with a whole set of different pedal power cables. Make sure that the set includes all the cables (and connectors) you require. If not you will have to buy the additional cables you need.
Because a pedalboard runs audio effects the power supplied by the PSU has to be ”clean”, e. g. free from extraneous noise, buzz and hum. Most traditional pedalboard PSUs provide this type of isolated power with the help of a whole row of tiny transformers. The transformers make sure no mains hum gets into the pedals’ power cables, while also isolating each of the outputs individually.
Because I have chosen the very compact and flat Palmer Pedalbay 50S frame, most professional PSUs cannot be mounted underneath the pedalboard in my case. Luckily, a 1Spot ”wall-wart” can be a viable option, if you forsake the additional safety and dependability of a ’board-mounted PSU. I’m not planning on touring with this pedalboard, and all the transporting will be done either by car or public transport, meaning the long cable between the transformer and the daisy chain cable will not be a problem for me. Additionally, I’m not running more than four pedals concurrently, and there’s no power-hungry digital multieffect in the group, so a simple daisy-chain set-up will work here.
Building my pedalboard
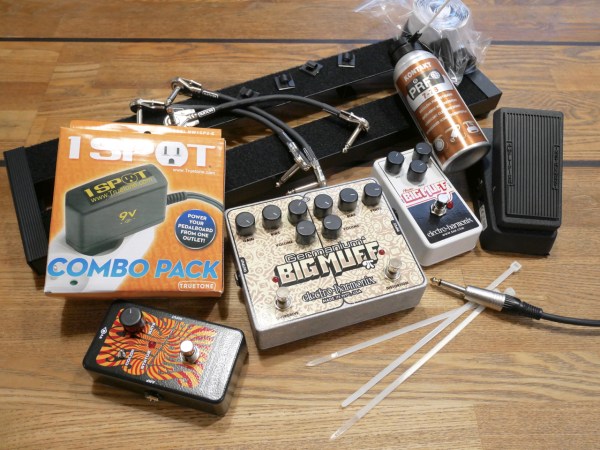
Here’s where it starts
Here’s what everything looks like at the beginning. I forgot to put the scissors in the picture, used to cut the velcro to size. Additionally, I made a last-minute switch to black cable ties, because they looked better, after all.
Cleaning all connectors
Should one of your chosen pedals be faulty, you should have it repaired before it goes on the pedalboard. One faulty pedal will have a very detrimental effect on the whole signal chain and the reliability of your new ’board.
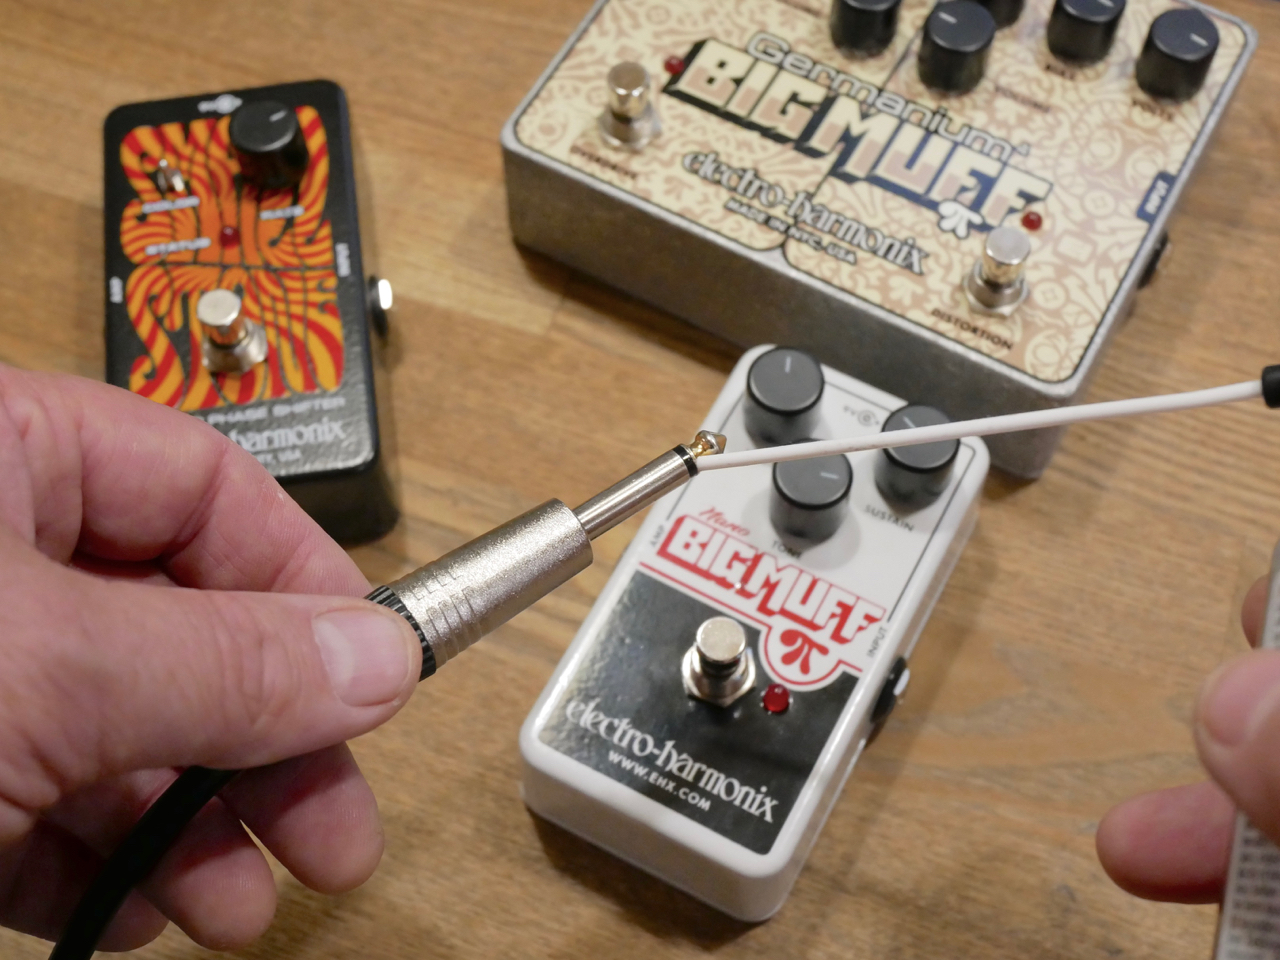
You should clean all audio jacks before you assemble your ’board by squirting a little bit of switch cleaner (like PRF 7-78 Kontakt) on a 1/4″ plug, and then inserting and unplugging the plug several times from the jack. Repeat for each audio input and output.
Cleaning all bottom plates
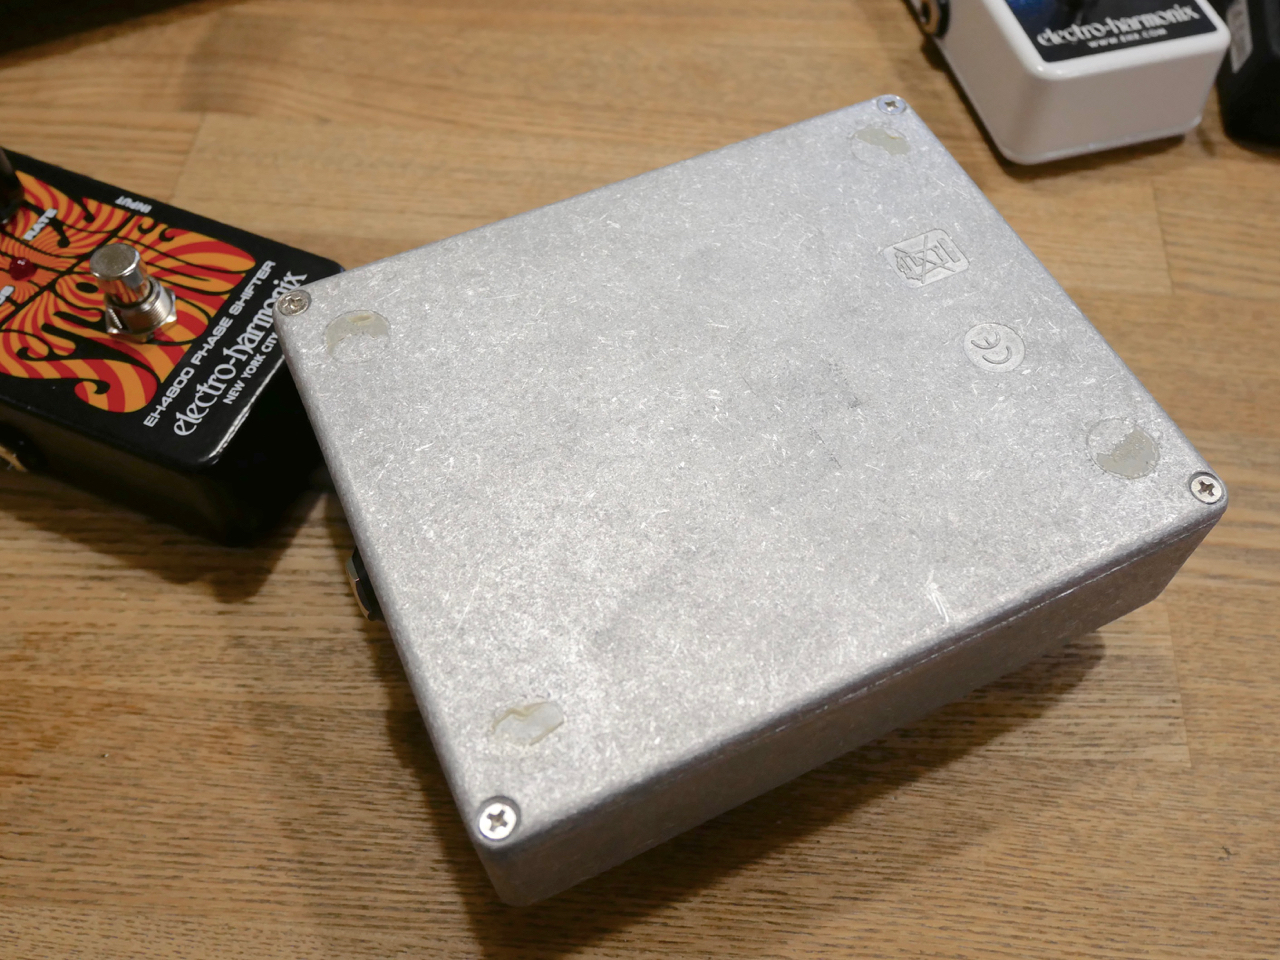
Before you can use any adhesive material on a pedal’s base plate, you will have to take off all rubber feet from the pedal. Velcro and 3M Dual Lock need a smooth and clean surface for them to stick reliably to a pedal’s bottom plate. Sometimes using an additional cleaning agent (like PRF Label Off) can help to get rid of any old glue residue.
On my Electro-Harmonix effects my work is made easier by the separate little rubber feet this company uses. Most Boss and Ibanez pedals, on the other hand, use large rubber or silicone mats, which are much harder to get to grips with. I’d recommend looking for the appropriate removal techniques in the Custom Boards online guide or on Internet forums.
Prevent leakage!
Remove all batteries from the pedals that go on your ’board. The patch cables stay inserted in each pedal’s input jack, which means any battery will be drained in a matter of hours (or a couple of days at the most). Taking the batteries out will prevent damage from leaking batteries in the long run.
Applying the adhesive
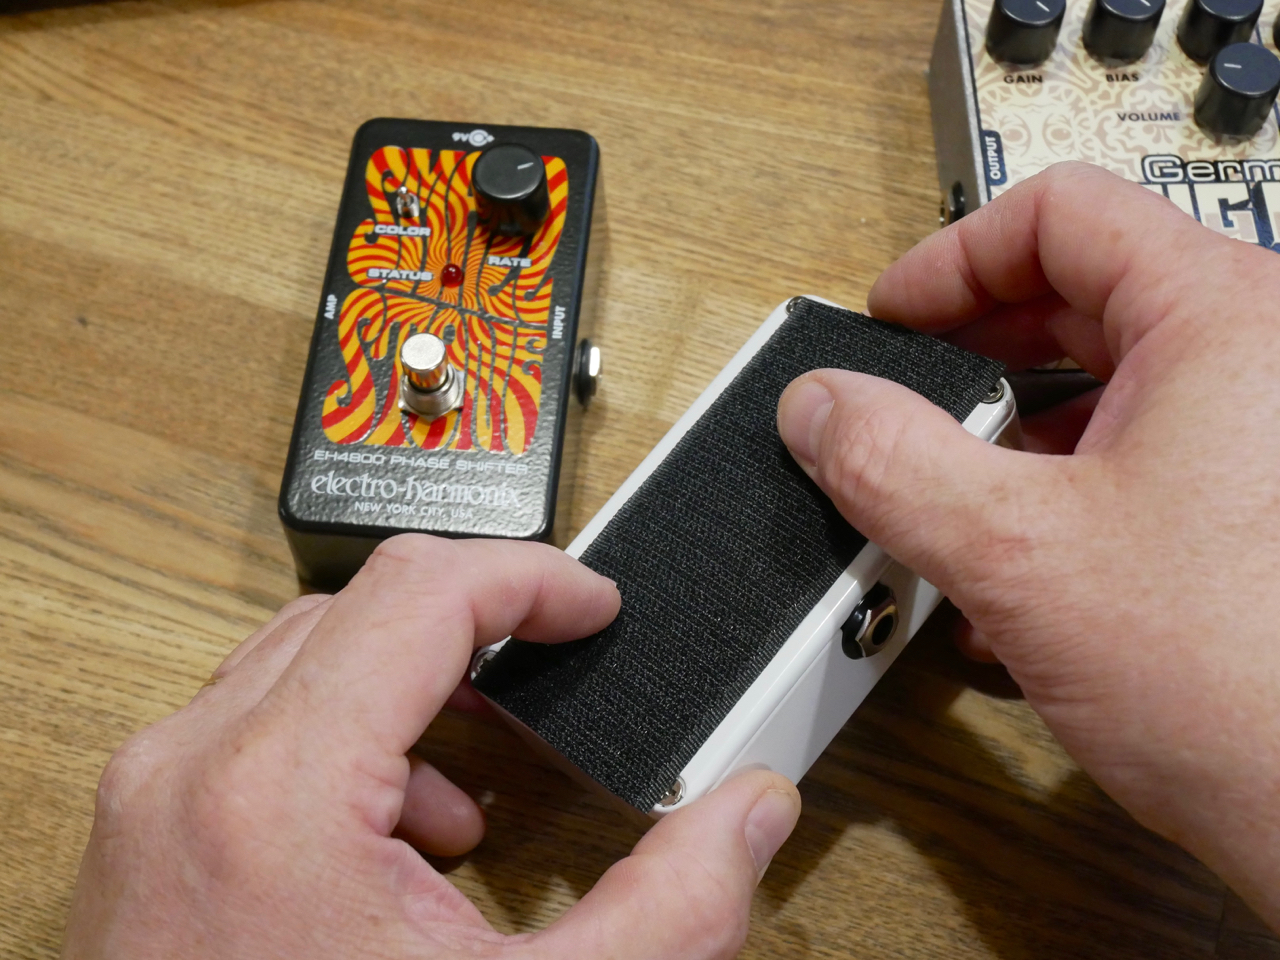
Now it’s time for the velcro to go on the base plates of the pedals. Make sure the adhesive tape sits nice and flat with no air bubbles.
The Palmer Pedalbay 50S comes with the loop side adhesive already installed on the frame. Most other models require you to glue the loop side yourself. If I were to use 3M Dual Lock on this ’board, on the other hand, I’d have to remove the pre-installed adhesive first and clean up all glue residue, before putting on the Dual Lock.
Installing the effects and patch cables
As there’s usually only a certain amount of space on a pedalboard, an effect pedal has to be installed on the frame with the patch cable already inserted in the previous effect’s output and this effect’s input. A 1/4″ plug is too long to be inserted after you’ve put all the pedals next to each other.
Installing the DC-cables with security clips
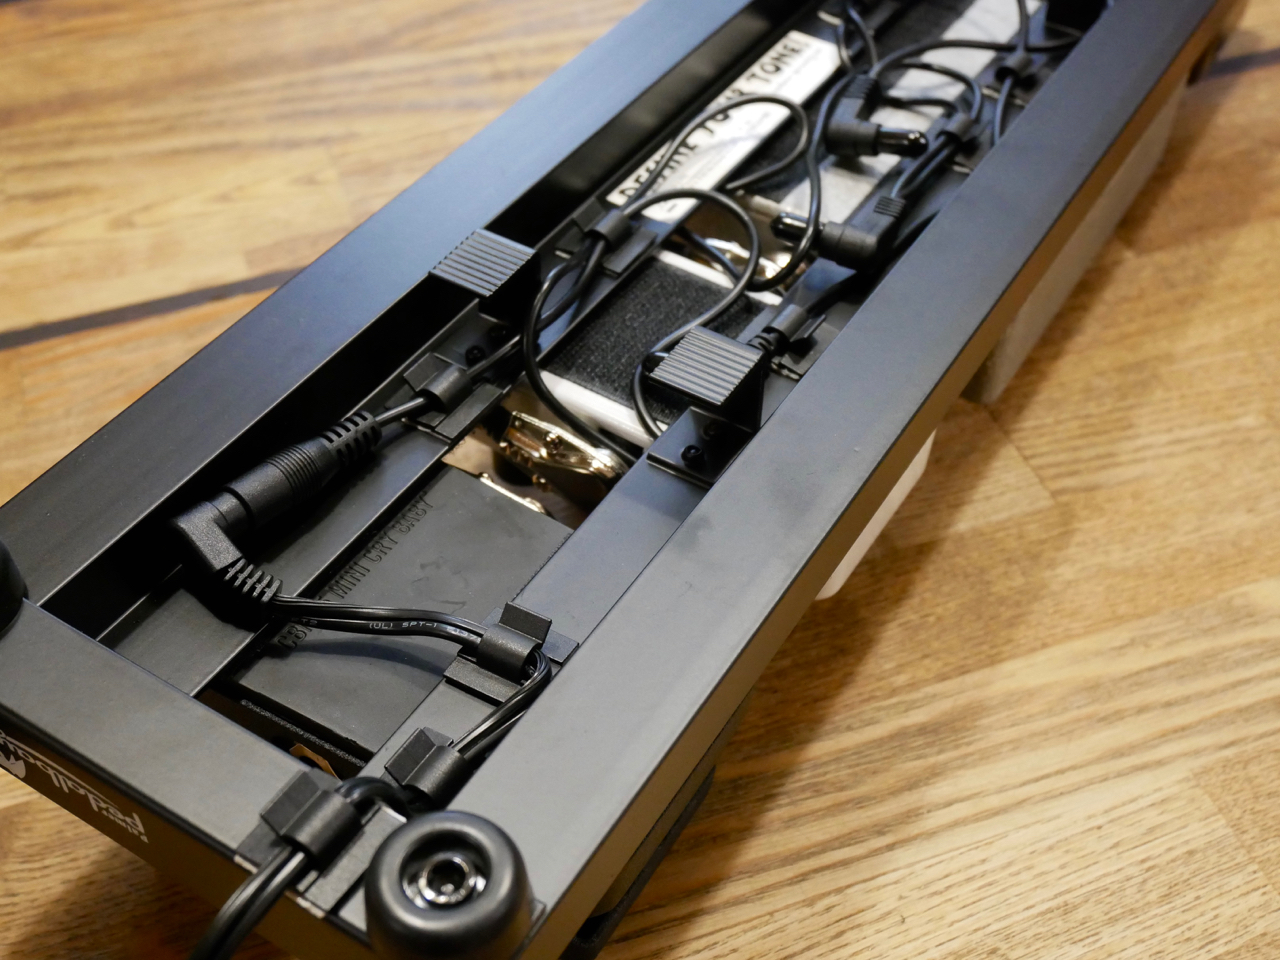
You’ll achieve a very clean and professional look by wiring the power supply cables from the ’board frame’s underside.
Many guitar shops also sell stick-on plastic security clips, which are just the ticket to keep all the DC-cables in place and securely out of harm’s way.
Time to check out your new pedalboard
This is a good time for a trial run of your new pedalboard with a guitar and an amp. Check out if the placement and the distance between the footswitches is convenient for you. Do all effects power on and off as they should? Is the signal going to the amp free from extraneous noise and hum?
In my project everything worked fine, but if you need help troubleshooting your pedal, you should consult Custom Boards’ builder’s guide.
Securing the patch cables
Because I’ve used off-the-shelf MXR patch cables for my project, and the cables had a relatively large diameter and flat, but wide, plug bodies, securing the patch cables with small plastic clips wasn’t really feasible. This is why I’ve chosen cable ties.
The idea is to keep the patch cables out of harm’s way – or should that be foot’s way – so that it’s impossible to step on them. You apply only a minimal amount of pull on the cable ties. You only want to keep the patch cables from moving around, you don’t want to damage the cables’ outer insulating layer.
Many DIY patch cables are thin enough to be secured with the same type of stick-on security clips used for the DC-cables.
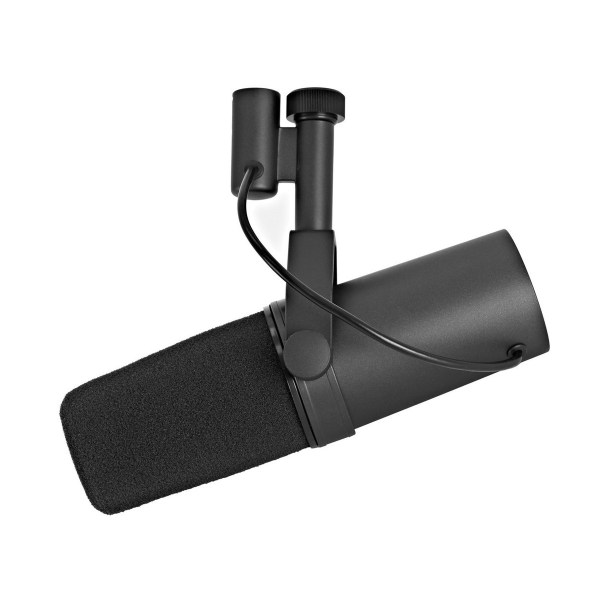
The following tracks were recorded with the Shure SM7B: • Squier Bronco Bass through a Bluetone Bass 200 tube hybrid combo • Two Fender Stratocaster rhythm guitar tracks with an EHX Nano Small Stone phaser through a Bluetone Black Prince Reverb all-valve combo • Fender Telecaster rhythm guitar through a Bluetone Black Prince all-valve combo • Fender Telecaster lead guitar with a Mad Professor Simble Overdrive through a Bluetone Black Prince all-valve combo • A shaker • A Sonor tambourine • Male voice ****
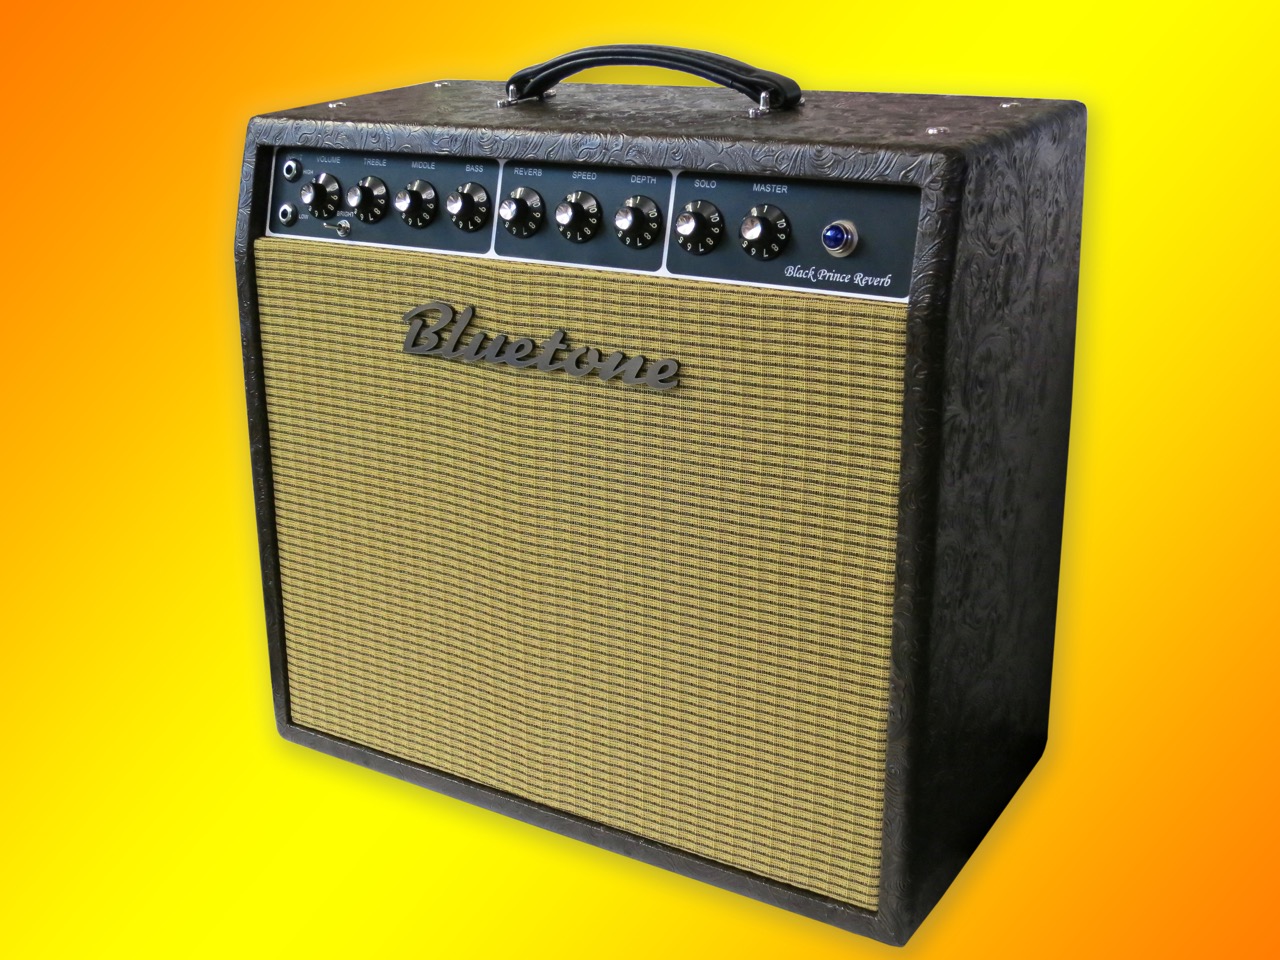
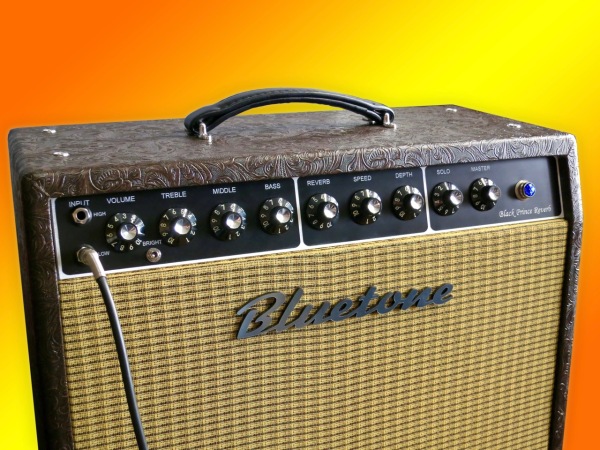
Ensimmäiseksi huomataan varmaan kaikki kosmetiset seikat. Vanhalla versiolla oli hyvin siisti ja asiallinen ulkonäkö. Uuden version myötä Bluetone on viennyt suosikkimallinsa ulkonäköä kuitenkin selkeästi Boutique-vahvistimien piiriin – Fender-tyylisessä kombossa on nyt western-tyylinen keinonahkapäällystys, etupaneeli ja säätimien nupit ovat Blackface-tyylisiä, ja vahvistimen etukangas muistuttaa väriltään vehnän oljet.
Ratkaisevat päivitykset on tehty kuitenkin Black Prince Reverbin elektroniseen varustukseen.
Tämän putkikombon sähköinen rakenne perustuu edelleen löyhästi Fenderin klassiseen Blackface Princetoniin – gain-rakenteen, tremolon ja jousikaiun suhteessa – mutta uutena ominaisuutena on lisätty jalkakytkimellä toimiva Solo-boostaus.
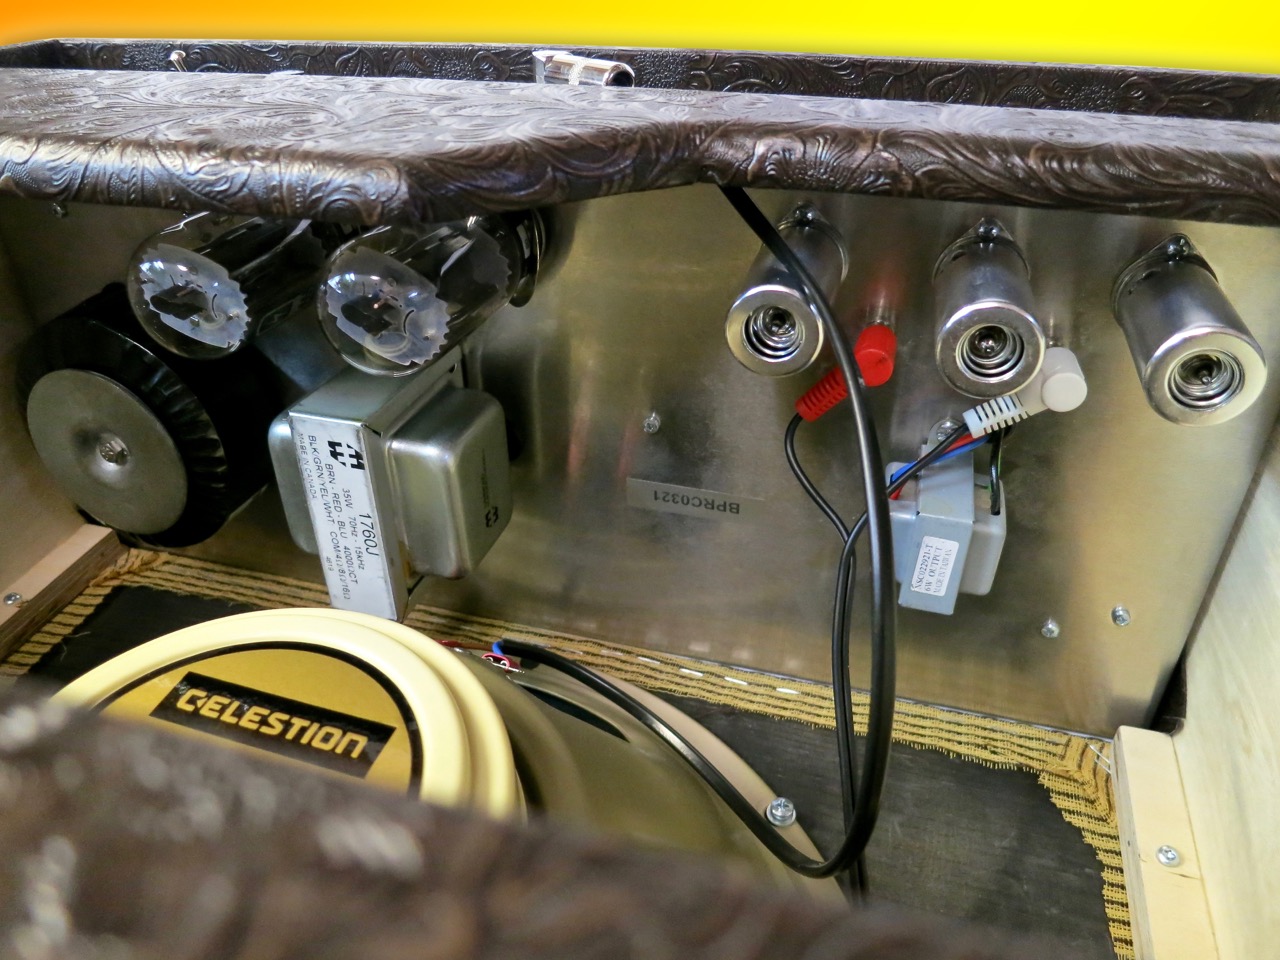
Kenties tärkein parannus Black Princen uudessa versiossa on uusi, isompi kaiutin. Vanhassa mallissa oli mukana Princeton-tyylisesti 10 tuuman elementti. Nykyiseen vahvistimeen voi valita yhden kahdesta 12-tuumaisista vaihtoehdoista – joko Celestionin G12 Neo Creamback -kaiutin (niin kuin testikoneessa) tai Warehouse Guitar Speakersin malli G-12 C/S. Isomman kaiuttimen vuoksi nykyversiossa on entistä isompi kotelo, joka on lähellä Blackface Deluxen kokoluokkaa.
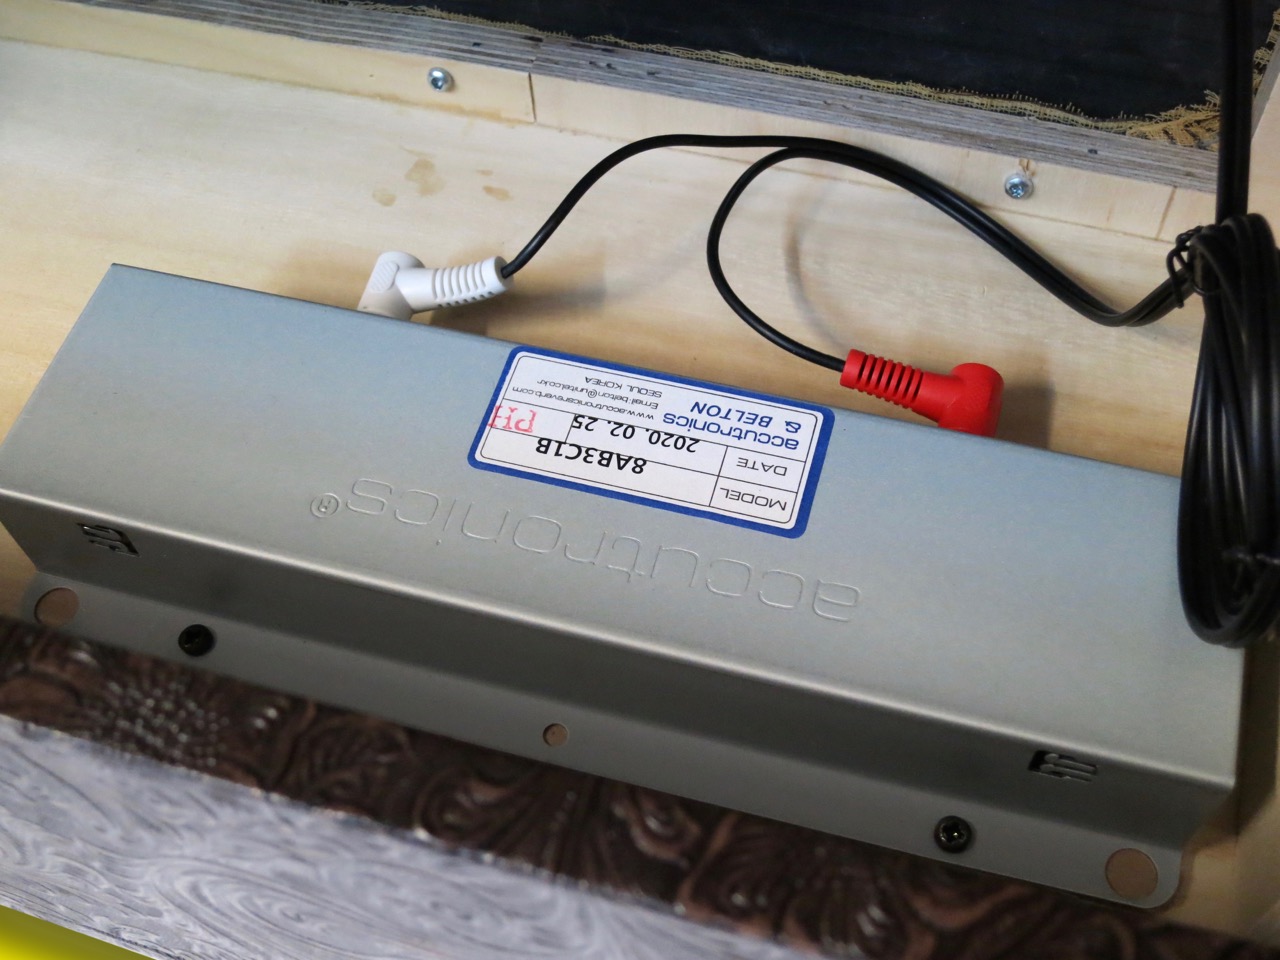
Bluetonen Harry Knecktin mukaan myös jousikaiun (ja sen vahvistuspiirin) tarkkaa rakennetta on parannettu entisestä, minkä ansiosta kaiku soi paremmin ja sen omakohina on selkeästi vähennetty. Black Princen lyhyt jousitankki tulee Accutronicsin mallistosta.
Tämän Bluetone-vahvistimen etuvahvistin on rakennettu kolme 12AX7-putkia käyttäen, kun taas päätevahvistin käyttää kaksi putkia.
Päätevahvistin tarjoaa maksimaalista soundillista monipuolisuuta, sillä sen rakenne mahdollistaa käytännössä kaikien oktaaliputkien käyttöä. Päätevahvistimeen voi laitta 6V6GT-, 6L6GC-, 5881-, EL34-, KT66- ja KT77-putkipareja ilman tarvetta biasointiin!
Parilla 6V6GT-putkilla Black Prince Reverb -kombosta lähtee ääntä noin 15 watin voimalla, kun taas kahdesta 6L6GC-putkista (niin kuin testikoneessa) tai EL34:stä vahvistimen teho nousee noin 28-30 wattiin.
Vaikka kombo ei vaadi uudelleenbiasointia, on hyvinkin tärkeä laittaa pääteputkien ja toroidisen muuntajan välistä pikkukytkintä oikeaan asentoon (katso käyttöohjetta), muuten pääteputket (tai jopa sisäiset kompponentit) voivat pahimmassa tapauksessa hajota liian suurten sähkövirtojen takia.
Takapaneelista löytyy kolme kaiutinlähtöä, sekä DIN-mukainen liitin pakettiin kuuluvaa jalkakytkinyksikköä varten.
****
Näitä klippejä on äänitetty Fender Stratocaster -kitaralla ja Shure SM57 -mikrofonilla.
Ensimmäinen seikka jota huomataan, kun laittaa uuden Bluetone Black Prince Reverb -vahvistimen päälle, on miten hiljaa se on tyhjäkäynnissä. Brummin tai kohinan määrä on pitkälti riippuvainen laadukkaista komponenteista ja osien fyysisesta sijoittelusta, esimerkiksi päämuuntajaan nähden. On selvää, että Bluetonen väki tietää mitä se tekee.
Koska Black Prince ei yritä olla tarkka Princeton-klooni, Bluetonen kombo voi tarjota laajemman soundivalikoiman kuin vanha Fenderin klassikko. Tässä tarjotaan kaikkea mikä on hyvä Blackface-kombojen soundissa, ilman klassikkovahvistimien huonoja puolia, niin kuin esimerkiksi välillä löysästi soivia Jensen-kaiuttimia tai – Princetonin tapauksessa – EQ:sta puuttuvaa keskialuen säädin ja alkuperäinen pieni kaiutin.
Sooloboosteri on erittäin tervetullut uudistus, kun taas Bluetonen Master Volume -säätimen ansiosta saa omat lempisoundit tarvittaessa esille myös hiljaisella volyymillä.
Päätevahvistimen monipuolisuus mahdollistaa myös erilaisia hybridisoundeja, yhdistämällä kombon Fender-tyylisen etuvahvistimen myös britti-tyyliseen päätevahvistimeen (EL34), perinteisten 6V6GT- ja 6L6GC-parivaljakkojen sijaan.
Black Princen tremolo on suorastaan herkullinen, ja se tarjoaariittävästi säätövaraa sekä efektin nopeudessa että sen syvyydessä. Itse tykkään erittäin paljon myös kombon päivitetystä jousikaiusta, koska se kuulostaa kermaiselta ja sillä on aitoa syvyyttä. Jotkut rautalankka-kitaristit voisivat ehkä toivoa vielä enemmän kaiun ”roisketta”, mutta se on selvästi makuasia…
Demobiisin kitararaidat on äänitetty nauhamikrofonilla. Soolokitarana toimii Hamer USA Studio Custom -kitara, kun taas komppiosuudet on soitettu Gibson Les Paul Juniorilla (vasen kanava) ja Fender ’62 Telecaster Custom -uusintapainoksella (oikea kanava).
****
Bluetonen vuoden 2021 Black Prince Reverb -painos on huippuluokan versio Blackface-aikakauden täysputkikombosta, höystettynä erilaisilla päivityksillä ja nykyaikaisilla parannuksilla. Tästä kombosta on käytännössä mahdotonta saada huonoa soundia.
Niin kuin kaikki Bluetone-tuotteet, myös Black Prince Reverbiä tehdään käsityönä Suomessa. Tästä huolimatta tämä kombo on jopa edullisempi kuin Fenderin oma tämänhetkinen ’64 Princeton -uusintapainos.
Ei ole siis ihme, että Bluetone Black Prince Reverb on ollut jo jonkun aikaa firman eniten myyty vahvistin. Itse asiassa uuden Black Princen soundi oli niin hyvä, että testikombosta tuli – Bluetone Shadows Jr. -kombon lisäksi – Kitarablogin referenssivahvistin.
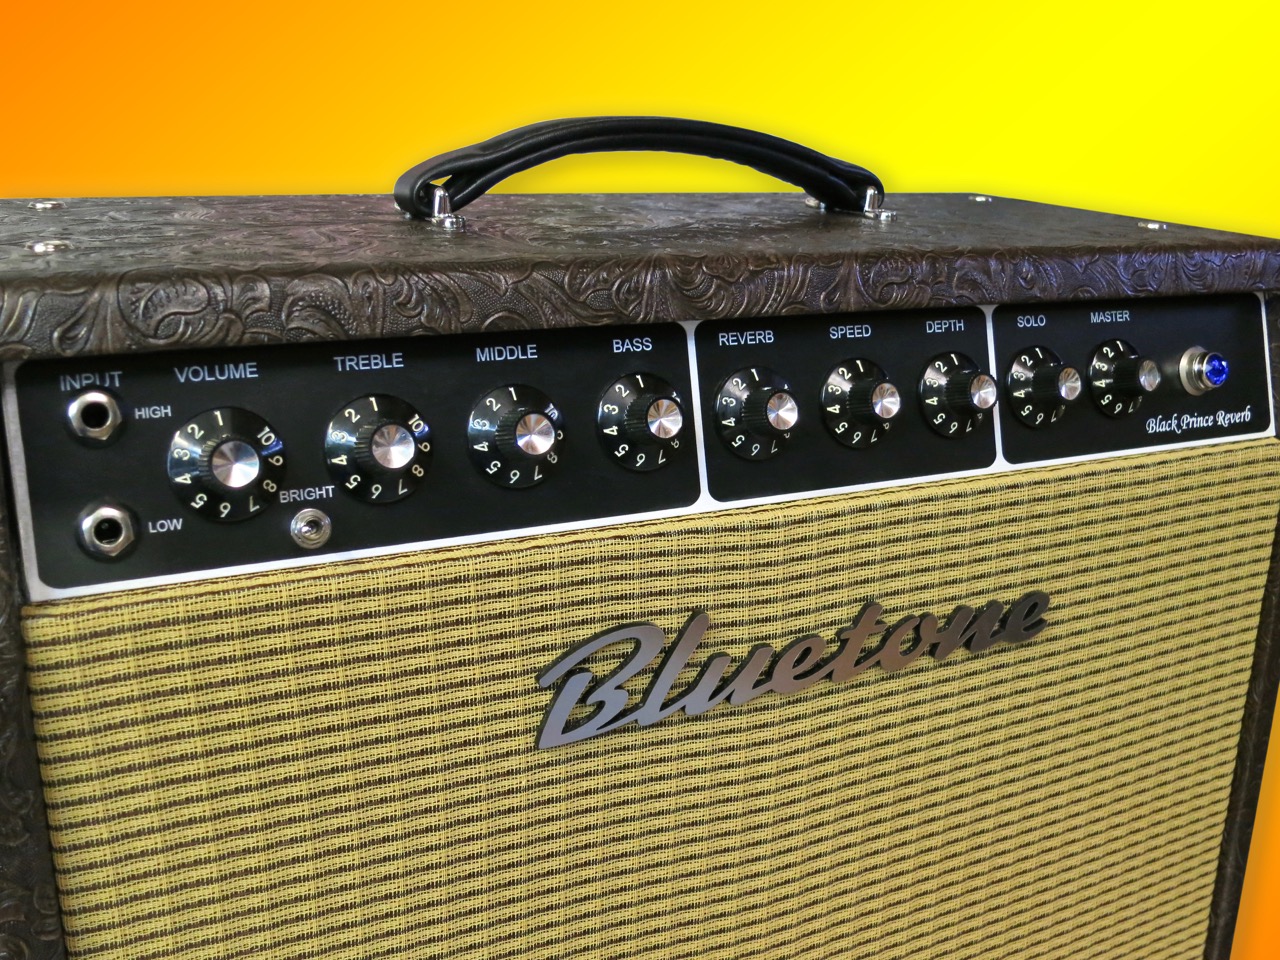
I first reviewed the Bluetone Black Prince Reverb in 2016, and I really liked it. A lot has happened since then, though, and this year Bluetone has bundled all of the most requested custom updates of the Black Prince and put them into a new and improved 2021 version (prices starting from 1,450 €) that supersedes the previous issue.
The first things you’ll notice are the cosmetic features; the old version of the Black Prince Reverb was a very clean looking combo with a very business-like appearance. The new version takes the amp’s look clearly into boutique Blackface territory with its Fender-style cabinet, its Country and Western tolex, its faceplate and control knobs, and with the wheat-coloured speaker grille.
But the improvements go much deeper in the Black Prince than mere cosmetics.
The preamp section’s architecture regarding the combo’s gain structure, spring reverb and tremolo effect are still loosely based on Fender’s classic Blackface Princeton, but Bluetone now adds a footswitch operated Solo-boost circuit to the proceedings.
In terms of the amp’s sound the most important update is the choice of a larger speaker. The older model followed the Princeton by using a 10-inch speaker. The current model has been updated with a choice of two 12-inch speakers – either a Celestion G12 Neo Creamback (as reviewed) or a WGS G-12 C/S. To accommodate the larger speaker the Black Prince Reverb’s cabinet has been enlargened to a size similar to a Fender Blackface Deluxe.
As Bluetone’s Harry Kneckt told me, the Black Prince’s genuine spring reverb’s circuit has been further improved for a fuller sound with even less hiss. The short reverb tank is an Accutronics model.
The Bluetone’s preamp runs three 12AX7 valves, while the power amp is handled by a pair of tubes.
The power amp has been designed with tonal flexibility in mind, by accepting all regular octal power tubes like 6V6GT, 6L6GC, 5881, EL34, KT66 and KT77 models without re-biasing.
With a pair of 6V6GTs the Black Prince Reverb will give you approximately 15 watts of power, while a pair of 6L6GCs (as supplied) or EL34s raises the output to 28-30 watts.
Even though re-biasing isn’t necessary, you have to make sure that the mini-switch between the second power tube and the toroidal transformer is set correctly to ensure the amp works properly, and to avoid possible component failure!
The back panel sports three speaker outputs, as well as the five-pin DIN-connector for the combo’s three-button footswitch unit (supplied with the amp).
****
These clips have been recorded with a Fender Stratocaster and a Shure SM57.
In terms of its sound, the first thing you’ll notice about the Bluetone Black Prince Reverb is how quiet it is when it comes to hum and hiss. Unwanted noise in an all-valve amplifier has a lot to do with the physical layout of the components, and Bluetone’s team clearly know what they’re doing.
The Black Prince’s sound offers a wider scope than a straight Princeton-clone (which it isn’t). There’s all of the original Blackface-era goodness without any of the drawbacks, like the sometimes flabby Jensen speakers, and – in the case of old Princetons – the missing mid-range EQ and smaller speaker.
The solo boost is a great new feature, and the Master Volume control makes sure that you can dial in your tone at the volume level you need.
Being able to step outside the typically Fender-ish 6V6GT- and 6L6GC-realm in the power amp section allows you to experiment with hybrid tonalities, like a Blackface with a British accent.
The tremolo sounds great and it offers enough scope in terms of speed and depth. I like the spring reverb very much, because it sounds creamy and full. Some will like even ”wetter” and ”sploshier” reverb types, but you can’t please everyone…
The demo’s guitar tracks have been recorded with a ribbon mic. The lead guitar is a Hamer USA Studio Custom, while the rhythm guitar tracks are played on a Gibson Les Paul Junior (left channel) and a Fender ’62 Telecaster Custom reissue (right).
****
Bluetone’s 2021 version of its Black Prince Reverb is a high-end version of what people love about Blackface-era amps combined with a number of sensible updates and improvements.
The Bluetone Black Prince Reverb is a handwired and handcrafted all-tube combo, made here in Finland. In light of this you can only call the price tag very fair, coming in several hundreds of euros lower than Fender’s current handwired ’64 Princeton Reissue.
No wonder that the Black Prince has been Bluetone’s best selling model for quite some time now. In fact, I liked the combo so much that the review sample has now joined my Bluetone Shadows Jr. as Kitarablogi’s reference amp.
Tässä videossa ei ole käytetty efektipedaaleja.Alkuperäinen Musicmaster Bass 1970-luvulta oli bassolle tarkoitettu harjoitusvahvistin.
Fenderin alkuperäinen Musicmaster Bass -kombo oli mielenkiintoinen tapaus. Musicmasteria oli ajateltu alkavalle basistille sopivaksi harjoitusvahvistimeksi, ja sitä myytiin jopa paketissa samannimisen ”halpabasson” kanssa. Kombo oli kuitenkin jonkinasteinen pettymys, sillä sen soundi oli suhteellisen ponneton ja potkuton.
Viime vuosina jotkut kitaristit ovat kuitenkin alkaneet nähdä Musicmaster-komboa edulliseksi mahdollisuudeksi päästä käsiiksi aitoon Silverface-soundiin. Totta, tämä kombo on varsin riisuttu ilmestys, mutta se on kuitenkin täysputkikone. Lisäksi se ei ole keräilymalli, minkä ansiosta Musicmasterin modaaminen omaan tarpeisiin ei tunnu lainkaan pahalta ratkaisulta.
Tästä ilmiöstä meidän stoori alkaa:
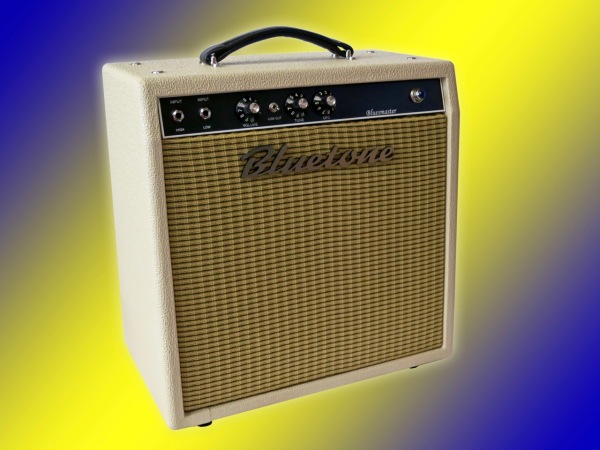
Suomalainen vahvistinpaja Bluetone on hiljattain alkanut valmistaa oman käsintehdyn ja parannetun version Fender Musicmasterista. Uutukainen on tarkoitettu nimenomaan kitaristille. Uuden kombon nimi on Bluetone Bluesmaster, ja sen hinta on – valituista optioista riippuen – jossain 960 ja 1.190 euron välillä.
Bluesmasterin signaalitie on periaatteessa sama kuin alkuperäisessä styrkkarissa, mutta muutamalla parannuksilla, kuten Low Cut -bassoleikkuri ja Bluetonen oma OPC-tehosäädin. Kolmiasentoisen OPC:n (Output Power Control) ansiosta Bluesmasterin lähtötehoa pystyy pudottamaan jopa vain kahteen wattiin, ilman että kombon soundi muuttuisi ratkaisevasti.
Koska alkuperäinen Musicmaster oli tarkoitettu halpavehkeeksi, Fenderin insinöörit poistivat kaikki ylimääräiset komponentit, jotka eivät olleet välttämättömiä saada bassosignaalia vahvistetuksi kaiuttimelle. Ehkä epätavallisin ratkaisu oli toteuttaa Musicmasterin vaiheenkääntäjää muuntajalla, kun se hoidetaan yleisesti putkella.
Niin kuin näkee kuvassa (yllä) Bluetone on käyttänyt samaa ratkaisua myös uudessa Bluesmasterissa. Putkien lisäksi – yksi 12AX7-putki (etuaste), sekä kaksi 6V6GT-putkia (pääte) – siellä näkyy kolme muuntajaa. Piennemmät niistä ovat vaiheenkääntäjä ja audiomuuntaja, kun taas se isompi musta kapistus on kombon sähkönsyöttöä varten.
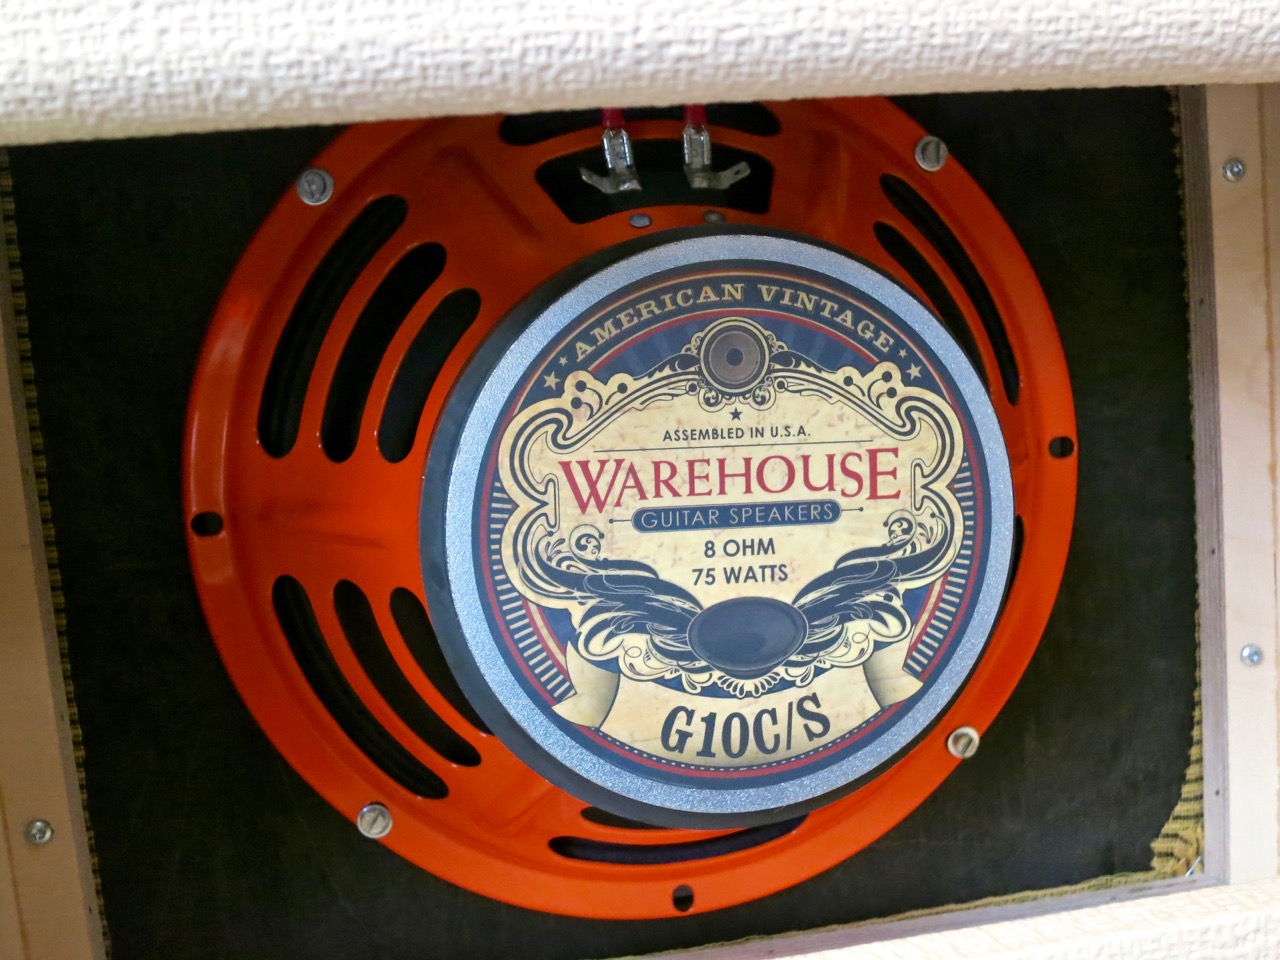
Kitaristien suosituin modifikaatio vanhaan Musicmasteriin on alkuperäisen Fender-kaiuttimen vaihtaminen johonkin soundilta tukevampaan.
Bluetonen Bluesmasterissa on jo valmiiksi asennettu alkuperäistä laadukkaampi ämyri. Kymmenentuumainen Warehouse Guitar Speakerin G10C/S kuuluu WGS:n American Vintage -mallistoon, ja sitä tunnetaan sen selkeästä ja lämpimästä soundista. Tämä malli tykkää myös efektipedaaleista. Bluetone tarjoaa optiona myös toisentyypistä kaiutinta Bluesmasteriin (tsekkaa Bluetonen tuotesivulta).
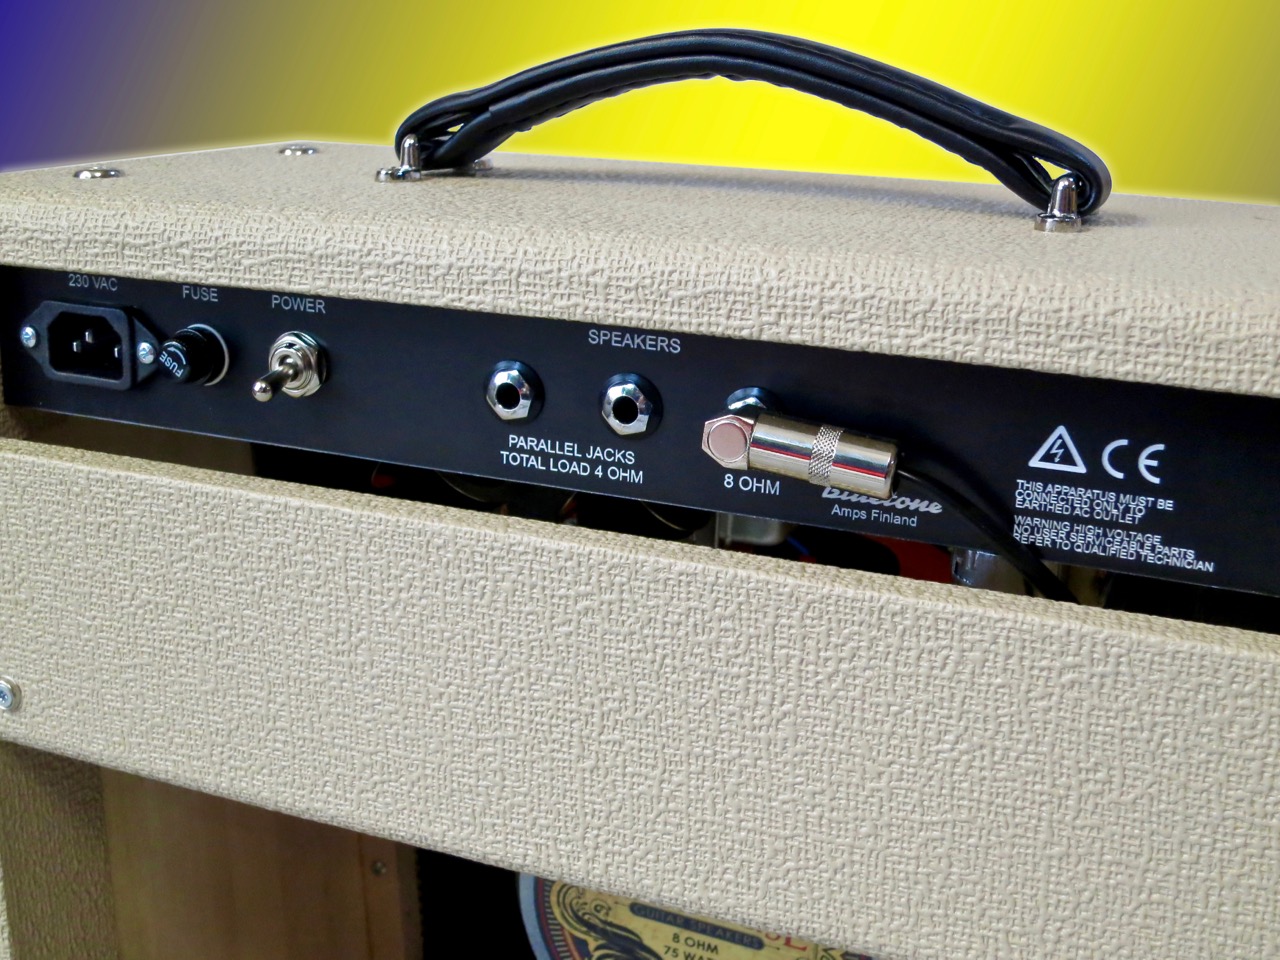
Takapaneeliin on asennettu virtakytkimen ja pääsulakkeen lisäksi ainoastaan kolme kaiutinlähtöä.
****
Vaikka Bluetone Bluesmaster -kombo voi vaikuttaa ensituntumalta hieman kuivakkaalta ja suorasukkaiselta, se lisää eittämättä jotain maagista lisämaustetta soundiin.
Vahvistin lisää nimittäin annoksen hienon musikaalista kompressiota jo puhtaaseen meininkiin. En puhu sellaisesta kompressiosta, joka puristaa nuottien atakkia kasaan, vaan tässä vahvistin ikäänkuin lisää nuotien häntäpäähän lisää eloa. Bluesmasterista saa näin enemmän sustainia vaikkapa puhtaaseen kantri- ja bluessoittoon, ilman että atakin napakkuus kärsisi tästä.
Koska Bluesmasterissa on kyse matalatehoisesta putkivahvarista ilman master volyymiä, kannattaa mielestäni ehdottomasti kokeilla rauhassa läpi minkätyypisiä soundeja saa aikaiseksi Volume-säätimellä, sekä vaihtamalla Low- ja High-tulojakkien välillä.
Bluetonen Bluesmaster-kombo ei tarjoa massivisiä määriä puhdasta headroomia, mutta sen sijaan siltä saa esillä todella herkullisia reunasärösoundeja, jotka reagoivat erinomaisesti soittajan dynamiikkaan ja kitaran volume-säätimeen. Kombo toimii hyvin myös efektipedaaleilla.
Volume-säätimen ”loppumetreillä” pikkukombosta lähtevät myös maukkaita särösoundeja. Huom: koska kyseessä on non-master volume kombo, Bluesmaster soi täydellä säröllä suhteellisen isolla äänellä, jopa kaksiwattisena, ja voi silloin olla liian äänekäs kerrostaloon.
• Komppikitarat: Gibson Les Paul Junior (vasen kanava), Fender Stratocaster (keskellä), Fender Telecaster (oikea kanava)
• Soolokitara: Hamer USA Studio Custom
****
Uusi Bluetone Bluesmaster lunastaa kaikken mitä se lupaa. Minun mielestäni tämä on erinomainen Silverface-tyylinen putkikone blueskitaristille. Bluesmaster on käsintehty laatuvahvistin, joka tarjoaa rutkasti parempaa työnjälkeä kuin esikuvansa, ja joka on valmiiksi modattu kitaristille sopivaksi. Bluesmasterin ”riisuttu” olemus myös tarkoittaa, että soittimesi soundi pysyy mallikkaasti ehjänä matkalla tulojakista kaiuttimeen.