Buying an electric guitar, part 3 – Assessing a guitar’s condition

How do you assess the condition of an instrument?

In my view, the condition of any guitar can be gauged by dividing up any possible issues into three groups:

Group 1 – Things that can be changed/corrected easily:

++ truss rod settings

++ dead strings/”wrong” string gauge

++ intonation

++ string height (action)

++ pickup height

++ pickup model (if no woodwork/modification is required)

++ worn-out tuners (if no woodwork is required)

***

Group 2 – Small and slightly bigger issues that a qualified repairperson can solve:

++ a cracked top nut

++ string slots in nut too deep or not deep enough

++ a faulty vibrato system

++ worn frets or high/low frets

++ crackling controls

++ faulty switches

***

• Group 3 – Issues that are difficult and/or expensive to repair:

++ a badly warped neck (so-called corkscrew)

++ a set neck that is out of alignment

++ a broken truss rod

++ unrepaired (or badly fixed) cracks in the wood (for example a broken-off headstock)

++ a botched DIY ”customisation”

Would you buy a guitar from Pete?

****

Here’s one way of assessing the condition of a guitar systematically:

• Tune the instrument and play it for a minute or two. You’ll get an idea of the current set-up, as well as of the general condition and sound of the instrument.

• Is the neck correctly aligned to the body (especially important in set-neck instruments)?

Look at the distance of the e-strings to the fingerboard edges at the 14th fret. If both e-strings are approximately the same distance from the edge of the fingerboard, you’re good to go.

• The truss rod setting (aka relief):

Press the bottom E-string down simultaneously at the 1st and 14th frets (you can use a capo at the first fret), and use it as a straightedge. Take a look at the string at the 8th fret; there should be a small gap between the top of this fret and the E-string – that’s what we call the relief. If the gap is around 0.5 mm, the truss rod is set as it should be. Check the treble e-string in the same way. If there’s a substantial difference between the relief at the low E and the treble e, you’re most likely looking at a warped neck.

If the truss rod setting is not ideal (too tight = no relief; too loose = relief greater than 0.5 mm) you should ask the seller to adjust the truss rod for you.

• Check the nut slots:

Each string is pressed down in turn at the 3rd fret. The string should now be resting on the second fret. Look for a small gap between the 1st fret and the string you’re pressing down. Using a regular 009- or 010-gauge set, there should be a tiny gap beneath the treble e-string and the first fret (when fretting the string at the third fret), just about large enough to fit a sheet of printer paper in there. Because the bass strings need more clearance to vibrate freely, the gap between the first fret and the bottom of each string increases slightly going from the top e-string to the bass E-string.

If the nut slots aren’t cut deep enough, the guitar will be hard to play, and sound badly out of tune in the lowest (open) positions, regardless of action settings and intonation. A luthier will be able to correct the matter for a small charge using a set of special nut files.

If the string slots are too deep (= the strings rest on the first fret, when pressed down at the third), a nut replacement will be in order (except with locking nuts that can be shimmed). Nut slots that are too deep will result in rattling open strings, even if the action and the truss rod have been adjusted correctly. Note: You should check for string rattling using clean amp settings. Playing the guitar unamplified might make you whack the strings harder than necessary.

In most cases replacing a nut is an easy procedure for a repairperson.

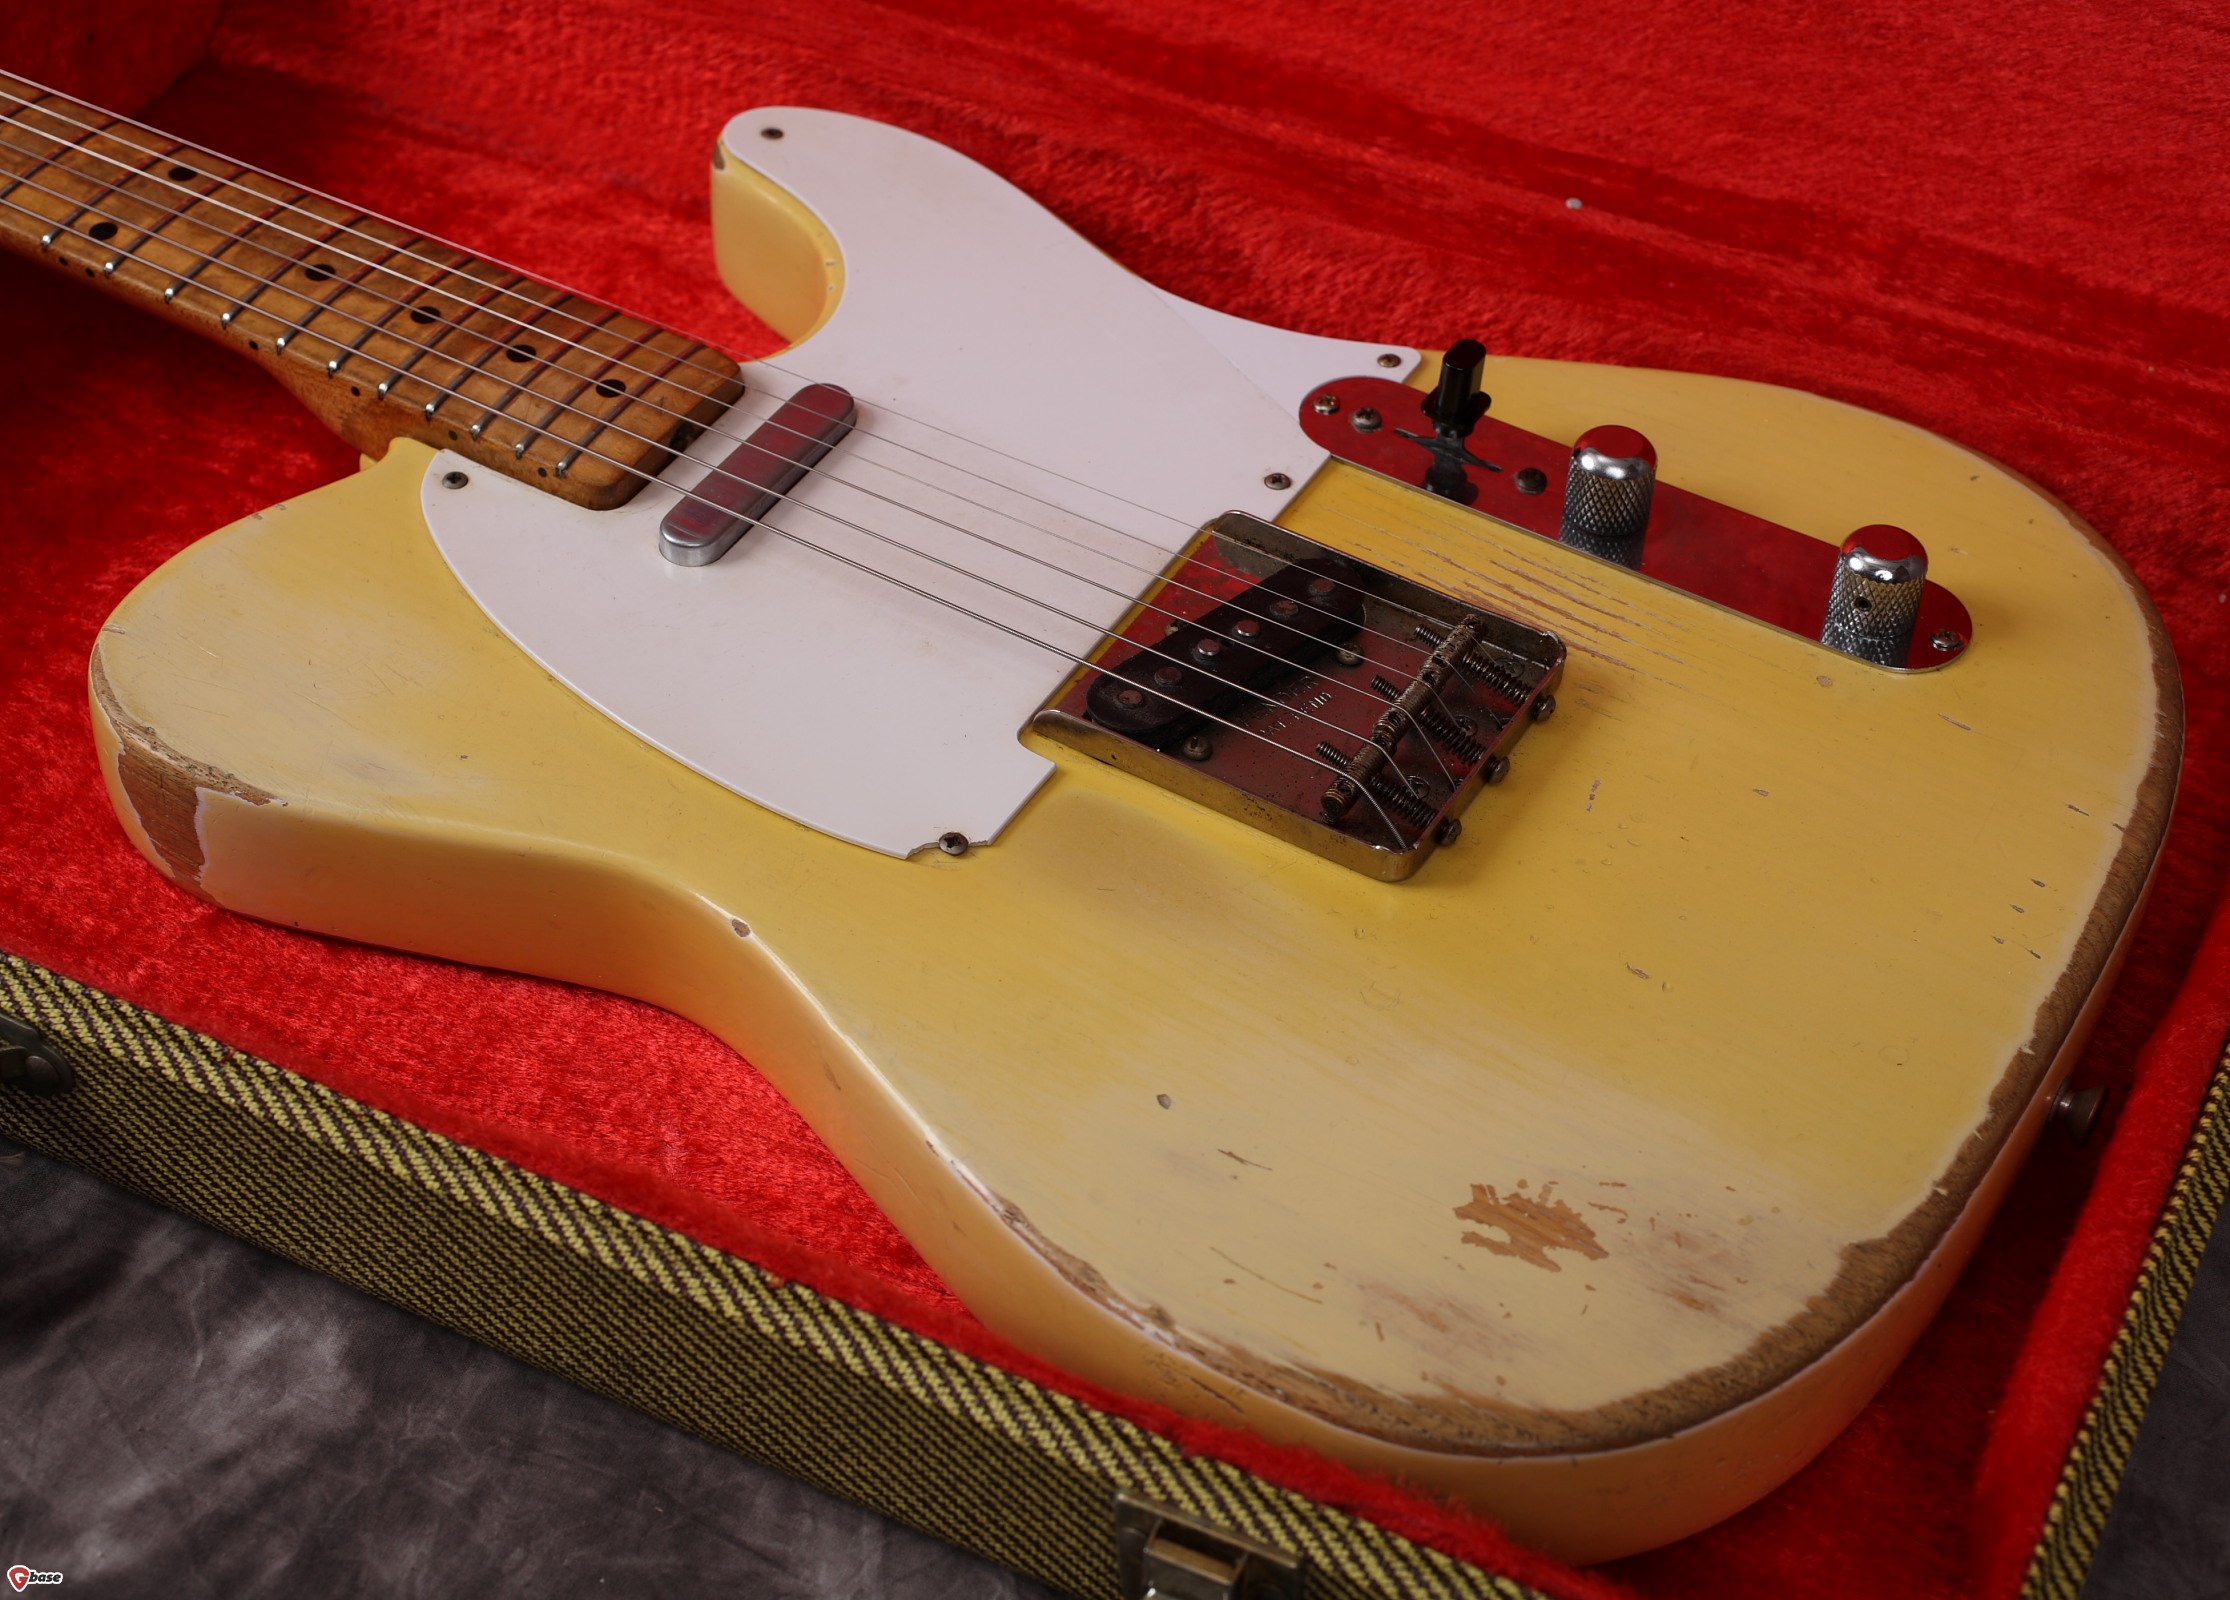
• The condition of the frets:

On a used guitar, slight wear marks on the frets are the result of normal use, and this light wear won’t cause any problems.

If the frets are very worn (like the ones in the picture below), you should take the cost of a fret dress (or even a complete refret) into consideration, and maybe try to get the seller to lower his/her asking price.

Refretting bound fingerboards is more complicated and time-consuming than dealing with unbound ’boards, which is usually reflected in the cost. Ask you luthier.
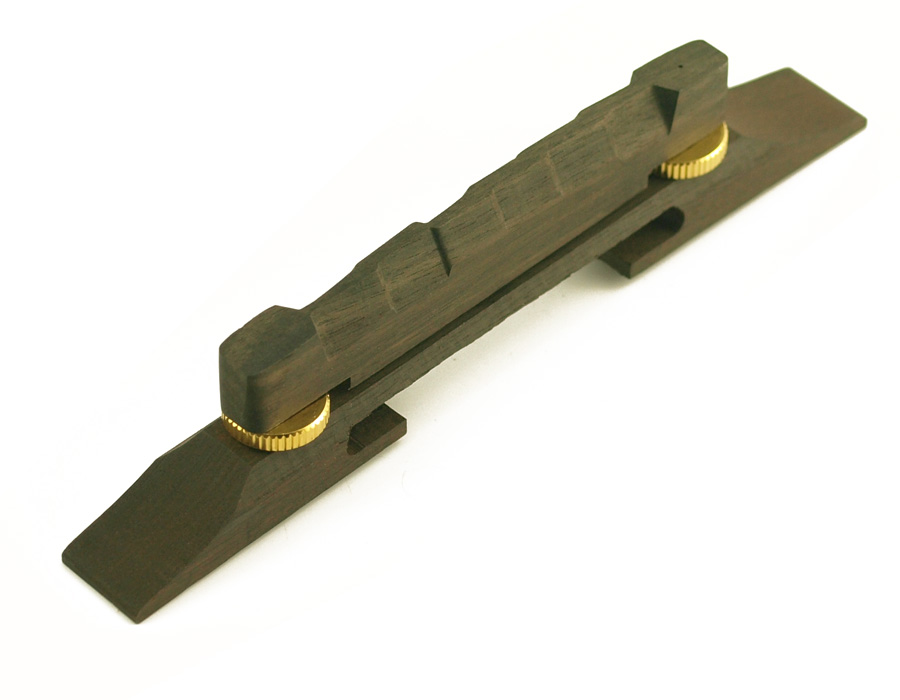
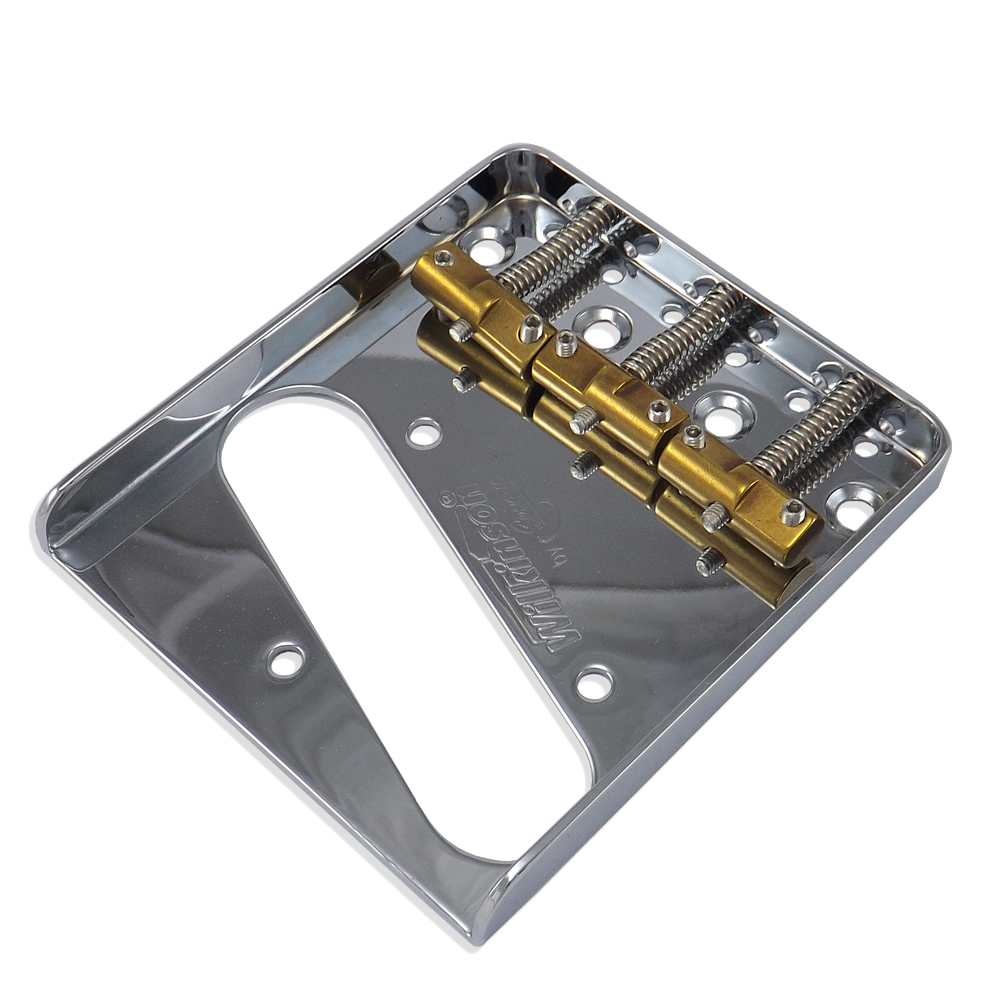
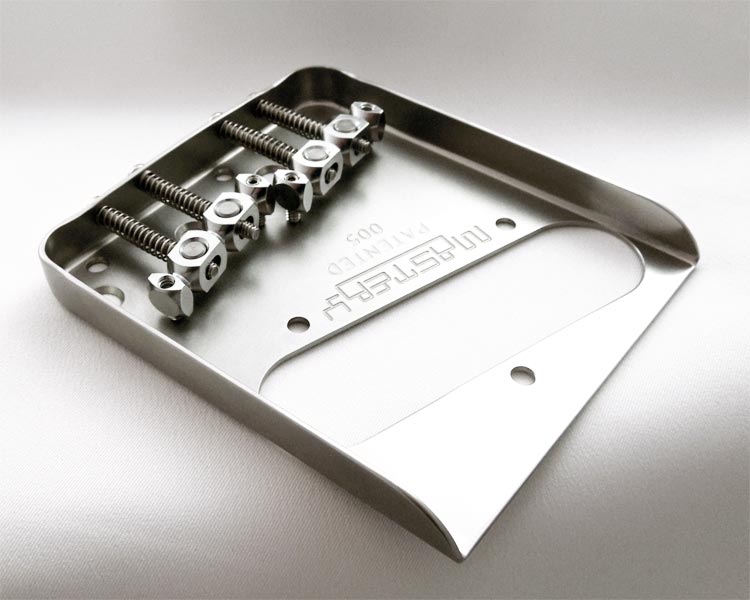
• Check the bridge:

Are all the screws and bridge saddles in working order? Is there ample scope for intonation adjustment?

If the guitar’s set-up is unsatisfactory – the action may be too high or too low; the intonation may be off – ask the seller to adjust the guitar for you before making a buying decision!

• Check the electronics:

Play around with all controls and switches – is everything working as it should? Do all the pickups work?

Scratchy, crackling pots and faulty switches are quite easy for a luthier to exchange. If we’re talking about a new guitar, the shop should take care of this before you buy. With a pre-owned instrument, you will have to take care of the repairs. Note: Replacing electrical components and pickups in semi-acoustic and archtop guitars is generally much more complicated, which will be reflected in the luthier’s quote.

• Check the vibrato:

Does the vibrato (aka the tremolo or the whammy bar) work as it should? Are all the parts in working condition, or are you faced with rusty screws or even broken parts? Is there ample scope for action and intonation adjustment?

If the vibrato bridge looks very worn, or if there are structural problems, like a broken off (or loose) bridge post, you might be facing a complete replacement or a costly repair.

• And finally: Plug the guitar into an amp, and play it some more. Listen to the sound of the instrument. Check its playing feel, its ergonomics, and make a final assessment of its overall condition.

• Based on this checklist (and any possible issues you might have found) you should ask yourself two questions:

  1. Do I like this instrument?
  2. Do I think this guitar is worth its asking price?

Gretsch Streamliner G2420T – full front

Save

Save

Save

Save

Save

Save

Save

Save

Save

Save

Save

Save

Save

Save

Save

The Fender Telecaster – tone at the expense of intonation?

Why do we need intonation adjustment?

On string instruments, the fret spacing along the fretboard is calculated according to a mathematical formula. This formula is theoretical, though, and doesn’t take into account variables, such as string tension (tuning), string thickness (gauge) and string height (action). These variables make the actual pitch of a string, which is pressed down against a fret, deviate from the theoretically correct pitch. To compensate for this pitch offset, you need some sort of intonation adjustment that sets the correct intonation (or octave compensation) for each string.

Martin_D-42K_2006_brdt_opt

On acoustic guitars correct intonation is achieved by an angled bridge saddle, often carefully shaped to fine-tune the compensation further.

Jazz guitar bridge

Early electric guitars were basically modified archtop acoustics, which carried on using traditional rosewood (or ebony) archtop bridges with carved ”steps” presetting the intonation. Overall intonation adjustment was carried out by moving the whole bridge carefully closer to (or further away from) the neck.

****

Fender 52 Reissue

The advent of the – much clearer-sounding – solidbody electric guitar necessitated a more precise approach to the problem of intonation adjustment.

52 Tele Bridge

Leo Fender’s novel Esquire/Broadcaster/Telecaster-bridge featured a mounting plate for the bridge pickup, as well as individual action adjustment for each string, and octave compensation in string pairs.

Fender_Custom_Shop_52_Telecaster_Nocaster_Blonde_R10539_1

Fender’s Telecaster bridge assembly plays a huge part in this model’s distinctive, twangy tone, laying the foundation for the model’s classic status.

close-up Fender bridge

brucke-und-ta

Over the course of the 1950s and 60s, Fender experimented with different saddles – smooth brass, smooth steel, threaded steel, and steel saddles with a single notch per string – but the basic, three-saddle formula stayed firmly in place. You got fantastic tone, but not perfectly spot-on intonation.

****

70s Fender six-saddle

Twenty years after the original launch of Fender’s first solidbody electric, things had evolved.

In 1952 the original three-saddle bridge was less of a compromise, because the regular string sets of that time (012s or 013s) had a wound g-string. With a wound g-string the biggest step in intonation adjustment was between the b- and the g-string, and, as they were catered for by different saddles, a good, working compromise could be found.

By the late Sixties, ”slinky” string sets with plain g-strings had become the norm. This shifted the intonation step between the highest wound string and the lowest plain string onto a single, rigid bridge saddle (for the D- and g-string).

Fender retained the traditional three-saddle bridge on its standard Telecaster, but introduced six-saddle bridges on many of its new models in the Seventies. Pictured above is the six-saddle bridge from a (second version) Custom Telecaster (introduced in 1972).

Although this bridge finally offered perfect intonation, some players criticised this type of bridge for ”sounding” thinner (or brighter) than the original version. This might also have been due to changes in the precise specifications of the bridge pickup at that time, though.

Hipshot 6-saddle

Modern Fender 6-saddle

More recent six-saddle designs by makers like Hipshot, Gotoh or Fender are based on a thicker bridge plate. These are perfectly serviceable, modern designs, which offer precise intonation. Many Tele-anoraks still steer clear of these bridge types, however, because the more rigid bridge plate tends to tame the bridge pickup’s twang noticeably.

****

Another approach to better intonation on a Telecaster is to keep the twang-enhancing three-saddle ashtray bridge in place, but modify the saddles.

Joe Barden angled

Pickup specialist Joe Barden came up with angled brass saddles in his design for the late Tele-master Danny Gatton.

Wilkinson

Graph Tech

Wilkinson’s and Graph Tech’s designs have two different, preset jump-off points per saddle – one for each string.

These three approaches (Barden, Wilkinson, and Graph Tech) work very well in providing good intonation, while keeping the Telecaster-tone intact, as long as you use string sets with a plain g-string.

pivoting brass saddles

Mastery stainless steel

If you want to retain your three-saddle twang, but want to have more freedom in choosing your string gauges, the best way to go are saddles with an angle adjustment. Good examples are Wilkinson’s replacement brass saddles (above), or this stainless steel Tele-bridge by Mastery.

****

p1_u2nu2p1fg_so

How come that the vintage-type Fender Telecaster, with all its intonation flaws, is still in production and still very successful? The answer is that people have always been creative in working out solutions to design shortcomings.

In the Telecaster’s case this means finding a way to ”sweeten” the guitar’s slightly flawed intonation.

Here are three (of a myriad of) possible approaches:

1.) The fifty percent approach

After you’ve put on a set of new strings, use your digital tuner to set the (12th fret) intonation correctly for both E-strings, as well as the g-string (I call them the most critical strings). Then tune your guitar by tuning the open E-strings and the g-string to pitch. The remaining three strings (A, D, and b) are then tuned, so that the pitch at the seventh fret is correct (giving you E, a, and f#).

The A-, D-, and b-strings will be a little off in their intonation going up (or down) from the seventh fret, but overall the pitch will be much sweeter, than if you had tuned these strings to their correct open string pitches. You can then fine-adjust your sweetening by ear, using first position chords as a reference.

2.) Tuner sweetening

After you’ve put on a set of new strings, use your digital tuner to set the (12th fret) intonation, so that each string pair is slightly off in an approximately even way. With the E- and A-pair this would mean that the E-string’s intonation comes out slightly sharp, while the A-string’s intonation is a tiny bit flat. The next pair would see the D-string a bit flat, while the (plain) g-string is a tad sharp. The last pair would have the b-string a bit sharpish, with the e-string a little flat. Then tune the guitar by tuning all strings, so the pitch is correct at the seventh fret.

Now all strings will be a little off in their intonation going up (or down) from the seventh fret, but overall the pitch will be much sweeter, than if you had tuned them to their correct open string pitches. You can then fine-adjust your sweetening by ear, using first position chords as a reference.

3.) Sweetening to the A

After you’ve put on a set of new strings, use your digital tuner to set the (12th fret) intonation, so that each string pair is slightly off in an approximately even way. With the E- and A-pair this would mean that the E-string’s intonation comes out slightly sharp, while the A-string’s intonation is a tiny bit flat. The next pair would see the D-string a bit flat, while the (plain) g-string is a tad sharp. The last pair would have the b-string a bit sharpish, with the e-string a little flat. Then tune your guitar by first tuning the open A-string to pitch. Next, tune all the other strings by ear, using the A-string as your reference:

• E-string at the fifth fret against open A

• D-string at the seventh fret against open A (or A-string 12th fret harmonic)

• g-string at the second fret against open A (or A-string 12th fret harmonic)

• b-string at the tenth fret against open A (or A-string 12th fret harmonic)

• e-string at the fifth fret against open A (or A-string 12th fret harmonic)

You can then fine-adjust your sweetening by ear, using first position chords as a reference.

****

Remember, none of the above tuning tips is set in granite. Tuning and intonating a three-saddle Telecaster is a dark art, and most players have developed their own way of sweetening their guitar’s intonation. Let your ears be your guide!

Fender-American-Special-Telecaster-Olympic-White-Maple004

Sähkökitaran osto-opas, osa 3 – Miten arvioin kitaran kuntoa?

Osto-oppaan kolmannessa osassa arvioidaan kitaran kuntoa.

Mielestäni on tärkeä järjestää soittimen kunto-/laatuseikkoja kolmeen ryhmään:

Ryhmä 1 – helposti muutettavissa olevat asiat:

++ kaularaudan sädöt

++ kielten paksuus/kunto

++ intonaatio

++ kielten korkeus

++ mikrofonien korkeus

++ mikrofonimalli (jos ei vaadi puutöitä)

++ virittimien kunto (jos ei vaadi puutöitä)

***

Ryhmä 2 – kitarakorjaajaa vaativat pienet/keskisuuret ongelmat:

++ rikkinäinen satula

++ ei riittävän syvät tai liian syvät urat satulassa

++ isommat tallaongelmat, esimerkiksi rikkinäinen vibratalla

++ kuluneet tai erikokoiset nauhat

++ rähisevät potikat

++ epäkunnossa oleva kytkin

***

• Ryhmä 3 – ongelmat, joiden korjaus on hankalaa ja/tai kallista:

++ kiero, epätavallisen vääntänyt kaula

++ sivusuuntaan vinosti runkoon liimattu kaula

++ rikkinäinen, murtunut kaularauta

++ korjaamatta jäänyt isompi murtuma puussa (esim. lavassa)

++ huonosti suoritettu tee-se-itse-kustomointi

Älä osta Peteltä…

****

Kitaran systemaattisen arvioinnin voi suorittaa esimerkiksi näin:

• ensin viritetään ja sitten soitetaan vähän aikaa; tutustutaan soittimeen, sen (tämänhetkisen) soitettavuuteen ja akustiseen sointiin

• tarkistetaan istuuko kaula sivusuunnassa suoraan:

Onko ala-E:n etäisyys otelaudan reunaan 14. nauhalla suurinpirtein sama kuin ylä-e:n etäisyys diskanttipuoliseen reunaan?

• kaularaudan asetus:

Ala-E-kieltä painetaan samanaikaisesti alas ensimmäisellä ja 14. nauhalla, jolloin 8. nauhan kohdalla nauhan yläpinnan ja kielen alapinnan väliin pitäisi näkyä noin puolen millin rako (ns. relief; lausutaan ri-Liif). Samaa toistetaan ylä-e-kielen kanssa. Jos kaulan kuperuus on sama sekä basso- että diskanttipuolella, kaula ei ole vääntänyt korkkiruuvin tavoin, mikä on hyvä asia. Jos ala- ja ylä-e-kielten välillä on reliefissä huomattava ero, on hyvin todennäköistä että kaulassa on joku vika.

Jos kaularaudan asetus sinänsä on pielessä (liian kireä = olematon relief, liian löysä = relief-rako isompi kuin 0,5 mm) kannattaa pyytää, että myyjä säätää kaularaudan, ennen kuin tekee ostospäätöstä!

• satulaurien tarkistus:

Jokainen kieli painetaan peräkkäin alas kolmannella nauhalla niin, että kieli makaa toisen nauhan päällä, ja katsotaan kuinka iso väli jää ensimmäisen nauhan yläpinnalta painetun kielen alapintaan. Tavallisen 009- tai 010-satsissa ylä-e:n ja ensimmäisen nauhan väliin pitäisi jäädä niin pieni rako, että tavallinen kopiopaperi mahtuu just ja just väliin. Koska kielen liikerata kasvaa miten paksumpi kieli on, kielet etääntyvät ensimmäisestä nauhasta mitä ”matalammaksi” mennään (ala-E:ssä on siis isompi väli ensimmäiseen nauhaan kuin ylä-e:ssä).

Jos kielet jäävät liian kauaksi ensimmäisestä nauhasta, kitara soi alanauhoissa epäpuhtaasti (sävelet liian korkeat), vaikka kitara on tallassa intonoitu oikeaoppisesti. Kitararakentaja korjaa ongelman varsin nopeasti sopivilla satulaviiloilla.

Jos kieliurat ovat liian syvät, minkä takia kieli makaa tarkistuksessa täysin ensimmäisen nauhan päällä, satulaa täytyy todennäköisesti vaihtaa uuteen, koska vapaat kielet rämisevät alanauhoja vasten. Huom: Tässä ratkaisee kuitenkin aina soittotesti vahvistimen kautta puhtaalla kanavalla!

Satulan vaihtaminen on soitinkorjaajalle jokapäiväinen toiminta, eikä se ole kallistakaan.

• nauhojen kunto:

Lievät kulutusmerkit nauhoissa ovat käytetyissä kitaroissa vain tavallisen käytön merkkejä – eikä vikoja – joiden kanssa pystyy hyvinkin eläämään.

Jos nauhoissa taas on (alla olevan kuvan tavalla) pitkästä käytöstä johtuvia syviä uria ja kulumia, täytyy arvioida pyydettyä hintaa tarkemmin (ja ehkä tinkiä hieman myyjän kanssa). Sellaisissa tapauksissa onkin ainakin nauhan hionnan ja uudelleenprofiloinnin aikaa, tai jopa kaikkien nauhojen vaihto.

Reunalistoitetun tai lakatun otelaudan nauharemontti on työläämpi, ja maksaa tämän takia hieman tavallista enemmän.

• tarkistetaan tallan kuntoa:

Ovatko kaikki ruuvit ja tallapalat kunnossa? Onko intonaatiolle ja/tai kielten korkeussäätöihin riittävästi pelivaraa?

Jos kitaran säädöt ovat täysin pielessä – kielet liian korkeat/matalat; intonaatio ei kohdallaan (= 12. nauhalla soitettu kieli ei samalla sävelkorkeudella kuin 12. nauhan huiluääni) – pyydä myyjää säätämään asiat kuntoon ennen ostospäätöstä!

• elektroniikan tarkistus:

Kokeile rauhassa kaikki säätimet ja kytkimet läpi – toimiiko kaikki niin kuin pitää? Toimivatko mikrofonit?

Rähisevä potikka tai epäkunnossa oleva kytkin on soitinrakentajalle suhteellisen helppo korjata. Uudessa kitarassa vastuu on soitinliikkeellä, käytetyissa soittimissa korjausta täytyy kustantaa itse. Huom: puoliakustisissa ja orkesterikitaroissa kaikki mikrofoneihin ja/tai elektroniikkaan liittyvät korjaukset ovat haasteellisimmat, ja näin ollen myös hieman kalliimmat.

• vibratallan kunto:

Toimiiko vibra toivotulla tavalla? Ovatko kiinitysruuvit ja/tai tallan korkeutta säätävät ruuvit kunnossa, vai onko pahoja kulumia tai jopa murtumia? Onko riittävästi säätövaraa kielten korkeudelle tai intonaatiolle?

Jos vibratalla vaikuttaa erittäin kuluneelta tai esimerkiksi Floikan kiinnitysholkki on murtunut pienen osan runkopuusta irti, voi olla edessä tallan vaihto tai isompi remontti.

• Tämän kaiken jälkeen soitetaan kitaraa vahvistimen kautta, jolloin arvioidaan soittimen soundia, soitettavuutta, mukavuutta sekä yleiskuntoa.

• Lopuksi voi sitten pohtia näitä kahta asiaa arvioinnin aikana kerättyjen tietojen pohjalla:

  1. Tykkäätkö tästä soittimesta?
  2. Onko kitara mielestäsi hintaansa arvoinen?

Pidä blogia WordPress.comissa.

Ylös ↑