Lisätiedot: Musamaailma
Kitarablogi.com – Finland's premier Guitar and Bass blog
Juttuja kitaroista ja bassoista


ESP LTD MM-30 on Musamaailman 30-vuotis juhlamalli.


Soitinliikkeenä ja maahantuojana tunnettu Musamaailma juhlii tänä vuonna 30-vuotissynttäriään.
Juhlan kunniaksi ESP Guitars on valmistanut 30 kappaletta LTD MM-30 -juhlamallista. Synttärimallin Kitarablogi-testi on juuri työn alla.
ESP- ja LTD-soittimien lisäksi Musamaailma tuo kitara- ja bassopuolella maahan mm. myös seuraavat merkit: Admira, Blackstar, Bogner, DV Mark, EMG, GJ2 Guitars, Markbass, Mooer, Seymour Duncan, Spector, Tanglewood, Tech 21 NYC, Tokai, Rockbag ja Warwick.


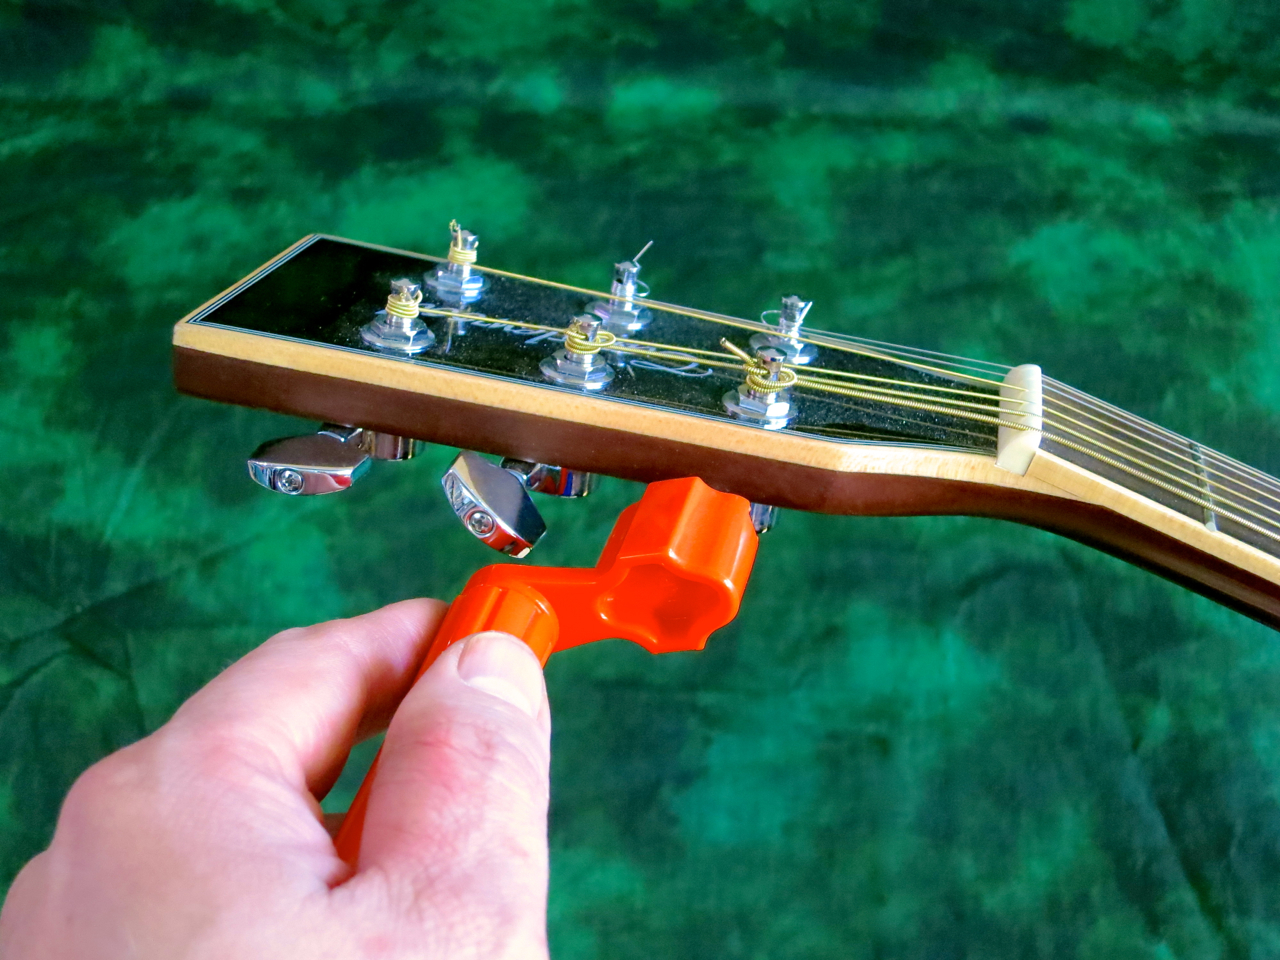
Kielten vaihtamiseen tarvitaan teräskielisessä kitarassa kielisatsin lisäksi terävän leikkurin, sekä viritysmittarin. Halpa muovikampi nopeuttaa virittimien kääntämistä.
Metalliviivoittimella taas mitataan ennen kuin aloitetaan kielten korkeus 12:n nauhan kohdalla. Mittaamisen ansiosta kaularaudan säätäminen helpottuu huomattavasti, jos uusi kielisatsi on ohuempi tai paksumpi kuin vanha. Parasta olisi kuitenkin aina vaihtaa samanpaksuiset kielet päälle – näin soittotuntuma pysyy muuttamattomana, eikä kaularautaa tarvitse silloin tavallisesti säätää.
Mielestäni on helpointa ottaa ensin kaikki kielet pois.
Jotkut väittävät, että akustisissa kitaroissa kaikkien kielten yhtäaikainen poistaminen olisi jotenkin soittimelle vahingollista, mutta itse olen aina (vuodesta 1977 lähtien) vaihtanut kielet näin, enkä ole tähän mennessä vielä rikkonut yhtäkään kitaraa. Myös Martin Guitarsin omassa videossa poistetaan heti koko kielisatsi.

Kun kielet ovat täysin löysiä, leikkaan ne keskeltä poikki.
Tämä ei ole välttämättömyys, mutta minusta lyhyet pätkät ovat helpompia käsitellä kuin täyspitkät kitaran kielet.

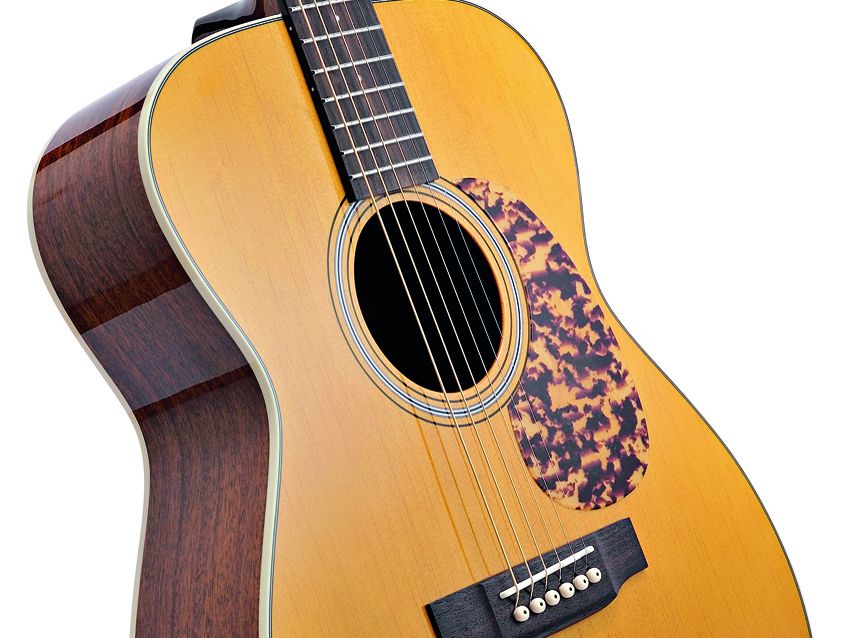
Teräskielisissä kitaroissa kielet on kiinnitetty tallaan ns. tallanastoilla (engl. bridge pin), jotka voivat olla muovista, luusta, puusta tai metallista.
Tallanastojen nostamiseen on lähes kaikissa viritinvivuissa pieni syvennys. Tavallisesti tallanasta ja kielen ball-end-rengas ovat näin jumissa, että vipua ei kannata käyttää nastan nostamiseksi, ainakaan heti.

Useimmissa tapauksissa kielen saa pois käsipelillä:
Työnnä ensin kielen hieman tallan läpi runkoon.
Tämä vapauttaa yleensä tallanastan ball-end-renkaan lukituksesta, ja nastan voi nostaa helposti ulos.
Jos tallanastaa ei saa – yrityksistä huolimatta – pois käsipelillä, suosittelisin talouspaperin (tai ohuen kangaspalan) käyttämistä tallan ja tallanastan suojaksi.

Joissakin kitaroissa – etenkin tietyissä Ovation- ja Takamine-malleissa – löytyy myös nastattomia tallaratkaisuja. Näissä talloissa kielet pujotetaan yksinkertaisesti tallan takaosan läpi.

Tämän jälkeen poistetaan vanhat kielet myös virittimien tapeista.
Kun kaikki vanhat kielet on poistettu, voi tarvittaessa öljytä otelaudan ja tallan sopivalla otelautaöljyllä.

Uudet kielet kiinnitetään aina ensin soittimen tallaan, laittamalla ball-endin ja tallanastan paikoilleen.

Seuraavaksi kieli vedetään kevyesti ulospäin, samalla kun pidetään tallanastaa paikalla. Näin kiilataan se tallanasta ball-endin avulla kiinni tallaan.

Lavalla kieli työnnetään virittimen läpi…

…vedetään viritintapin ympäri…

…ja lukitaan paikoilleen vetämällä sitä rungosta poispäin.
Yksi käsi painaa kielen alas, kun toinen kiertää sen kireäksi. Kielen pitää kiertää tapin ympäri ylhäältä yhä alemmas.

Kun viritin alkaa kiristää kieltä yhä enemmän, otan toisen käteni pois lavalta, jotta voin tarvittaessa estää tallanastan nousemista ulos tallasta.

Suosittelen ylijäävän palan poistamista – kun kieli on viritetty – katkaisemalla sen läheltä viritintappia. Sen jälkeen taivutan varovaisesti kielityngän hieman kohti lapaa. Ole varovainen, katkaistu kieli on hyvin terävä!
Laitan uudet kielet kitaralle tavallisesti pareittain – ensin E-e, sitten A-h ja viimeiseksi D-g.

Onnistunut lopputulos näyttää tällaiselta.
Tallanastat istuvat tasaisesti tallassa.
Kielet pitävät vireen nopeammin, jos niitä venytetään ensimmäisten viritysten yhteydessä: ensin viritetään, sitten venytetään… neljän-viiden kerran jälkeen virityksen pitäisi alkaa asettua.
Otekäsi pitää kielen alhaalla venymisen yhteydessä, jottei satulaan kohdistuisi liikkaa rasitusta.
****
Kun kitara on viritetty, voidaan tarkistaa vielä uusien kielten korkeus 12:n nauhan yllä.
Jos kielten korkeus on selvästi suurempi kuin ennen kielten vaihtamista, uusi kielisatsi oli luultavasti paksumpi kuin vanha. Silloin kannattaa kiristää kaularautaa (sopivalla avaimella) noin neljänneskierrosta (korkeintaan puolen kierroksen).
Jos kielten korkeus on selvästi pienempi kuin ennen kielten vaihtamista, uusi kielisatsi oli luultavasti ohuempi kuin vanha. Silloin kannattaa löysätä kaularautaa (sopivalla avaimella) noin neljänneskierrosta (korkeintaan puolen kierroksen).
Kaularaudan tarkoitus on säätää kaulan loivaa kaarevuutta (ns. neck relief). Vaikka kaulan reliefilla on suora vaikutus kielten korkeuteen, kaularauta ei ole varsinaisesti tarkoitettu säätämään kielten korkeutta. Kielten korkeuden oikeaoppinen muuttaminen on soitinrakentajan homma, ja sitä hoidetaan hiomalla (tai vaihtamalla) soittimen tallaluu.

Here’s what you need:
In addition to a fresh set of strings, you should have a wire cutter and a tuner at the ready. An inexpensive string winder makes the process much faster.
A steel rule will come in handy, should you want to double-check your ”before” and ”after” setups. Measure your string height at the 12th fret (top of fret to bottom of string) before taking the old strings off. That way you will be able to use the steel rule to ascertain that your setup has stayed unchanged. Alternatively, you could also measure the neck relief at the seventh fret directly, by using a capo at the first fret, while pressing down the low E-string at the 14th fret.
Ideally, though, you should stick to the exact same string gauge (and even string brand) to avoid inadvertently changing the playability of your acoustic guitar.
I find it most convenient to take off all strings at once.
There are some people who claim that taking all six strings off at the same time may cause damage to your instrument. Let me tell you, I have been changing strings on steel-string guitars since 1977, always removing the whole set at once, and have never had any problems at all. Even Martin Guitars suggest you do it this way in their own video, and they should know!
Once the strings are completely loose and flabby, I cut them in half.
This isn’t something you must do, but I find the shorter lengths easier to handle, than having to deal with the whole string.
For the largest part, steel-string acoustics come with pin bridges. The bridge pins – made out of plastic, bone, wood or even metal – keep the ball-ends locked into place.
Most string winders sport a small cut-out for lifting the bridge pins. I’d suggest, though, that you first try extracting the pins by hand, because, very often, the ball-ends have jammed the pins in place fairly tightly. Trying to pull them out directly might damage your string winder or the bridge pins, or, even worse, the bridge itself.
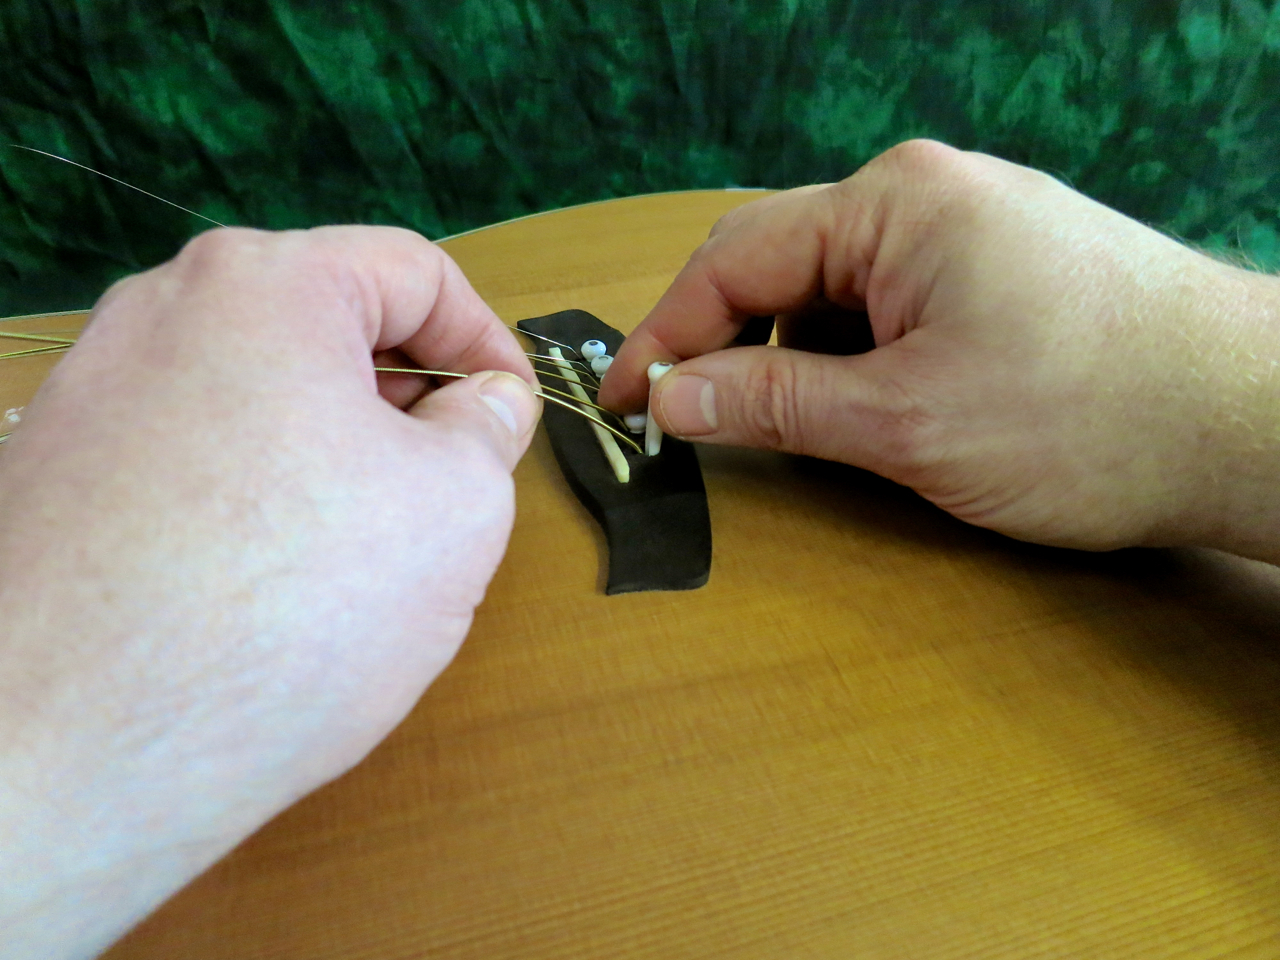
Most of the time you will be able to extract the bridge pins by hand:
Start by pushing the ball-end down (into the body) by a centimetre, or so.
Usually, this is all that’s needed to unjam the bridge pin.
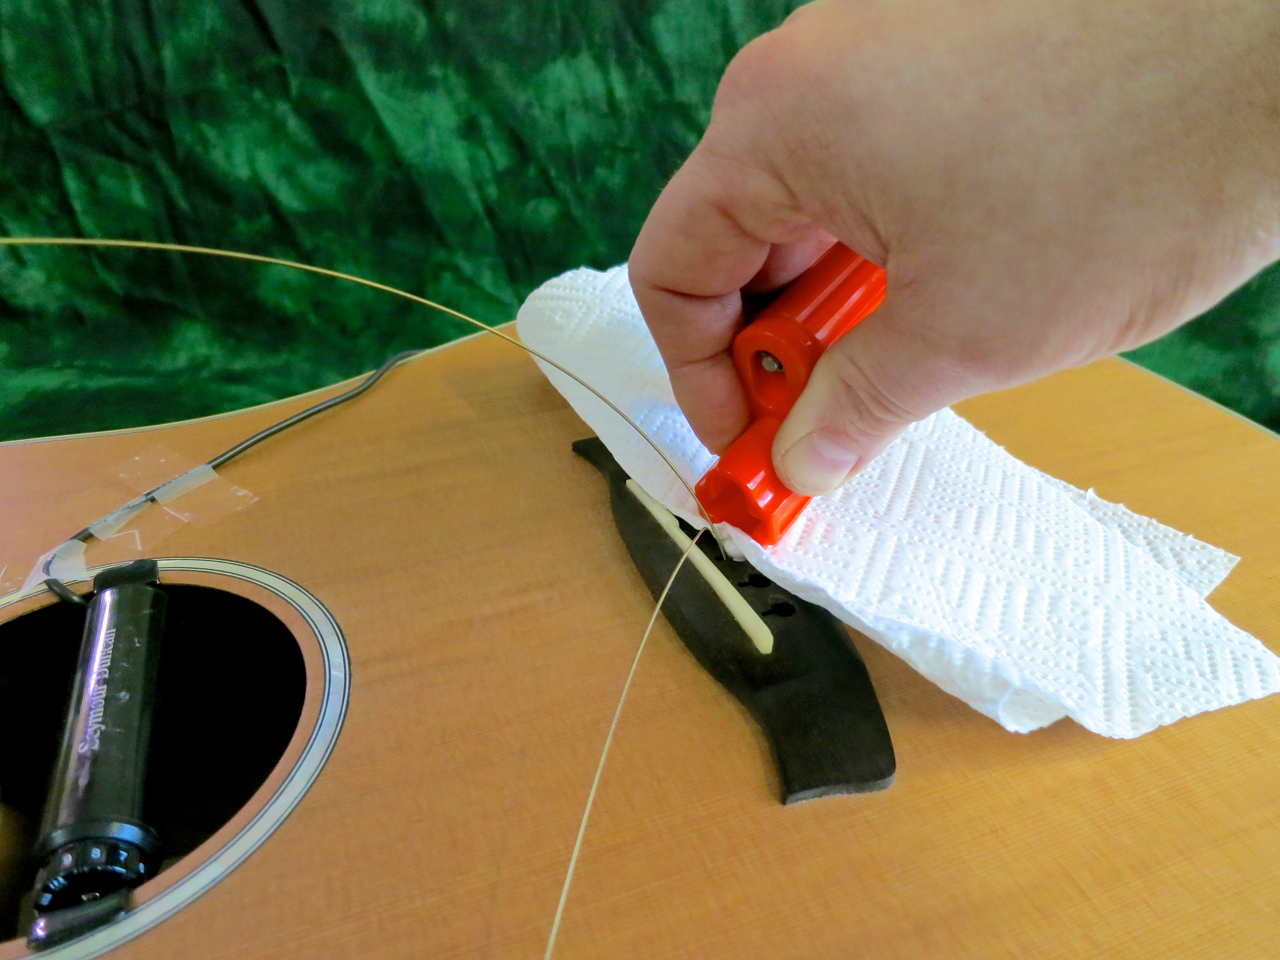
If a pin really is stuck, and can’t be lifted out with your fingers, I’d strongly suggest using a piece of tissue paper (or a piece of cloth) as a cushion to protect the pin and the bridge’s surface.
Some acoustic guitars come equipped with a pinless bridge – most notable Ovation and some Takamines. With these bridges, all you have to do is pull the ball-ends out of the back of the bridge.
At the headstock end you have to untie the strings and take them off the tuner posts.
If your guitar’s fretboard and/or bridge feel (or look) a little dry, now would be the perfect time for applying a little fretboard oil.
You start putting on a new string by feeding the ball-end into the appropriate bridge hole, while inserting the bridge pin.
By pulling the string up a little, while holding the pin down, you will conveniently get the ball-end to jam the bridge pin in place.
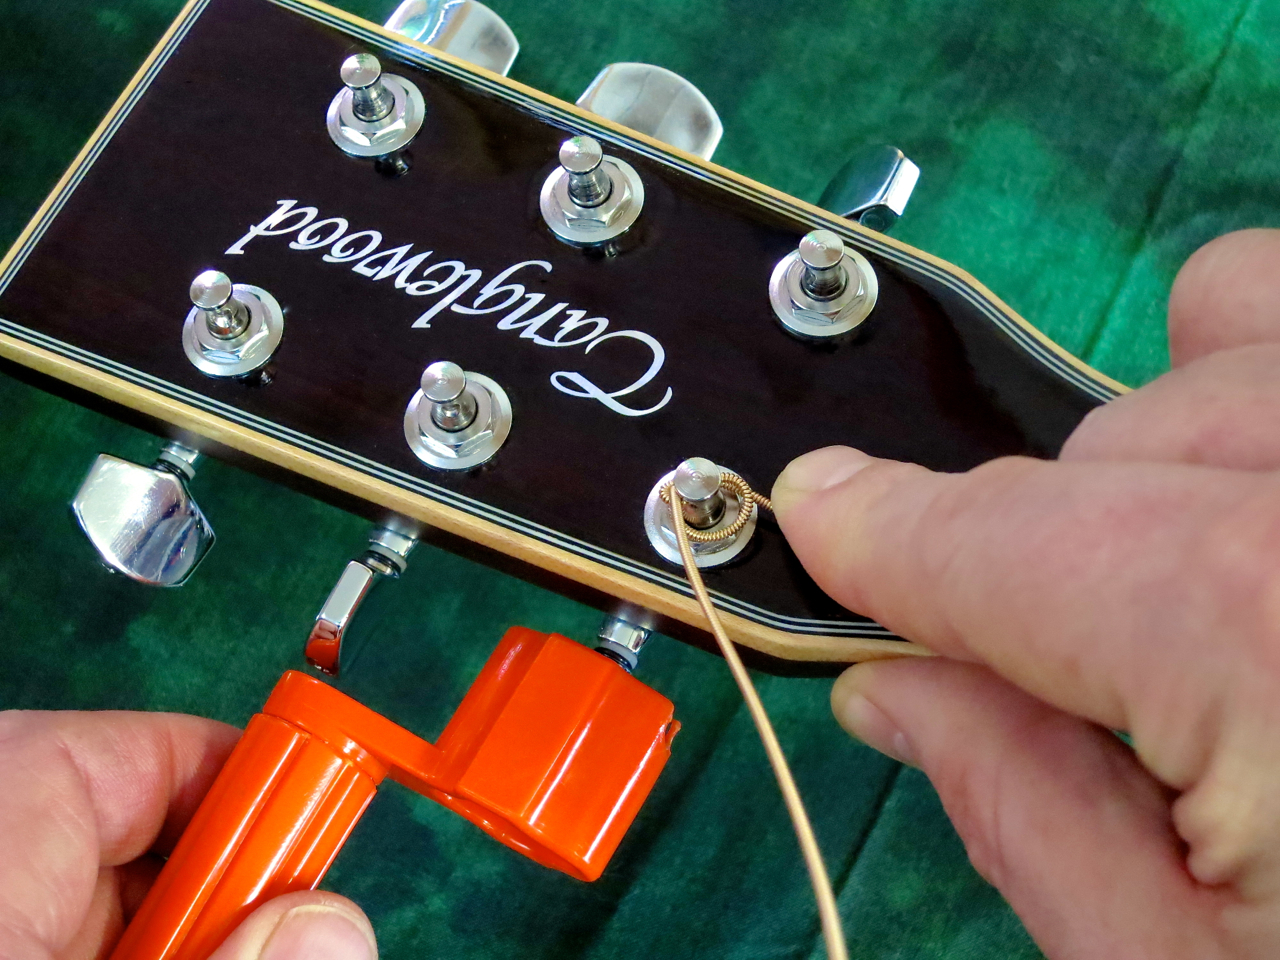
Next you feed the string through the tuner’s post…
…pull the string away from the body, and around the post…
…and, finally, lock the string end in place.
Keep the string pressed downwards, while you’re turning the crank. Each new winding should pass under the one before it.
When the string starts getting taut, I move my hand from the headstock to the bridge, to make sure the bridge pin stays firmly in place.
I’d recommend cutting off the surplus string in close proximity to the tuning post. Then I bend the stub down towards the headstock face. Be careful, a cut-off string is very sharp!
I put on the fresh strings in pairs, working my way away from the nut – first the two e-strings, then the pair of A and b, and lastly the D- and g-strings.
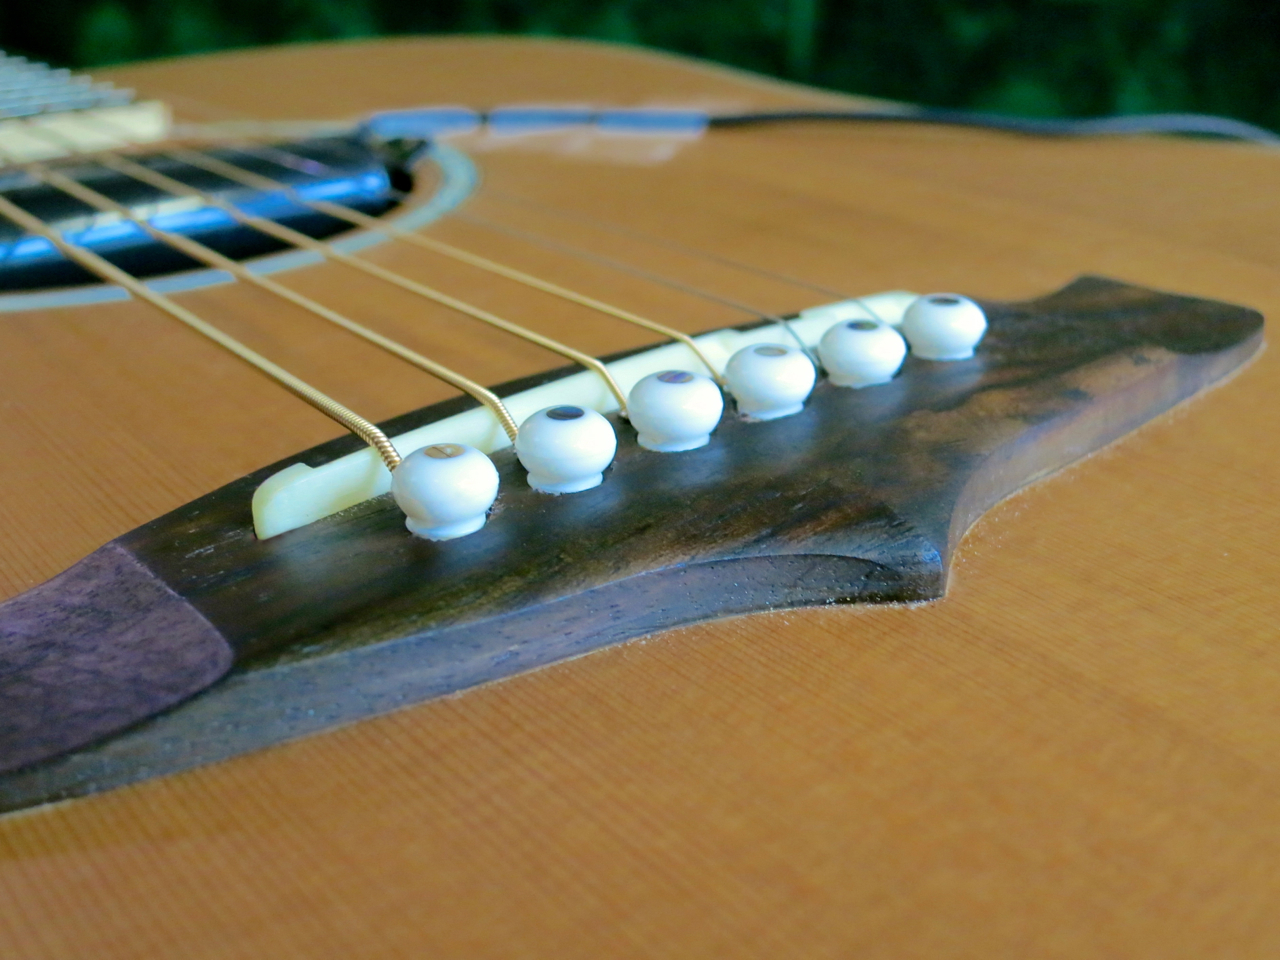
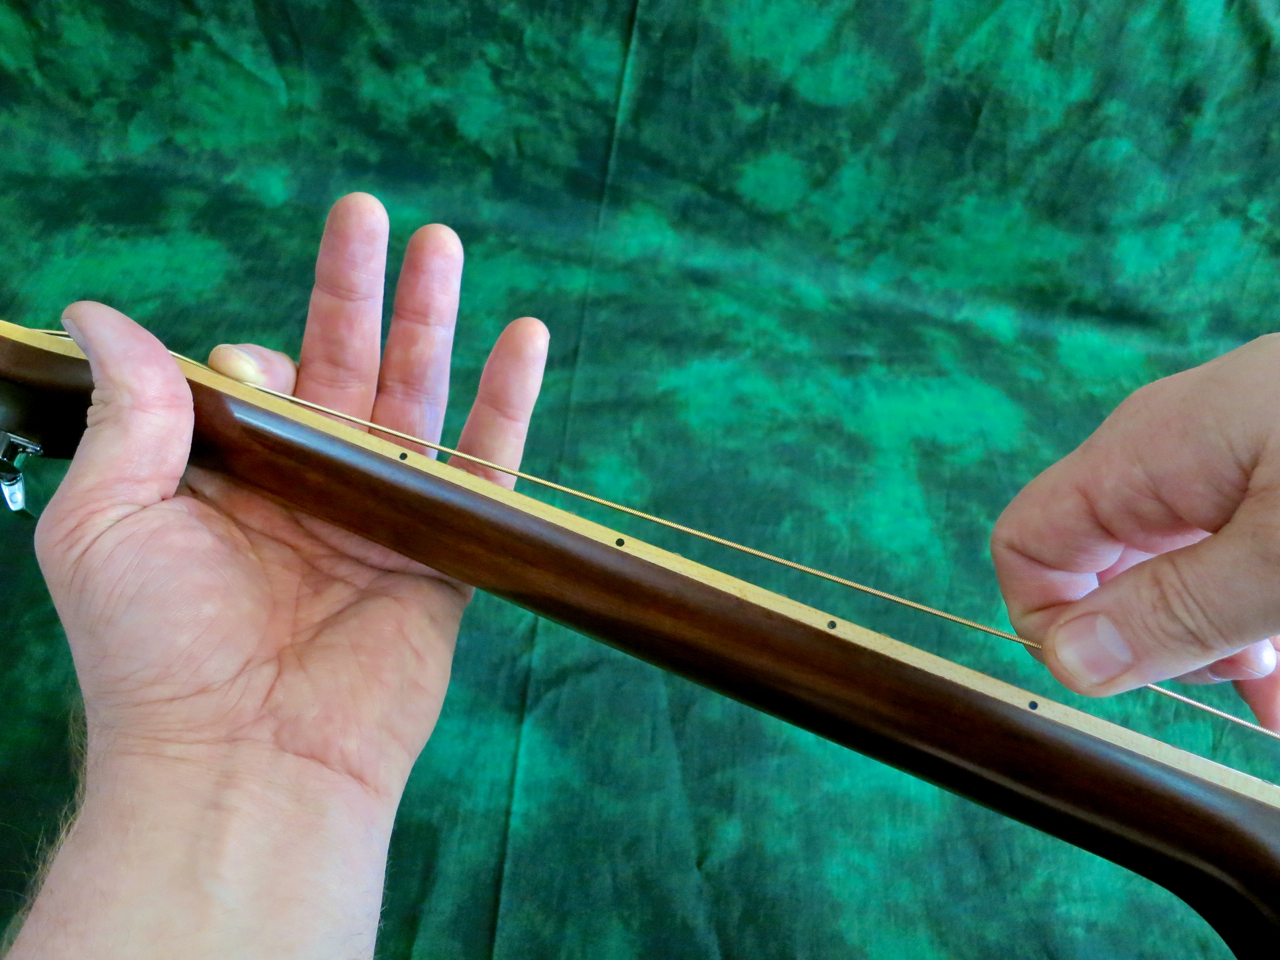
This is what the result should look like at the headstock end.
The bridge pins should sit at a uniform height above the surface of the bridge.
Getting new strings to stay in tune is a much faster process, if you stretch each string carefully. It works like this: First you tune to pitch, then you stretch each string, and retune again. Once you’ve repeated this process four to five times, you should be ready to go.
Your fretting hand should hold down the string you’re stretching at the first or second fret to avoid damage to the top nut.
****
Once the guitar is in tune you could check the string action at the 12th fret and compare it with the values measured with the old string set.
If the action is noticeably higher, chances are you’ve put on a heavier gauge set of strings. You need to compensate for the stronger string pull by tightening the truss rod (with the correct tool) by a quarter of a turn (or half a turn, at the most).
If the action is noticeably lower, chances are you’ve put on a lighter gauge set of strings. You need to compensate for the weaker string pull by loosening the truss rod (with the correct tool) by a quarter of a turn (or half a turn, at the most).
The truss rod is meant solely for neck relief adjustment. Even though adjusting the neck relief does have an impact on the action, string height adjustment isn’t really what the truss rod is meant for. Adjusting the action on a steel-string acoustic is usually a job for a luthier, and is achieved by changing the height of the bridge saddle.

****

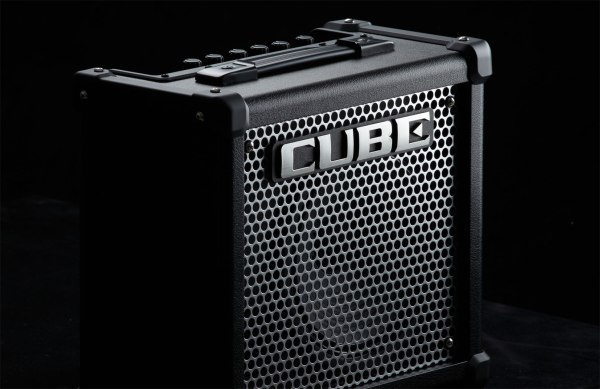
The new Roland Cube-10GX approaches the company’s popular Cube-concept from a slightly different angle.
****

The 10-watt Roland Cube-10GX (Finnish price approx. 125 €) slots into the model range right between the 3-watt Micro Cube GX and the 20-watt Cube-20GX combo.
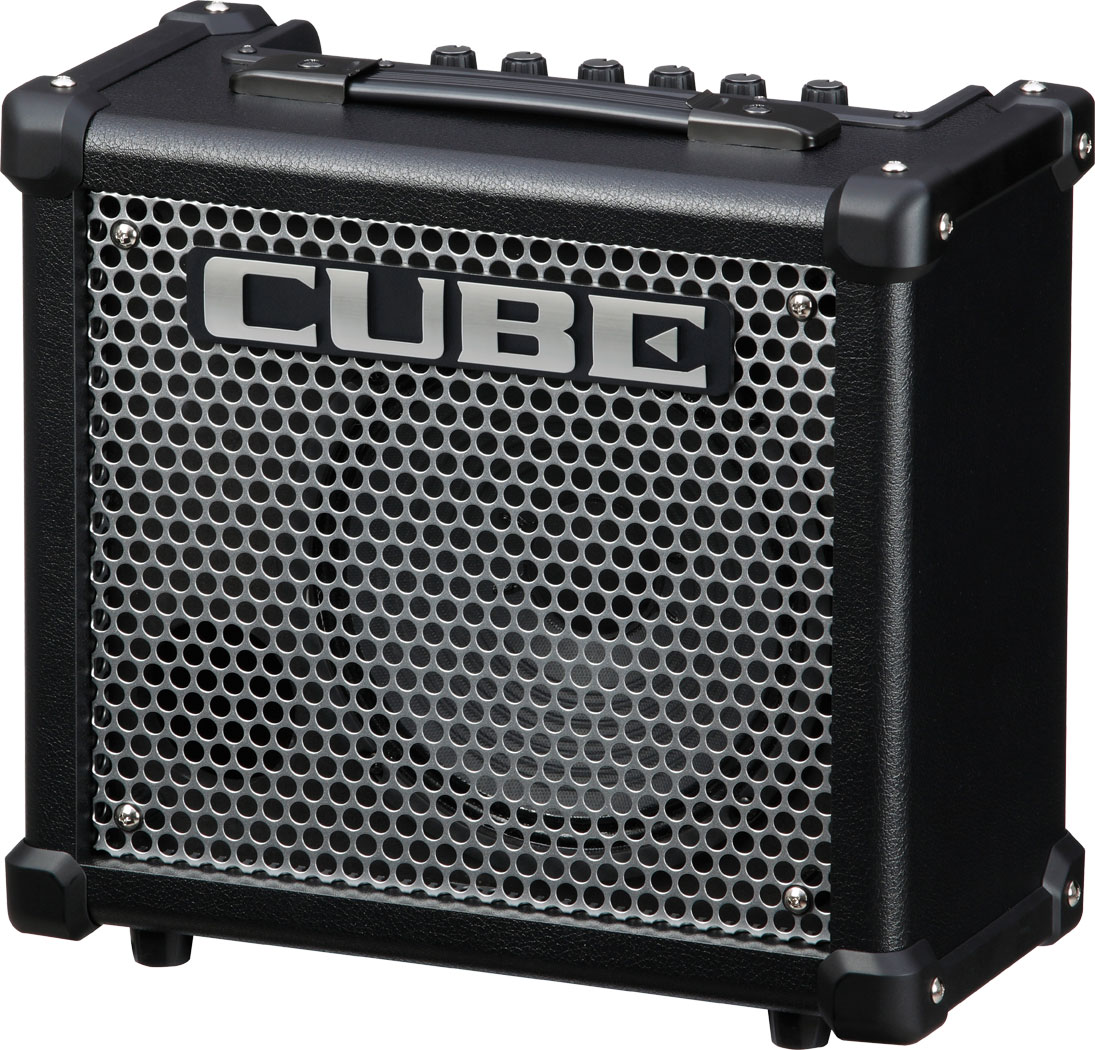
Despite its very affordable price, the 10GX is built as sturdily as the larger Cube models, featuring chunky corner protectors, and the metal grille typical of this series.
An eight-inch speaker has been installed into the closed-back, front-ported cabinet.

The backpanel sports connections for DC In (the PSU comes included), Aux In, as well as a combined line level output/headphones jack.

The Cube-10GX combo’s architecture differs somewhat from the rest of the GX-models:
The 10GX doesn’t feature a built-in tuner or an i-Cube-Link, like the rest of the GX-models, but offers a much more open way of offering its COSM-generated amp models.
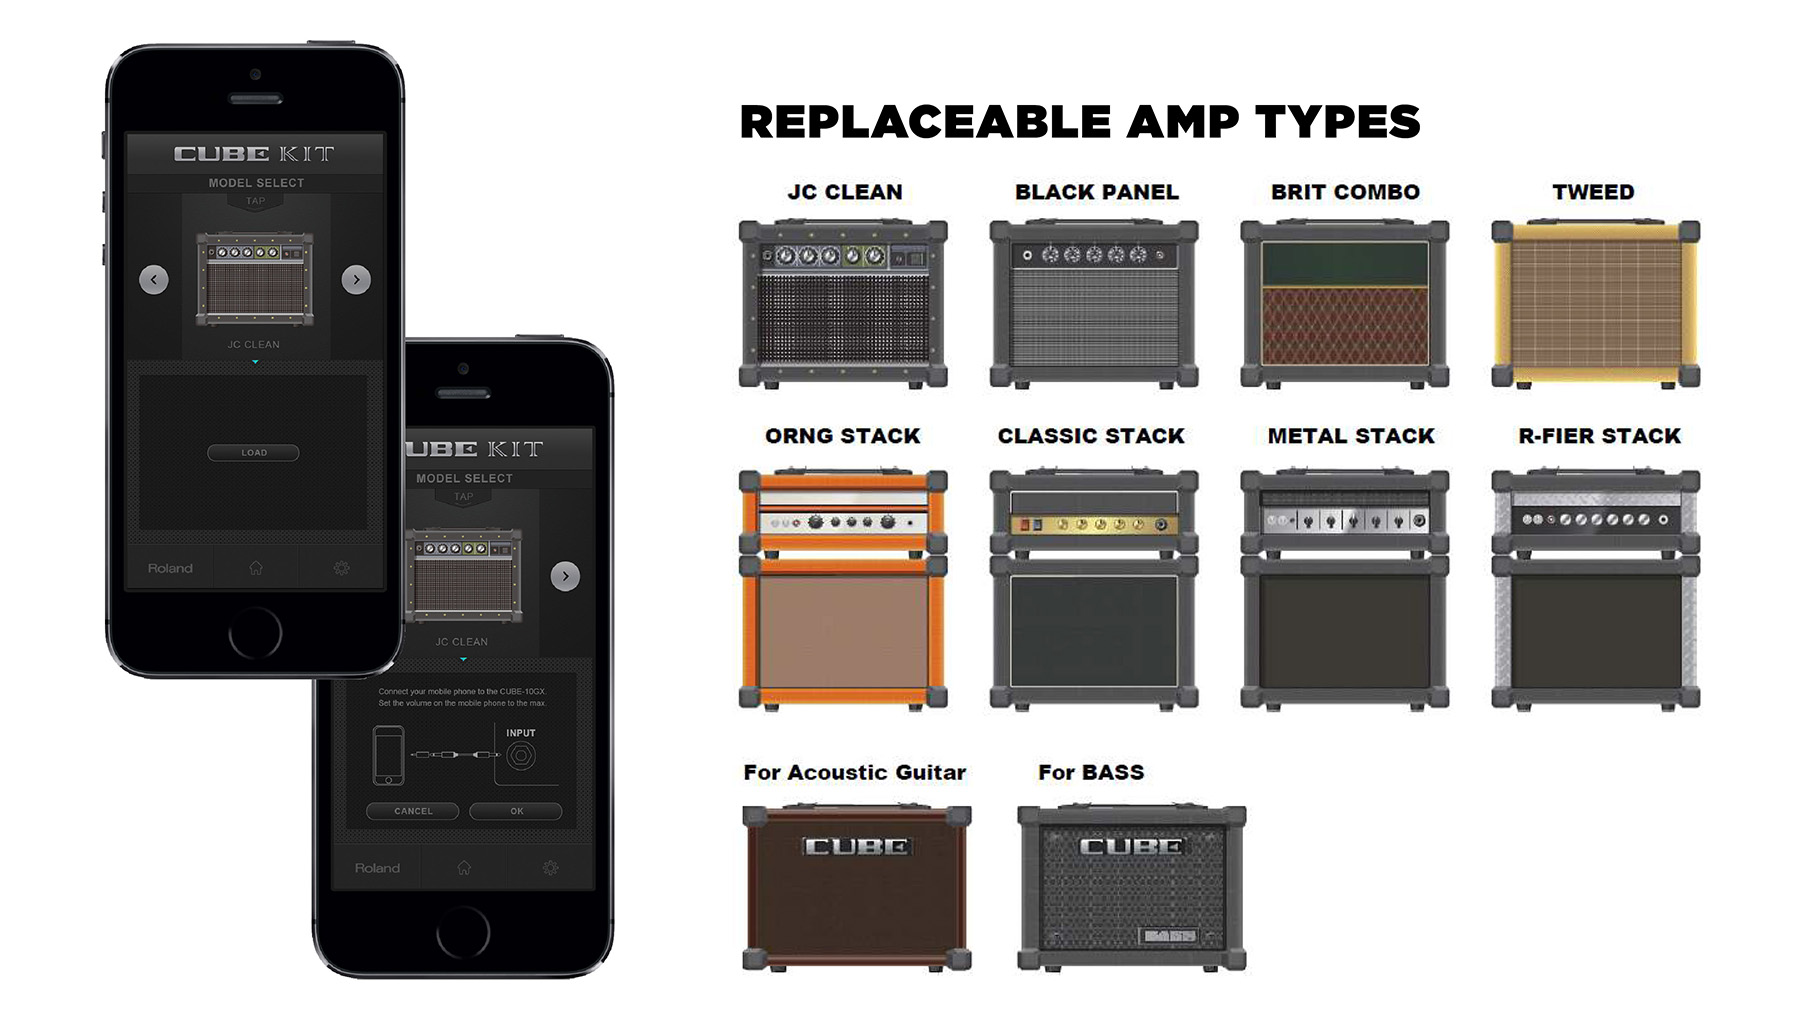
The Cube-10GX lets you choose from a number of different amp models via the new Roland Cube Kit app (Android and iOS). At the moment of writing the app offers eight guitar amp models, plus one bass amp and one amp for acoustic guitar.
Despite the fact that the control panel reads ”Clean”, ”Crunch” and ”Lead”, you can load any of the COSM amp models on offer into any of the amp’s three channels. If you’re a Jazzer, for example, you might prefer to use only clean amps, like Acoustic, JC Clean and Black Panel.
****
Let me deal with the ”bad news” first: Sadly, the Cube-10GX offers only a single effect section, in contrast to all the other Cube GX -combos. The 10GX gives you the choice between either a chorus or a delay or a hall reverb or a (very wet) spring reverb. And there are no effect combinations on offer.
The new combo’s main focus lies in the easy-to-swap amp models, and improvements in the sound of both the amp and the COSM-models. For a 10-watter the Cube-10GX is surprisingly loud. Thanks to its much larger speaker the new combo sounds much fuller and more grown up than the Micro Cube.
The updated COSM-models sound noticeably more transparent and fresher, without any additional background hiss or noise. The 10GX’ well-designed three-band EQ section lets you tailor the sound to your requirements.
Loading a new amp model into one of the Cube-10GX’ channels via the Cube Kit app is fast and easy, and doesn’t require any special cables. You only need a fitting mini-jack adapter to hook up the guitar lead to your smartphone (or tablet). All the necessary data is then transmitted from the Android- or iOS-device to the amp via the guitar cable. The whole process takes only a few taps and a couple of seconds.
The factory default has the Jazz Chorus amp model loaded into channel 1. I’m playing my Fender Telecaster with a little chorus added from the combo:
Here’s another Jazz Chorus clip, but this time seasoned with some Surf-type spring reverb:
The Classic Stack model is the factory setting for channel 2. It is Roland’s version of a Marshall-stack. I’ve added some delay for this clip:
I loaded the Brit Combo (AC30) model into channel 2, using the Cube Kit app. I’m playing my Telecaster with some reverb from the combo:
”Orng Stack” stands for Orange-stack. This is what it sounds like, played with my Gibson Melody Maker SG:
The factory default for channel 3 is the R-fier Stack model. First a clip using the Telecaster, and then an example Played with the Melody Maker SG:
The Cube Kit’s Acoustic model provides an easy solution for amplifying your acoustic guitar. I’ve used a Tanglewood dreadnought equipped with a magnetic soundhole pickup by Seymour Duncan:
The Cube-10GX even sounds surprisingly good as a tiny bass combo (all audio clips have been recorded with a Shure SM57):
****
Roland’s Cube-10GX (and the cool Cube Kit app) makes it possible to turn this little combo into the amp you really need. A Blues player will probably load his (or her) Cube-10GX with the Black Panel-, Brit Combo-, and Tweed-models, while a Metal guitarist will prefer the chunkier COSM-models on offer (like the Classic-, Metal- and R-fier-stacks).
The Cube-10GX sounds great and is a real little shouter. Despite offering fewer built-in effects than the rest of the GX-range, the Roland Cube-10GX still offers a lot of fun at a very competitive price.

****
Roland Cube-10GX
Price range in Finland approx. 125 €
Maahantuoja: Roland Scandinavia
****
Pros:
+ fair price
+ powerful
+ wide range of available amp models (via the Cube Kit app)
+ three-band EQ
+ sturdy build
+ sound
Cons:
– only one effect section
– spring reverb offers only little scope for adjustment
****
Hiljattain ilmestynyt Roland Cube-10GX on Cube-perheen uusin jäsen, joka lähestyy firman suosittua Cube-reseptiä hieman toiselta kulmalta.
****
Kymmenwattinen Roland Cube-10GX (hintaluokka 125 €) asettuu vahvistinteholtaan kolmiwattisen Micro Cube GX:n ja 20-wattisen Cube-20GX-kombon väliin.
Kymppi-GX on edullisesta hinnastaan huolimatta samaa vankkaa tekoa kuin sen isot veljeksiä. Reilunkokoiset kulmasuojat ja Cube-sarjalle tyypillinen metalliritilä suojaavat kombon tehokkaasti monilta kolhuilta.
Koteloon on asennettu kahdeksantuumainen kaiutin.
Takapaneelista löytyy virtaliittimen (verkkolaite kuuluu hintaan) lisäksi aux-tulo, sekä yhdistetty kuuloke- ja linjalähtö.
Cube-10GX-kombon arkkitehtuuri poikkeaa toisista Cube-perheen GX-malleista:
Muiden GX-kombojen viritysmittarit ja i-Cube-Link-lähdöt puuttuvat tästä mallista, mutta niiden tilalle uudessa Cubessa tarjotaan huomattavasti avoimempi rakenne COSM-vahvistinosiossa.
Cube-10GX tarjoaa nimittäin uuden Roland Cube Kit -appsin kautta (Android ja iOS) kitaristeille mahdollisuuden valita ja vaihtaa oman Cuben COSM-mallinnuksia oman maun ja käyttötarpeen mukaan. Tällä hetkellä Cube Kitistä löytyy kahdeksan sähkövahvistinmallia, yksi vahvistinmalli mikitetylle akustiselle kitaralle, sekä yksi bassovahvistin.
Vaikka kombon etupaneelissa lukee sen kolmen kanavapaikkojen kohdalla Clean, Crunch ja Lead, käyttäjä saa valita appsin kautta vapaasti kanaviin juuri niitä COSM-malleja, joita hän itse haluaa – vaikkapa vain puhtaita vaihtoehtoja, kuten Acoustic, JC Clean ja Black Panel.
****
Kerron sen ”huonon uutisen” ensin: Olisin kernaasti nähnyt myös uudessa Cube-10GX-mallissa kaksi efektiosastoa, niin kuin esimerkiksi Micro Cube GX:ssä! Kymppi-GX-kombossa voi valita joko choruksen tai viiveen tai kaiun tai (reilusti annostetun) jousikaiun, eikä yhdistelmäefektejä ole tarjolla lainkaan.
Uutuuskombon painopiste on siis selvästi vahvistimen soundissa ja entistäkin parannetuissa COSM-mallinnuksissa. Cube-10GX on yllättävän äänekäs vahvistin 10-wattiselle kombolle, ja sen kahdeksantuumaisen kaiuttimen ansiosta tämän Rolandin yleissoundi on paljon syvempi ja aikuisempi kuin esimerkiksi Micro Cubessa.
Uudistetuissa COSM-malleissa on myös selvästi rapeampi, erottelevampi soundi, ilman lisättyä kohinaa. Kymppi-GX:n musikaalisesta kolmialueisesta EQ:sta on todella paljon apua soundien muokkaamisessa.
Soundien vaihtaminen Cube Kit -appsilla onnistuu erittäin helposti ja – mikä on parasta – täysin ilman erikoisjohtoja. Tarvitaan vain puhelimen (tai tabletin) ja kitarajohdon väliin sopiva kuulokeadapteri, jolla saadaan ohjelman dataa kulkemaan Android- tai iOS-laitteen kuulokelähdöstä kitarajohdon kautta Cube-10GX:een. Muutama täppäys vaan ja valitun kanavan COSM-malli on vaihdettu uuteen.
Tehdasasetuksena kombon ykköskanavassa on valittu Roland Jazz Chorus -kombon mallinnus. Tässä soitan Fender Telecasterilla ykköskanavan läpi ja chorus-efekti on päällä:
Myös tässä käytän Jazz Chorus -mallia, mutta tällä kertaa Surf-tyylisellä jousikaiku-efektillä:
Classic Stack on kakkoskanavan tehdasasetus. Se on Rolandin COSM-versio Marshall-stäkistä, jota kuullaan tässä delay-efektillä höystettynä:
Latasin Cube Kitillä kakkoskanavalle Brit Combo -mallin (AC30). Soitan Telecasterilla ja käytän kombon kaikua:
Orange-stäkkiä matkiva Orng Stack -malli kuulostaa tällaiselta Gibson Melody Maker SG:ltä soitettuna:
Tehtaalta on asennettu kolmoskanavaan R-fier Stack -malli – siis Rectifier-meininkiä (ensin Telecasterilla, sen jälkeen Melody Maker SG:llä soitettuna):
Cube Kitin Acoustic-malli tarjoaa nopean ja helppokäyttöisen ratkaisun akustisen kitaran vahvistamiseen (tässä Tanglewood teräskielinen magneettisella Seymour Duncan -mikrofonilla):
Cube-10GX kuulostaa yllättävän isolta myös bassovahvistimena (kaikki ääninäytteet äänitetty Shure SM57:lla):
****
Rolandin Cube-10GX tarjoaa firman oivan Cube Kit -appsin ansiosta jokaiselle kitaristille juuri sen vahvistimen, jonka hän tarvitsee ja haluaa. Bluesmies (tai -nainen) voisi esimerkiksi ladata kymppi-GX:n kolmelle kanavapaikalle Black Panel-, Brit Combo-, sekä Tweed-mallit, kun taas rankan musiikin ystävä voi tehdä pikkustyrkkarista metallimusiikkiin erikoistuneen koneen (esimerkiksi valitsemalla Classic-, Metal- ja R-fier-stäkit).
Cube-10GX:stä lähtee niin paljon – ja etenkin niin laadukasta – ääntä, että tämän kombon (muihin GX-malliin nähden) supistetulla efektivalikoimalla ei ole mielestäni oikeastaan niin paljon väliä. Roland Cube-10GX tarjoaa todella paljon vahvistinta edulliseen hintaan.
****
Roland Cube-10GX
Hintaluokka noin 125 €
Maahantuoja: Roland Scandinavia
****
Plussat:
+ edullinen
+ tehokas
+ monipuolinen vahvistintarjonta (Cube Kit -appsin kautta)
+ kolmialueinen EQ
+ tukeva rakenne
+ soundi
Miinukset:
– vain yksi efektiosasto
– jousikaiun vähäinen säätövara
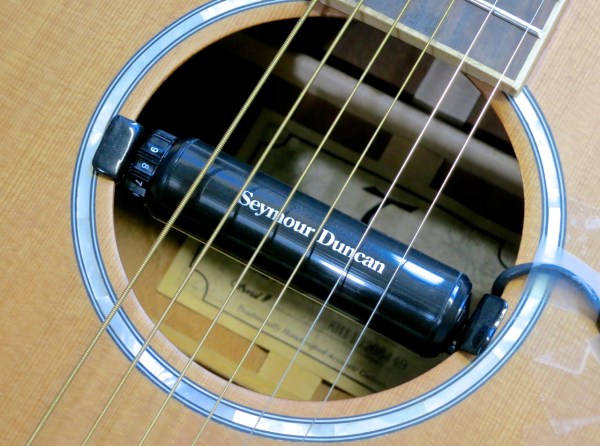
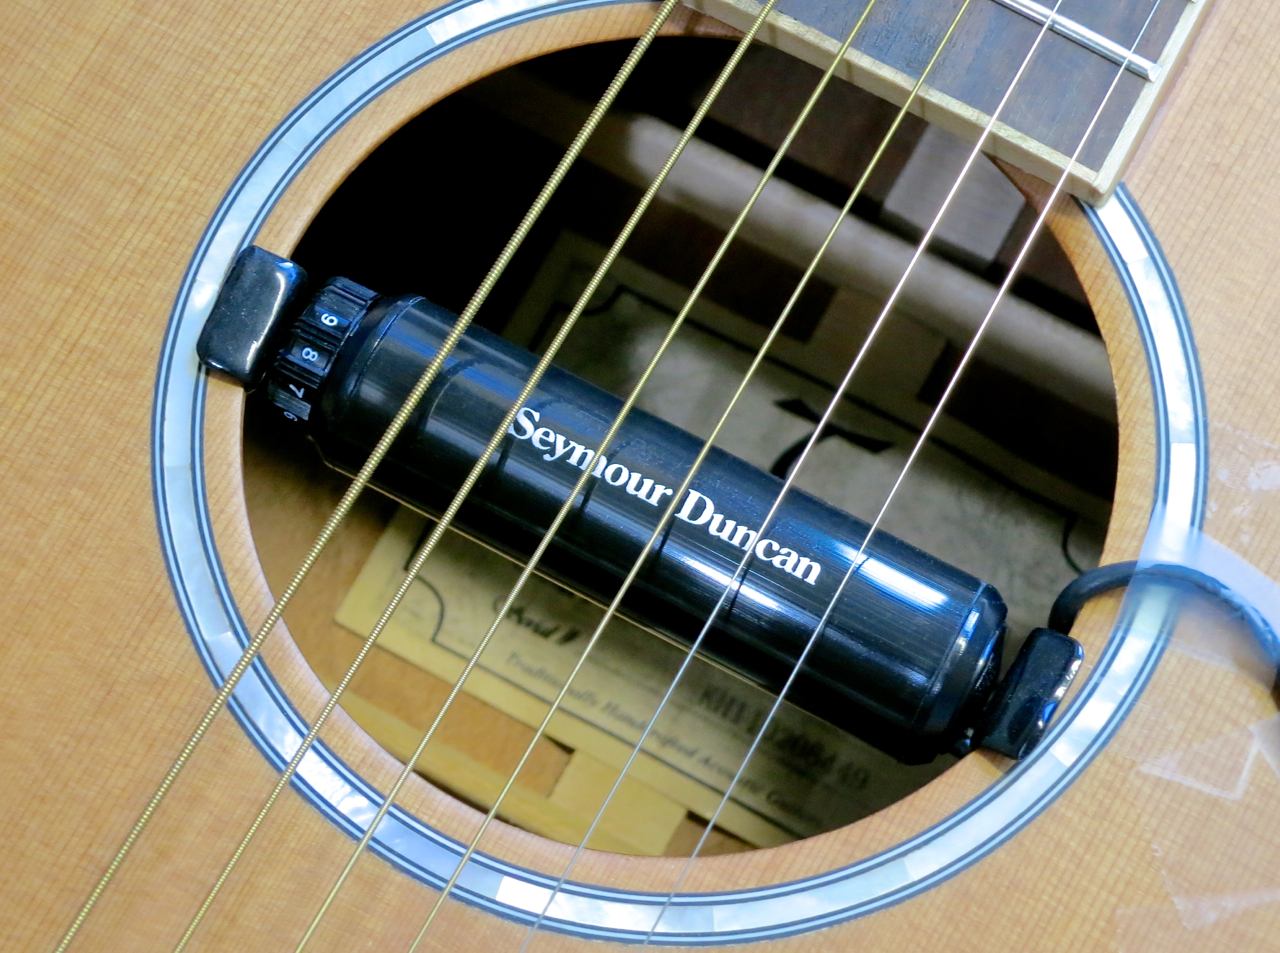
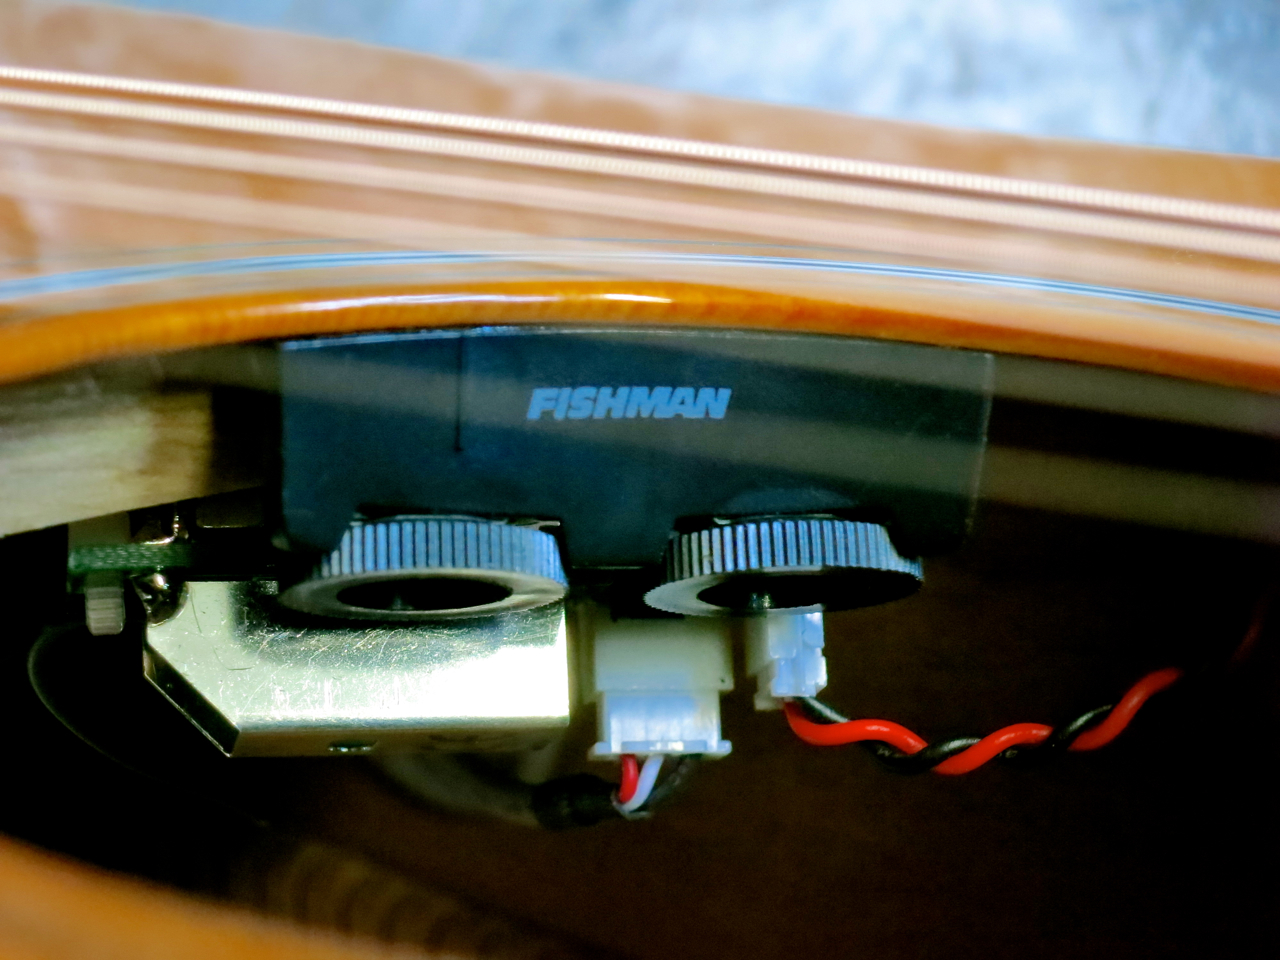
Ostin itselleni hiljattain Seymour Duncanin SA-1 Acoustic Tube -mikrofonin, koska etsin helppoa mikkiratkaisua akustisia keikkoja varten. Huomasin, että netistä löytyy melko vähän tietoa tästä magneettisesta mikrofonista, siksi tämä tietoisku:
SA-1 on humbuckermikki kahdella päällekkäisillä keloilla (ns. stack-rakenne), jolla on sisäänrakennettu volume-säädin.
Pidän siitä, että Acoustic Tube -mikrofonilla on vain lyhyt johto, joka loppuu laadukkaan jakkiin. Jakkia voi kiinnittää esimerkiksi kitarahihnaan, ja sitten voi käyttää tavallista kitarajohtoa SA-1:stä DI-boksiin, mikseriin tai akustiseen vahvistimeen.
Parasta tässä mikrofonissa on kuitenkin sen soundi, joka on yllättävän luonnollinen, kun ottaa huomioon, että kyseessä on suhteellisen edullinen, pelkästään magneettisesti toimiva mikki.
Lisätietoja saa Musamaailmalta.
****
****
I recently went out and bought myself a Seymour Duncan SA-1 Acoustic Tube pickup, because I needed an easy-to-use pickup solution for acoustic live gigs. Strangely, there’s not that much information on this pickup available on the Internet, which is why I decided to give you a short decription of the SA-1:
The SA-1 is a stacked humbucker pickup featuring a built-in volume control.
I like the fact that Duncan’s Acoustic Tube comes with only a short pickup lead that ends in a high-quality phone jack. You can tape the jack to your guitar strap and then run a normal guitar cable from the SA-1 to your DI Box, mixing console or acoustic amplifier.
The best thing about this soundhole pickup is its sound, though, which is very natural and offers plenty of sparkle – especially considering that the SA-1 is a relatively affordable, purely magnetic pickup.
Seymour Duncan products are distributed in Finland by Musamaailma.